Resampling Using ArcView Image Analysis
Resampling on the Fly
- If necessary, start ArcView GIS and load the ArcView Image Analysis Extension.
- Open a
new view and click the Add Theme Button.

- Navigate to the avtutor directory. Double click on the ia_data directory under the avtutor directory.
- Click on the Data Source types drop-down list and choose Feature Data Source.
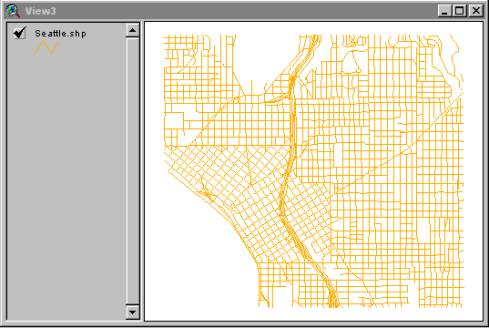
- Double click seattle.shp to add it to the view.
Customizing the View:
- Double click the title of the Seattle.shp theme to access the Legend Editor.
- Double click the line symbol to access the Pen Palette. Click the Size drop-down list and choose 1.
- Click
the Color Palette button
 .
Choose bright orange from the Color Palette. Close the Color Palette.
.
Choose bright orange from the Color Palette. Close the Color Palette. - In the Legend Editor, click Apply. Close the Legend Editor.
- Click the check box for the Seattle.shp theme to draw it in the view.
Add an Image File to Your View
- Click
on the Add Theme button.
- Navigate to the avtutor directory. Double click on the ia_data directory under the avtutor directory.
- Click the Data Source Types drop-down list and choose Image Analysis Data Source.
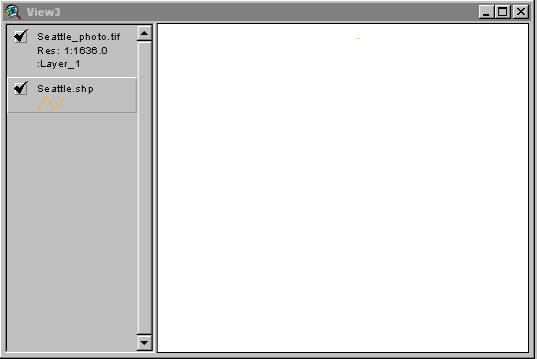
- Double click seattle_photo.tif to add it to the view.
- If the Calculate Pyramid Layers dialog appears, click YES to calculate pyramid layers. In the event this dialog does not appear, it is because the image has previously built pyramid layers.
- Drag Seattle_photo.tif theme below the Seattle.shp theme in the Table of Contents.
- Make the Seattle_photo.tif theme active and click the check box to draw it in the view.
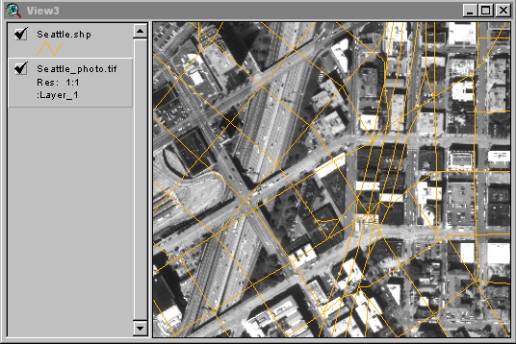
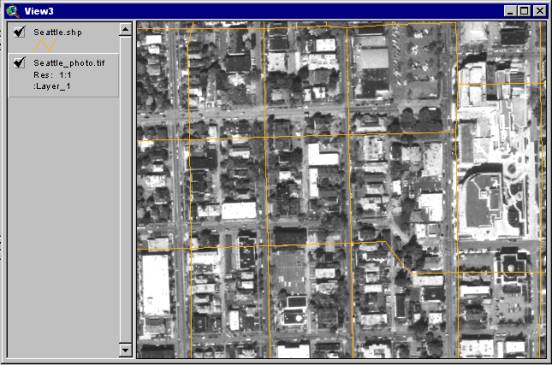
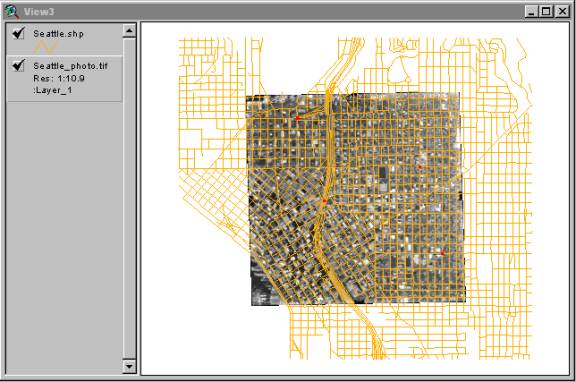
After you click the check box for the Seattle_photo.tif theme, you’ll notice that it does not draw in the view. This is your first indication that the image and the feature theme need to be aligned.
-
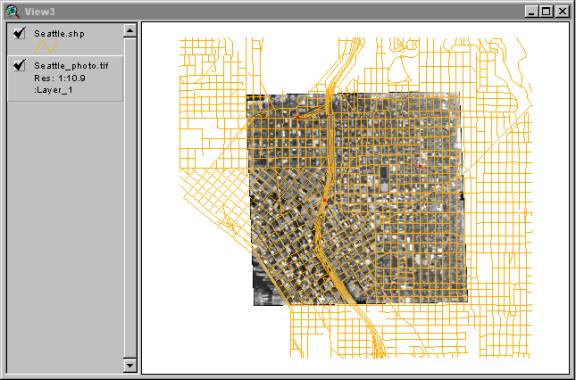
Click the Zoom to Full Extent Button.
- Move your mouse over the lower portion of the view (the location of the Image Analysis theme). Notice that the coordinates are small because images, before rectification, are usually not in a map coordinate system. If you move the mouse over the upper portion of the view (the location of the feature theme), the coordinates are large. You will use the Align tool to make the image and the feature theme draw in roughly the same area in the view.
Using the Align tool to Resample on the Fly
- Make sure the Seattle_photo.tif is active in the view.
- From
the view’s toolbar, click the Align Tool
 .
.
Creating Control Points
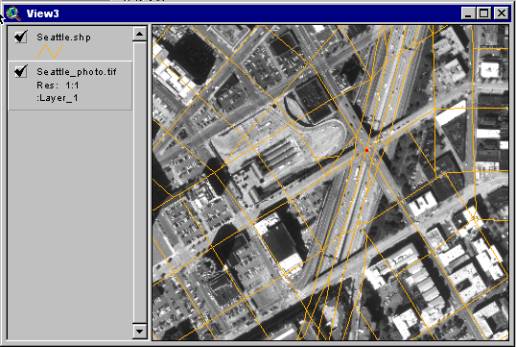
Once you have clicked the Align tool the image and the feature theme are both drawn in the view, you are ready to start collecting control point pairs. Control points are distinctive landmarks and road intersections that can easily be identified on both the feature theme and image views. The locations of the control points allow the ArcView Image Analysis extension to align the two themes. Once each control point pair, or link, is selected, you get immediate visual feedback to validate your choice.

- Move your cursor over the area indicated with the circle in the previous illustration.


 Click
the right mouse button and select Zoom to Image Resolution. The area you
clicked is centered in the view.
Click
the right mouse button and select Zoom to Image Resolution. The area you
clicked is centered in the view.
- Click on the intersection of the streets in the Seattle_photo.tif theme. The point in the image is the From point. Move your cursor and notice a rubber-banding line indicating you are going to collect the To point next.
- Click the same intersection in the Seattle.shp theme. It is slightly to the right of the intersection in the image. This is the To point. After you click the To point, the image shifts to make the From and To points align.
- Click the right mouse button and choose Zoom to Active Theme(s). This will allow you to see the entire image so the next set of control points can be identified.


Second Control Point Pare
- Make sure that the image, the Seattle_photo.tif theme, is active in the view.
- Move your cursor over the area indicated with the circle in the previous illustration.
- Click the right mouse button and select Zoom to Image Resolution.

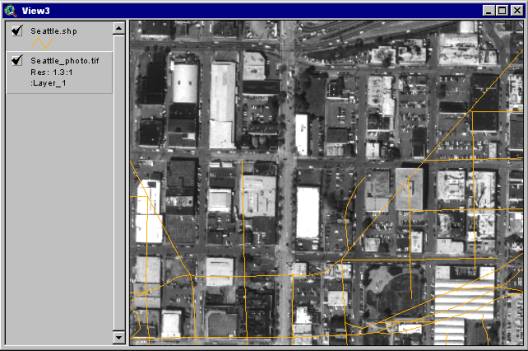
- Using the illustration of the image and the feature theme as a guide, click the intersection of the freeway ramps and surface streets in the Seattle_photo.tif theme. This is a From point.
- Click the same intersection in the Seattle.shp theme to create a To point.


Click the right mouse button and choose Zoom to Active Theme(s) to prepare for the identification of the third control point pair.
Create Third Control Point
- Make sure that the image, the Seattle_photo.tif theme, is active in the view.
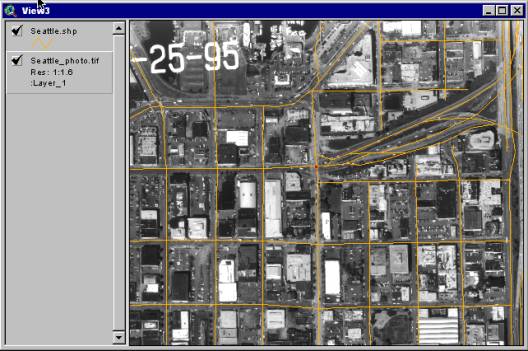
- Move your cursor over the area indicated with the circle in the previous illustration. You will see a street with a noticeable bend.
- Click the right mouse button and select Zoom to Image Resolution.
![]()
![]()
![]()
- Using the illustration of the image and the feature theme as a guide, click on the intersection in the seattle_photo.tif theme to create a From point.
- Click the same intersection in the Seattle.shp theme to create a To Point.
Create the Forth Control Point Pair
![]()
1. Make sure that the image, the Seattle_photo.tif theme, is active in the view.
- Move your cursor over the area indicated with the circle in the previous illustration. In the Feature theme, you can see a city block shaped like an upside-down and backwards “L”.
- Click the right mouse button and select Zoom to Image Resolution. The area you click is centered in the view.
- Using the illustration of the image and the feature theme as a guide, click the intersection of the road to the right of the large building in the Seattle_photo.tif theme. This creates a From point.
- Using the illustration of the image and the feature theme as a guide, click the same intersection in the Seattle.shp theme. This creates a To Point.
Once a least four control point pairs are collected, the RMS error is displayed in the status area of the ArcView GIS window. An RMS error , or root mean square error, is the distance measured in pixels between the input location (From point) and the rectified location (To point), after having applied the current transformation. The lower the RMS error during rectification, the more closely the feature theme and the image align.
- Notice the RMS error reported in the status area of the ArcView GIS window. In this example, the RMS error is 3.96. Yours will likely be different, based on the exact placement of your control points.
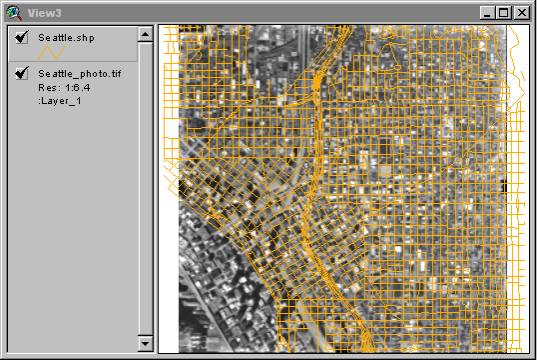
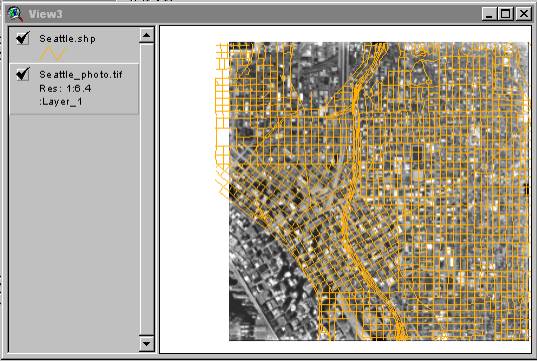
- Click the right mouse button and choose Zoom to Active Theme(s) to view the feature theme and image now that it is aligned.
Save Control Points to a New Image
The ArcView Image Analysis extension gives you the option of saving the control points as a shapefile. You are going to save the control points you created in this part of the exercise. You are also going to create a copy of the original image with the correct alignment. The process is called resampling. That means that the original image, Seattle_photo.tif, will not be changed.
- Make sure Seattle_photo.tif theme is active in the view.
- From the Theme menu, choose Save Image As.
- In the Save Control Points dialog box, click Yes to save the control points as a Shapefile.
- In the Save Control Points dialog, navigate to the directory where you want to save the control points. Type the name “seattle_cp.shp”, and click OK.
- In the Add the View dialog, click Yes to add the control point shapefile to the view.
- In the Save As dialog that appears, navigate to the directory where you want to save a copy of the rectified image.
- Click the List Files of the Type drop-down list and choose IMAGINE Image.
- In the File Name text box, type the name “seattlealign.img”, and click OK.
The resampling process takes a few moments. You can watch the progress bar in the status area of the ArcView GIS Window.
9. In the Add View Dialog, click Yes to add the resampled image to the view.