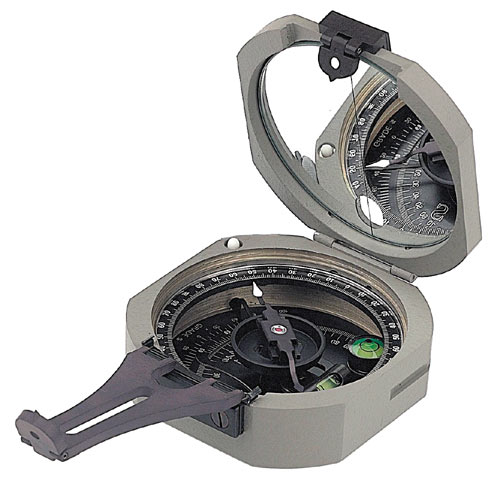
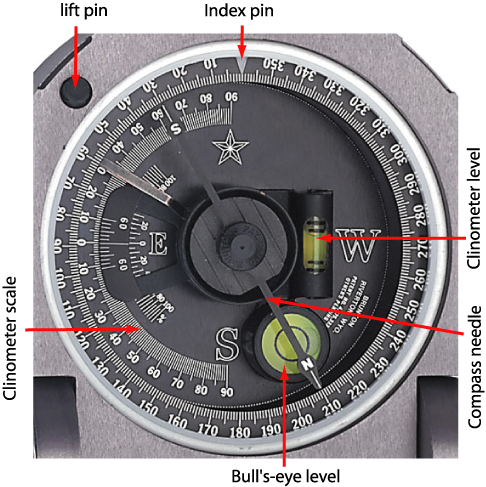
THE PARTS OF A BRUNTON COMPASS
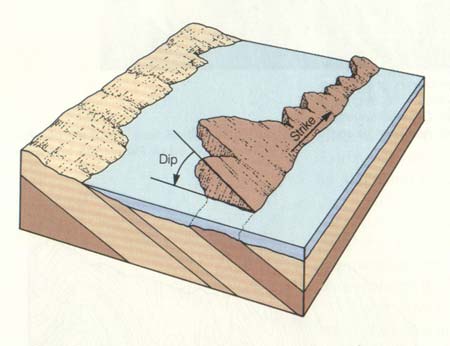
WHAT IS DIP AND STRIKE
MEASURING STRIKE AND DIP
Measuring strike:
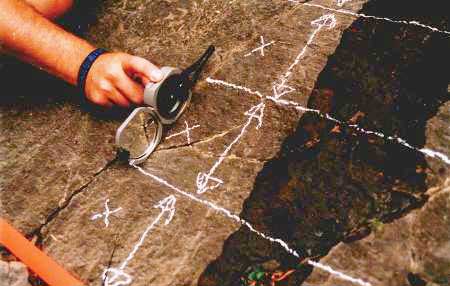
We will begin by taking the strike of a bedding
plane. For these measurements we will use a Brunton compass
like the one you see in the pictures above. In order to measure
the strike, place the side or edge of the compass against
the plane of the outcrop. Sometimes it is easier to put your
field book against the outcrop and then the compass against
the book to get a smoother and/or a larger surface. Now, rotate
the compass keeping the lower side edge of the compass fixed,
until the bulls-eye level bubble is centered (the round tube;
not the long narrow one). When the bubble is centered, the
compass is horizontal against the plane and parallel to the
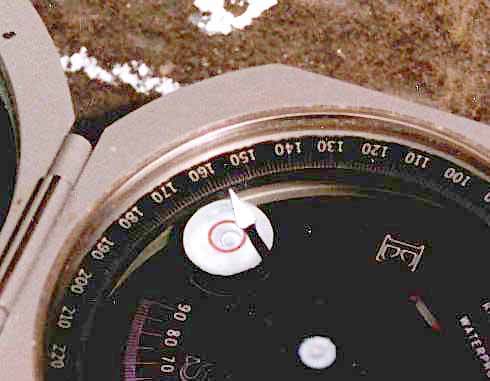
line of strike. Now, with the bulls-eye bubble centered, record
the number that either end of the compass needle is showing.
In other words:
- Place the bottom EDGE of the compass flat against the plane
of interest.
- Adjust the compass orientation, making sure the bottom edge
is always flat against the plane, until the air bubble in the
"Bull's eye level" is centered.
- Read either end of the compass needle to obtain the value
of strike.

Measuring Dip:
To measure the dip of the bedding plane, take your compass
and put its side against the rock so that it points in the same
direction as the line of dip (The dip line is perpendicular
to the strike line). Move the clinometer until the clinometer
level bubble is centered. As we did when we found the strike,
record where the white tipped end of the clinometer needle is
pointing. Note the degrees and the direction. Recall that the
dip direction MUST always be perpendicular to the strike direction
(e.g., a strike of 40° could only dip to the SE or NW, never
NE or SW)
In other words:
- AFTER you determine strike, rotate the compass 90°.
- Place the SIDE of the compass flat against the plane.
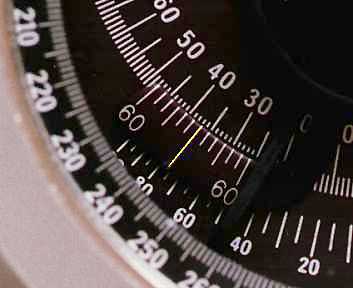
- Adjust the lever on the back of the compass until the air
bubble in the "Clinometer level" is centered.
- Read the dip directly from the scale in the compass.
Measuring Trend:
- The "Fold-out pointer" should point down-plunge.
- Hold the compass horizontally ABOVE the plane (the bubble
in the "Bull's eye level" should be centered).
- Look directly down through the "Slot" in the "Fold-out
pointer".
- Rotate the compass, keeping it horizontal, until the slot
is parallel with the line to be measured. (the line should run
straight down the middle of the slot).
- Read the North end of the compass needle to obtain the value
of trend.
Measuring Plunge:
- Place the bottom EDGE of the compass flat on the line (the
edge should be parallel to the line).
- Make sure the compass is vertical.
- Adjust the lever on the back of the compass until the air
bubble in the "Clinometer level" is centered.
- Read the plunge directly from the scale in the compass (the
same way you read dip).
The images have been copied from: http://courses.geo.ucalgary.ca/glgy203/images/sd.htm.
|