CHANGING PROJECTIONS -or- REPROJECTING DATA SETS
Let's start with shapefiles, because they are a bit easier. I'm assuming that you're using ArcGIS 9, since that is what's loaded on the fieldcamp laptops.
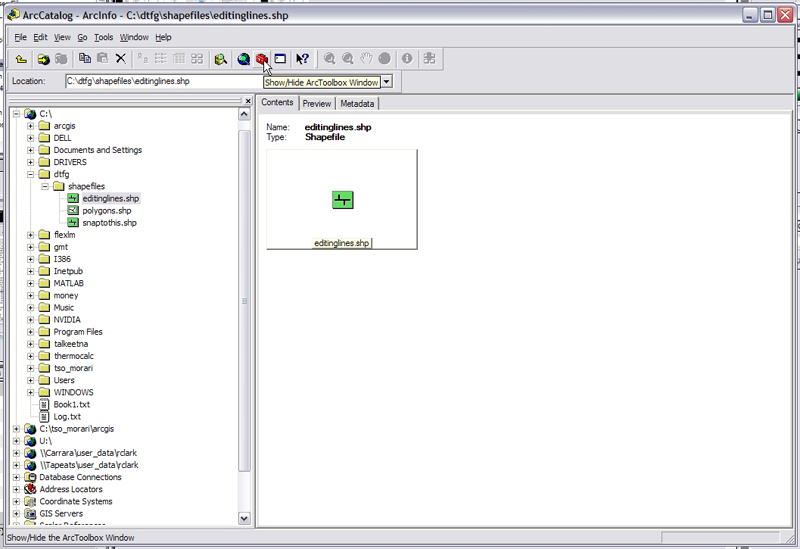
In ArcCatalog, click the red toolbox button at the top of the screen to open the ArcToolbox window.
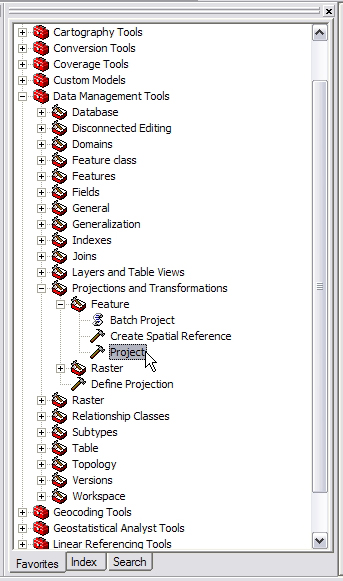
In the ArcToolbox window, select the Project tool in order to reproject one shapefile, or the Batch Project script, if you want to reproject multiple datasets. These tools can be found under Data Management Tools > Projections and Transformations > Feature.
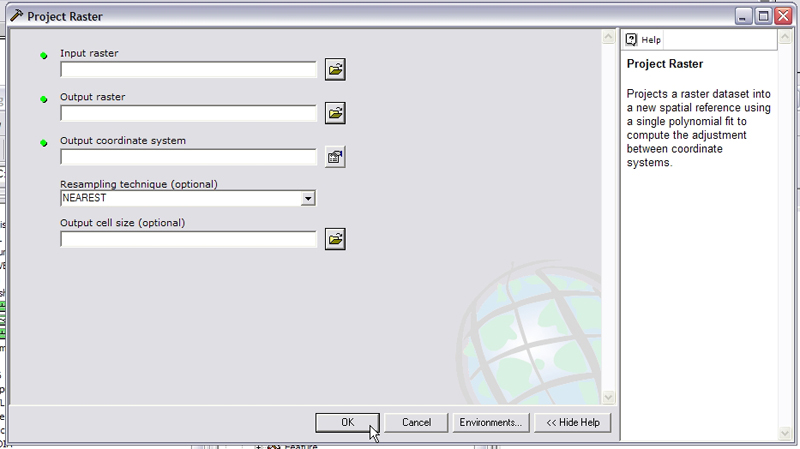
If you're using the Project Tool, this window opens

Specify the Input Dataset that you want to reproject, the name of the new dataset once it has been reprojected, and the coordinate system that you want the output to be in. When all that is entered, press OK and it will create the new, reprojected dataset.
If you're using the Batch Project script, the window looks like this:
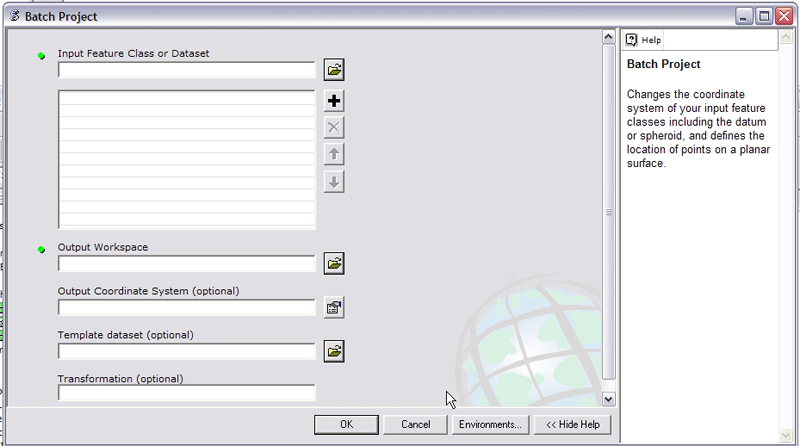
Here you specify the Input Datasets, the folder in which you'd like it to place the reprojected outputs, and of course, the coordinate system you'd like the outputs to be in. Press OK and you're done.
Reprojecting Rasters was next to impossible in ArcGIS 8, so if that's what you're using, you'll need to ask the TA for more help. Fortunately, in Arc 9, it's just as easy as reprojecting shapefiles.
In the ArcToolbox window, go to Data Management Tools > Projections and Transformations > Raster and select the Project Raster Tool.

In the Project Raster Window, specify the Input Raster, the name for the Output Raster, and the coordinate system you're projecting into. Also specify the Resampling Method. What they say is, use Nearest Neighbor for discrete datasets, and Cubic Convolution for continuous datasets. The bottom line is, I like to use Cubic for DEMs, because Nearest Neighbor gives some weird banding effects, but I usually use Nearest Neighbor for remote sensing data. Anyways, once you've specified everything, click OK and the tool does its work.