|
|
|

for 6.111 Introduction to Digital Systems
6.111 home → Labkit home → CC1010 Radio
CC1010 Radio
by Denis DalyIntroduction
The ChipCon 1010 radio is a commercial radio that you can use for your 6.111 project. We can provide you with a ChipCon 1010 development kit. Each development kit contains two radios that can be used to transmit and receive data wirelessly. The kit contains one CC1010EB evaluation board, two CC1010EM Evaluation Modules, two antennas, and a CD containing a free evaluation version of Keil uVision2 ID and SmartRF Studio Software. The evaluation board can be used to program the radios and to allow for easy testing. Once programmed, the two CC1010EM evaluation modules can operate independent from the evaluation board.
CC1010 evaluation module mounted on evaluation board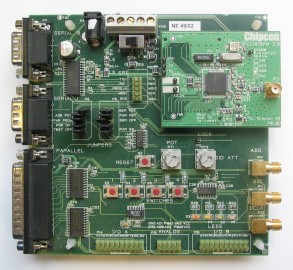
Radio Specifications
The radio operates in the 900 MHz ISM band and can communicate up to 76.8 kbps. The radio operates off a 2.7V to 3.6V power supply. The power consumption is sufficiently low that it can be powered by batteries.
The CC1010 has an integrated 8051 microcontroller that can be programmed in C. Libraries are available that make it easy to transmit and receive data. The radio can be controlled through an SPI digital serial interface. The CC1010 also includes a 10-bit ADC.
For more information, please refer to the CC1010 documentation on ChipCon's webpage.
Programming the CC1010
To load code onto the CC1010 microcontroller, you must first write and compile C code in Keil uVision. The CD that is included with each kit contains a limited version of Keil uVision that will work for small programs. You should leverage the CC1010 libraries: they include code to easily transmit and receive data. They also allow you to control the radio through the UART as long as the evaluation module is on the evaluation board. We are working to set-up a lab machine with the full version of Keil uVision.
Once the C code has been compiled, you need to program the radio through your computer's parallel port. The necessary parallel cable is included in the CC1010 kit. The ChipCon In-Circuit Flash Programmer program should be used to program your radio. It can be downloaded from ChipCon's website
Operating the CC1010
The CC1010 radio is located on the CC1010EM evaluation module. The evaluation module does not need to be connected to the evaluation board for the radio to function. However, if the evaluation module is not connected to the board, it is more difficult to interface with the radio. You will need to get a connector from us and solder wires to it.
Debugging Tips
The CC1010 radios are very reliable. If they aren't behaving as you expect, try running one of the examples included on the CD. Here are a few other tips:
- Avoid using SmartRF Studio to configure your radio. It is usually only needed to make low-level hardware changes. However, SmartRF Studio can allow you to revert the CC1010 to a "factory" state if it is behaving strangely.
- If you are powering the CC1010 evaluation modules with batteries, be sure that the batteries are fully charged. Otherwise, the radio may behave strangely.
- The ADC will likely not work well if you are operating the CC1010 off a battery. Use at your own risk!
Additional Information
If you have additional questions, please email Denis Daly (denis DOT daly AT mit DOT edu)
MIT 6.111 Introduction to Digital Systems, Updated April 13, 2005