Steps to Create/Submit Journal Voucher on MITVMA
- On the Command line of the CAO main menu, enter "jv" to run the Journal
Voucher system.
The Journal Voucher menu displays, as shown on prior screen. - Enter "1" (for "Create/update original vouchers").
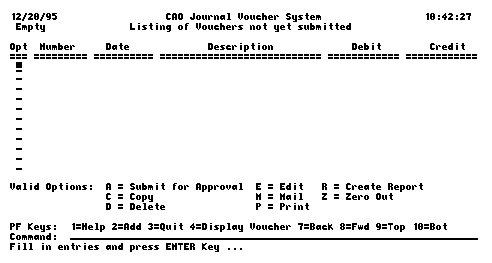
A list of vouchers your userid has saved but not yet submitted displays. If this is your first voucher, the list is empty (shown below). - Press your key for PF2 to add a voucher.
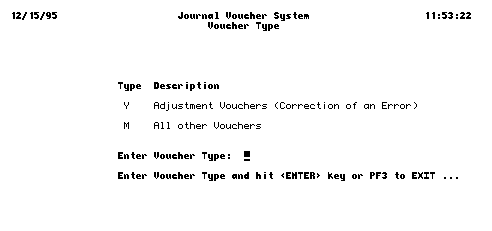
A screen for selecting the voucher type displays (shown below) - Select the voucher type,
- enter "Y" for an adjustment voucher (electronic equivalent of "X" voucher),
- enter "M" for another type of voucher (electronic equivalent of "B" voucher)
A screen for entering the voucher header and explanation displays (see below). Notice that a voucher number has already been assigned.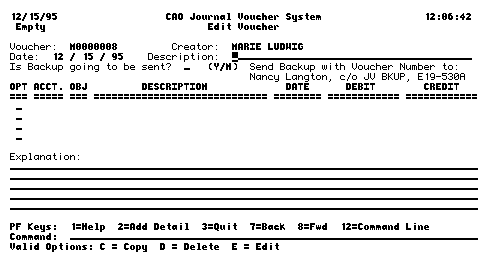
- Complete the voucher header, as described below. Press TAB to move
between fields.
- in the Description field, type a description of the voucher, for example "January xerox billing". This description is for your use only (to identify the voucher in lists).
- type "y" (over default "n") if you will send paper backup to CAO. Note: Send to address on screen; put voucher number on paper backup.
- change Date field, if needed, first pressing ESC, TAB to move to it.
- Add detail information for the voucher, as described below.
- Press PF2 to display a blank screen for entering a line of voucher detail (see below).
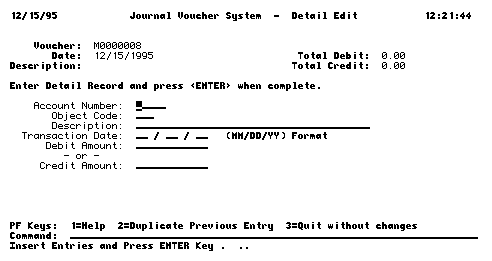
- Type account, object code, description, transaction date, and EITHER debit or credit dollar amount. Note: Each detail screen can represent either debit or credit, but not both.
- Press your key for ENTER.
The system edits the detail data. You need to correct errors before continuing. You can override warnings. If the detail data is acceptable, another blank screen for entering detail displays. - Repeat the above two steps to add other detail lines, or press PF3 from a blank detail screen to return to the voucher header/explanation screen.
The voucher screen now displays a line for each detail item entered (shown below). You can edit an item, if needed, by typing "E" in the Opt column and pressing ENTER.
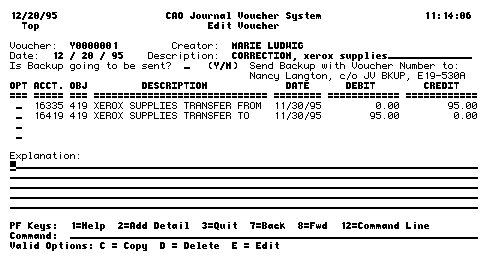
- Type the voucher explanation (see above).
Be as detailed as you can, especially when sponsored projects are involved. - Press your key for ENTER to save what you've done.
If the voucher data is acceptable, the screen for selecting a voucher type redisplays (shown above between steps 3 and 4). - At the voucher type screen,
- To create another voucher, repeat steps 4 - 8.
- To quit without creating an additional voucher, press your key
for PF3.
When you press PF3, the list of vouchers created by your userid redisplays (see below). The voucher you created is included in the list.
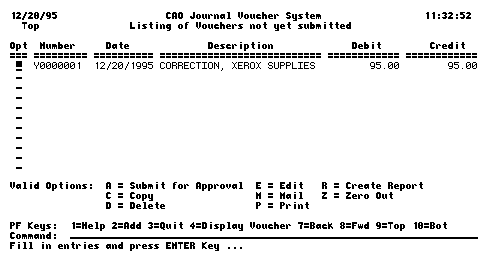
- You can perform further options on the voucher, as indicated at the
bottom of the screen.
For example, you can edit the voucher or e-mail a copy to another userid. - To submit the voucher for approval, type "A" on its line and press
your key for ENTER; confirm when prompted.
The voucher is edited. If acceptable it is sent to CAO for approval.
To follow a voucher through the approval process, you can use JV menu option 3 (pending voucher report).
