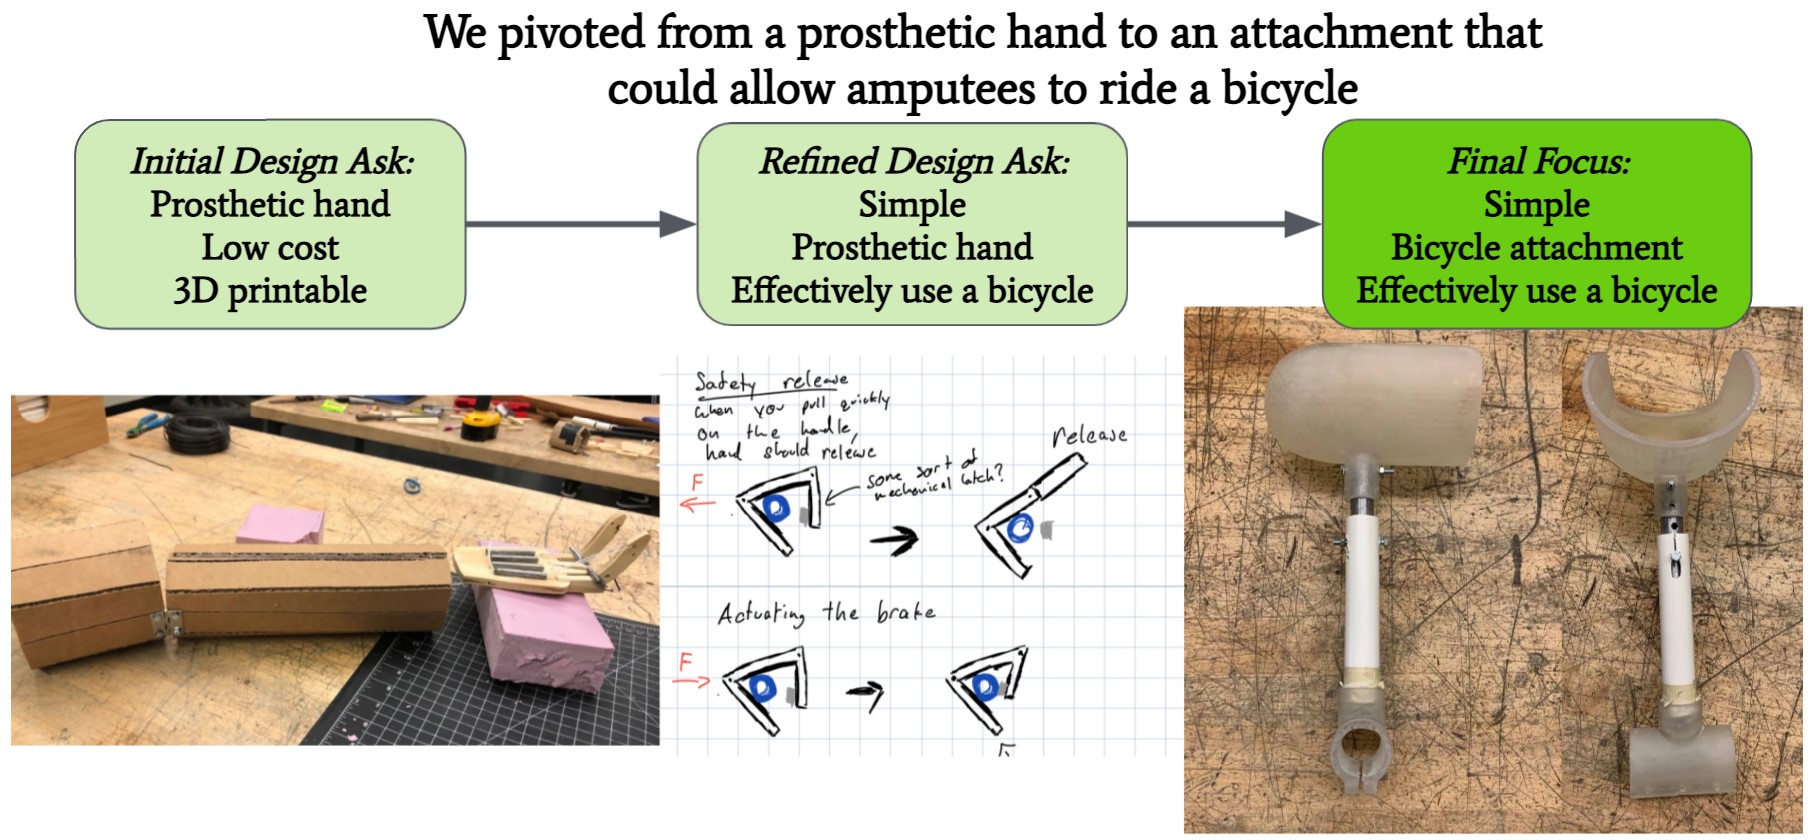
To begin this project, my group and I first touched base with our collaborators, and Iraqi fabrication lab. We were in constant contact over Whatsapp and scheduled early morning video calls on our end to best suit their desired form and time of communication. After speaking with the Science Camp, they gave us a brief context of what they have been working on themselves and why: a cost-effective and functional 3D printed hand that can be provided to Iraqis. The design was entirely 3D printed, with distinct fingers and palm. The issue with it, however, was that it was very clunky, and the fingers had no way to actuate. So our original ask from the Science Camp was broad: to develop an easy to assemble prosthetic hand that is low cost, socially accepted, and 3D printable.
In order to address all of these asks, my group and I conducted our own reasearch into current hand prosthetics on the market. We examined what materials are used, how they are actuated, what the costs were in creating them, and the complexity of them.
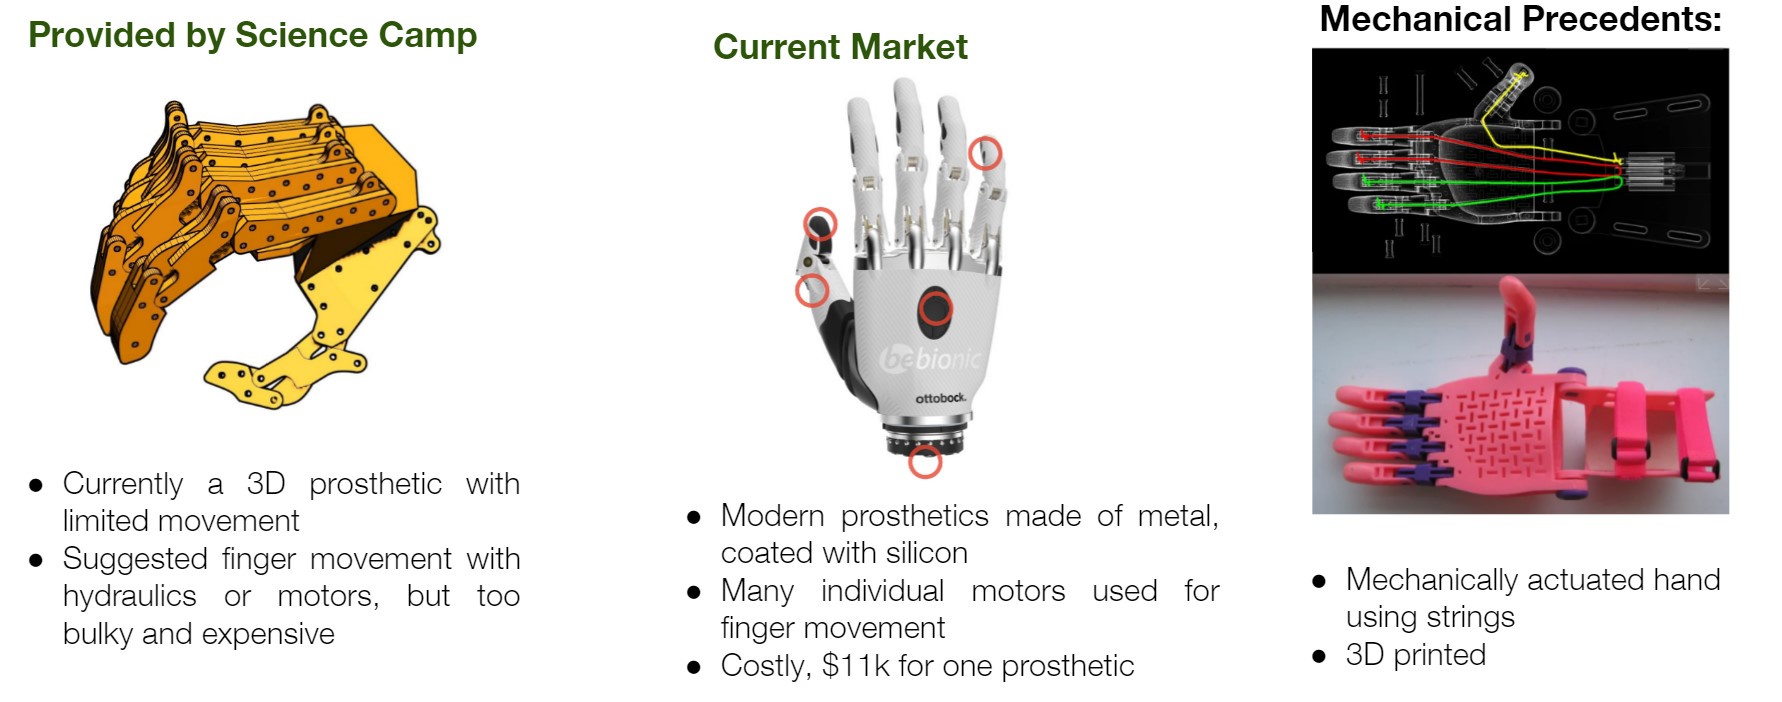
Further, besides the extensive research we found online and in papers, we spoke with some prominent prosthetics researchers at MIT about the best way to approach this problem. They guided us on what we should be aware of when designing this: since this is a cost-effective prosthetic, we must consider what specific situation we want this used for. Because designing an all-purpose prosthetic is very complicated in and of itself, we must look into a more niched bodily function that can be applied to many common tasks that will help the user.
Besides doing the research on what we were going to eventually make, we also needed to do research on who we were making this for. You can design anything, but if the person you are designing it for doesn't like it or find it useful, then it was pointless to make the design in the first place. And to stay true to the idea of human-centered design, we spoke with a few Iraqi amputees.
I spearheaded these interviews, and asked about not only what they look for and are missing with current prosthetics in Iraq, but about societal implications due to being an amputee. One amputee we spoke to lost his limb in a bus bombing. He explained to use how in Iraq, once you become amputated, you no longer seen as an active member of the community who can contribute to the family or society. Once amputated, people treat you as if you can't do anything for yourself and that you need to be bed-ridden. The man we spoke to told us that this outlook on amputees is detrimental to them, and that doing something as simple as riding a bicycle or getting groceries feels like they are breaking the stereotype and makes them feel more independent. Additionally, we learned about how most prosthetics there aren't even functional but only used for appearance. Many prosthetics break down so easily because only NGOs provide the poorly made prosthetics.
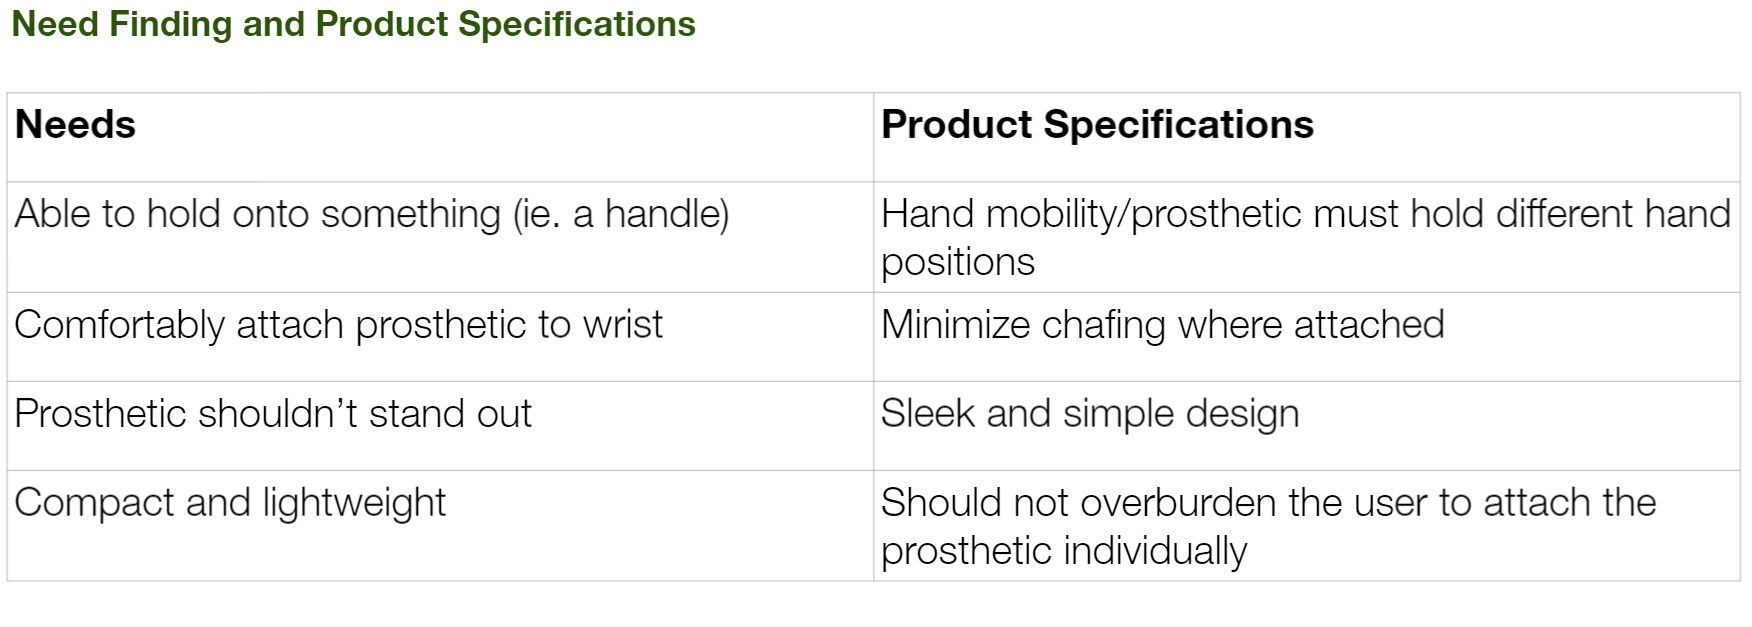
After conducting our own research and learning about our users, we came up with an initial set of product specifications from a set of user needs.
As a team we were brainstorming what we could do to actuate the fingers of the already existing design that Science Camp made. One concept we wanted to play around with was the flexibility of the fingers and wrist, as well as thinking about having an opposable thumb. With this, we thought the user could do common tasks throughout the day.
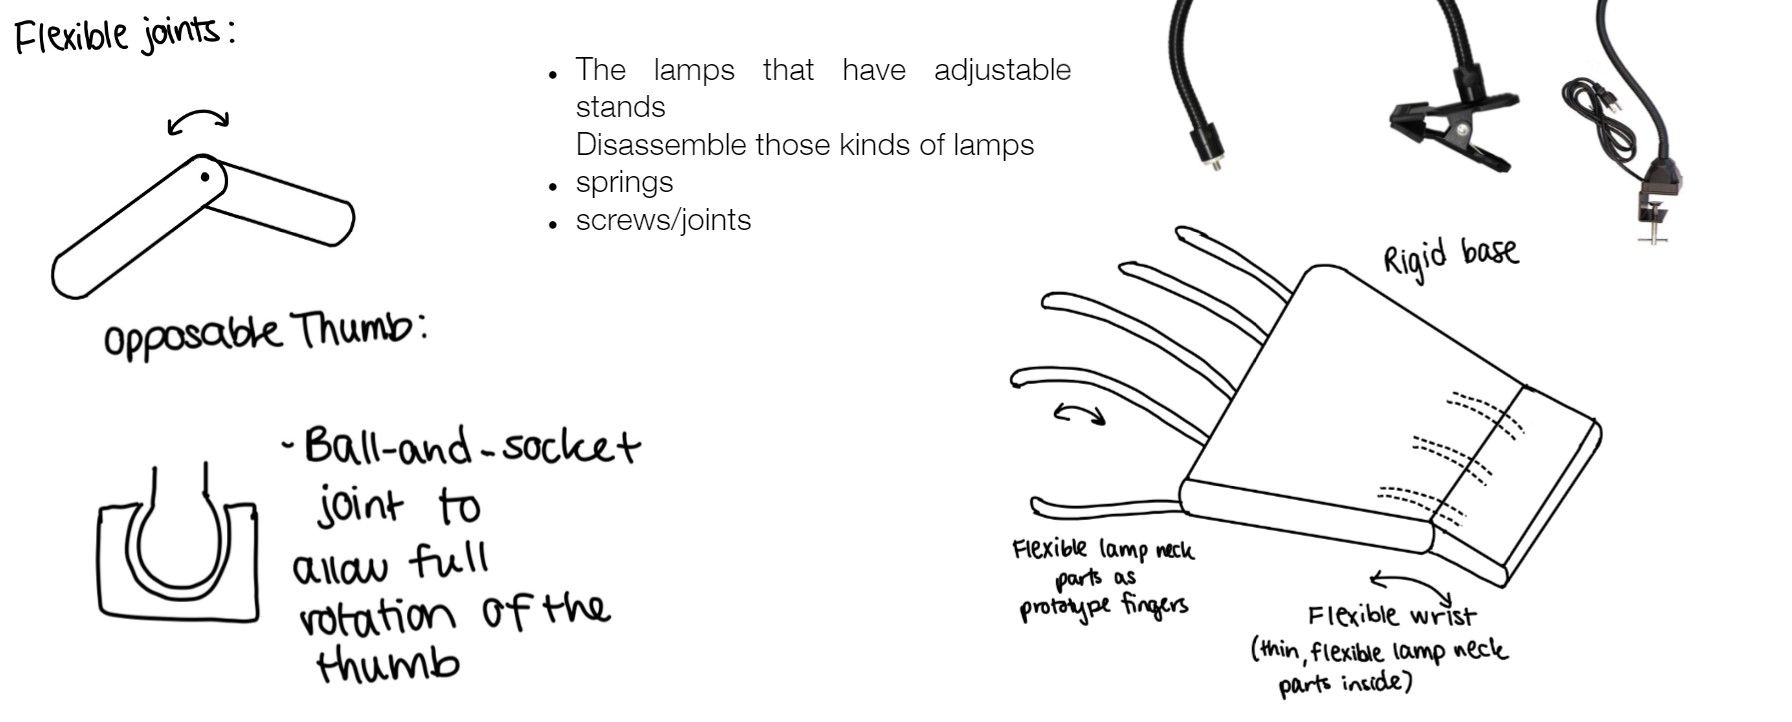
We went into lab and used pins and rubber bands through the fingers in order to mimic finger joints. From there, we got the idea of using strings at the base of the palm in order to get movement of the finger by moving the wrist. This proved wuite difficult to make because the string at to be taut at the perfect amount required for the wrist. When thinking about consistently manufacturing this, this wouldn't be perform to the standards that will suit the majority of the population, as it is so tailored to the user in this design.
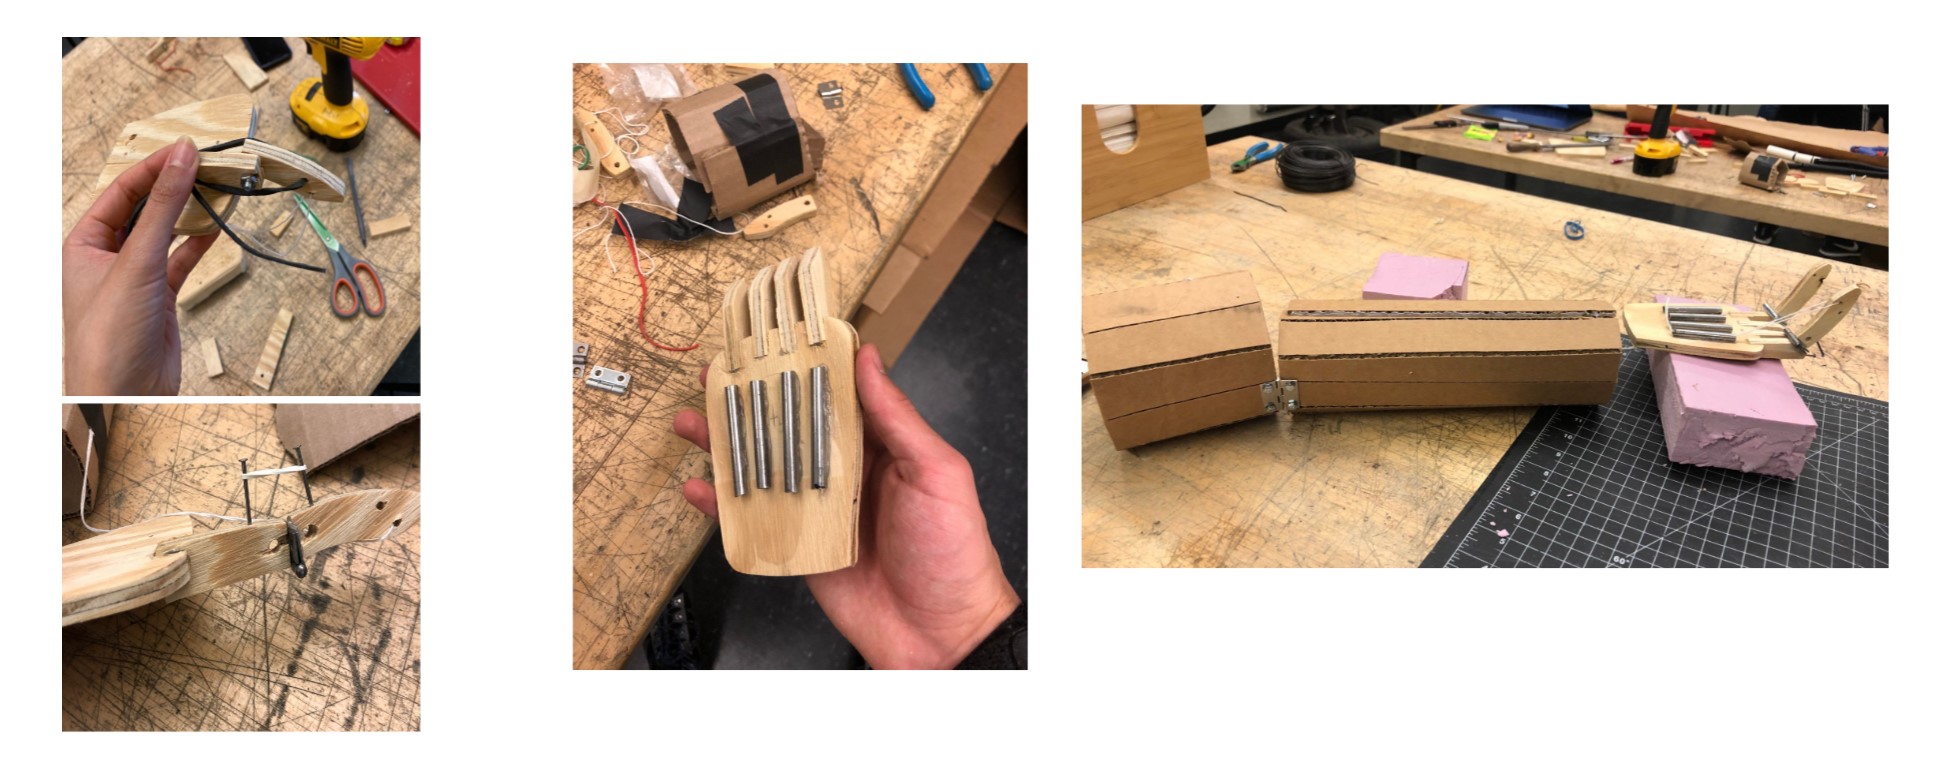
We presented the prototypes of our progress to Science Camp, and they then emphasized that they wanted to do a design similar to theirs. At this point in the journey we were being asked for a multitude of tasks that the prosthetic can complete, which weren't feasible in our timeline. This is where we had to communicate to Science Camp, along with our class professors, that we need to redefine our ask in order to complete as much as we can within the given time frame.
We had to hold many meetings in order to come to our final focus. THis way we could provide the best help to Science Camp so that they can build upon our idea themselves. From our learnings with Iraqi amputees and biomechanics researchers, we concluded that focusing on an attachment would be the best way to progress, as it can be applied to many tasks while being a simple, but elegant solution.
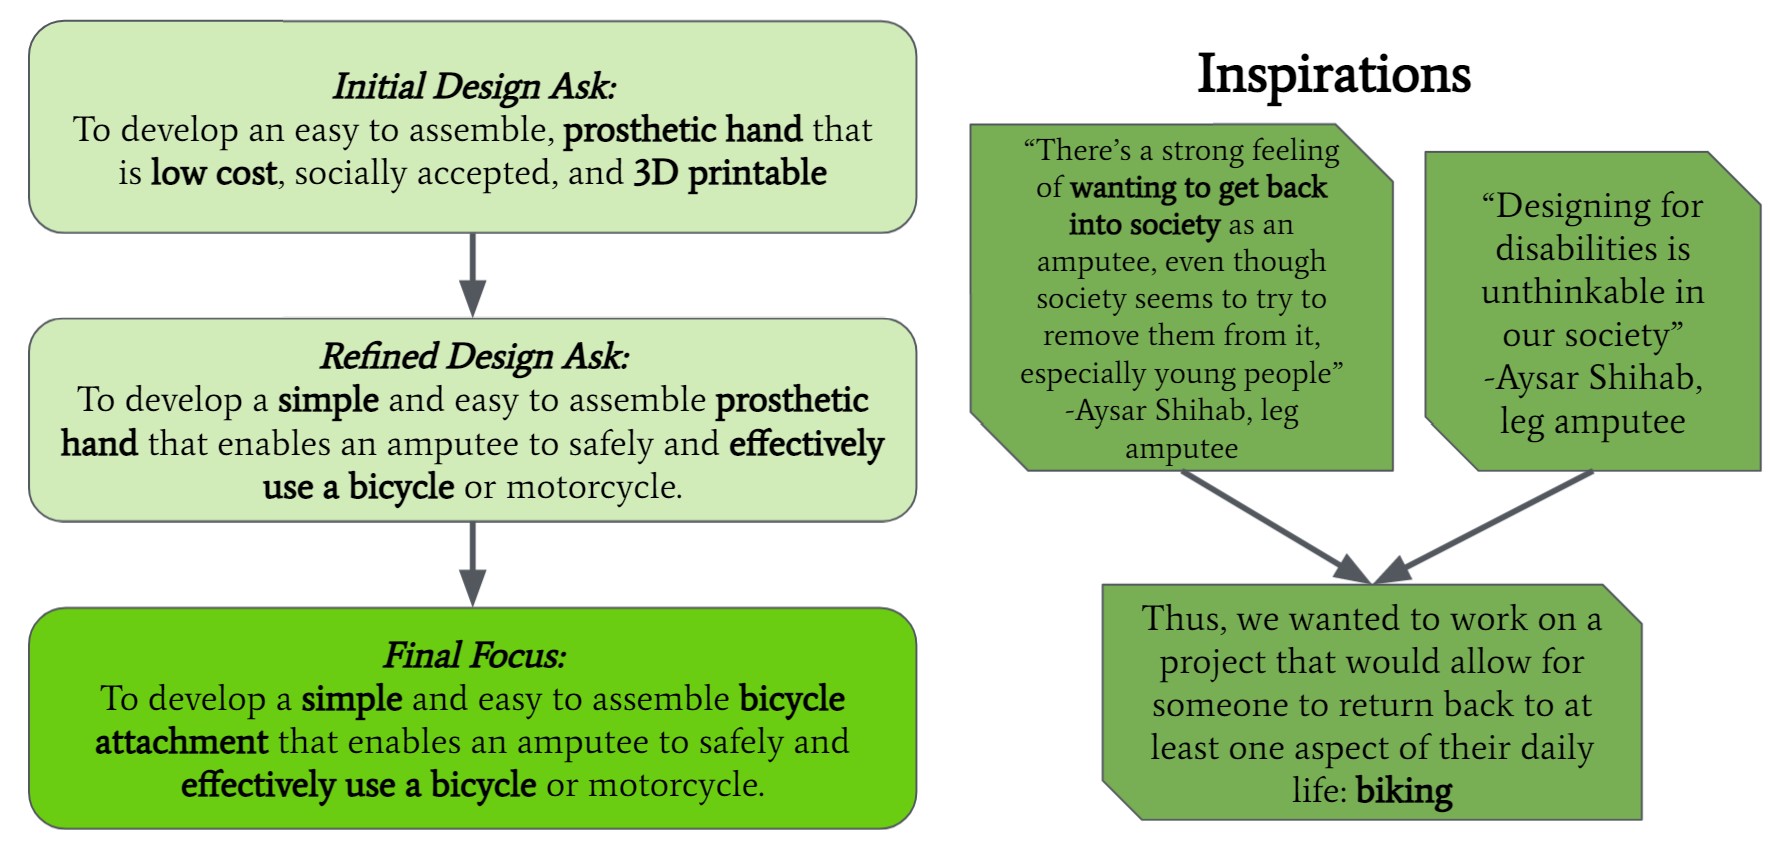
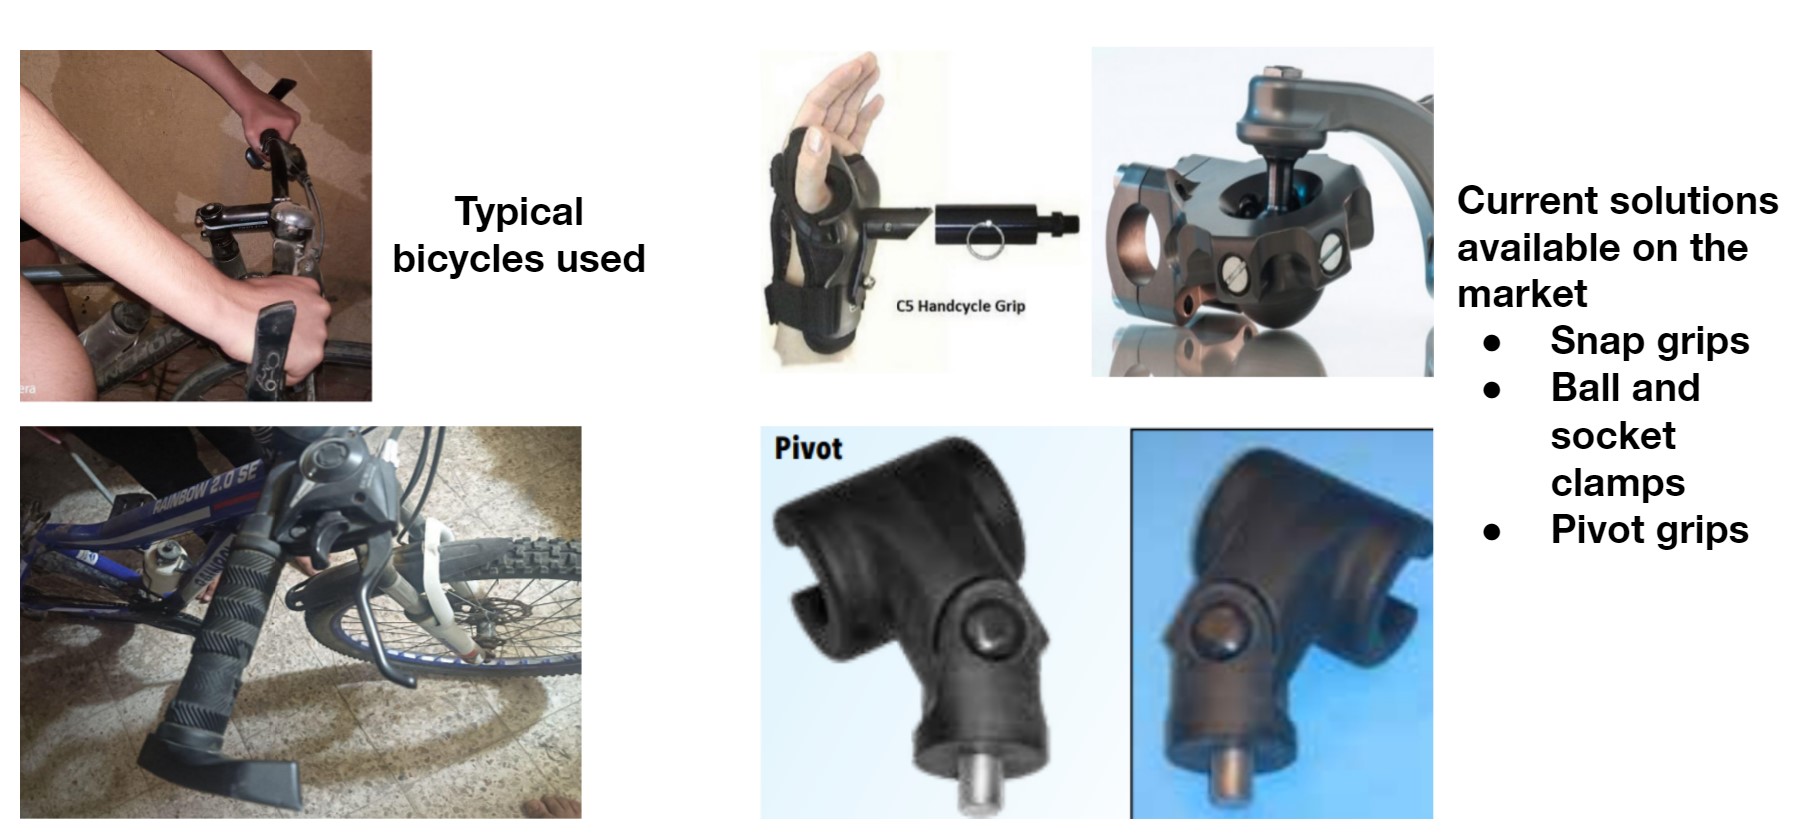
We concluded that creating a bicycle attachment would be best for the user and to build upon for Science Camp. This bicycle attachment will allow amputees to be more independent and gain confidence in being able to move about on their own. We immediately began researching what already exists for this approach. We asked Science Camp for photos of typical bikes used in Iraq so we could use a bike with a similar handle to test on.
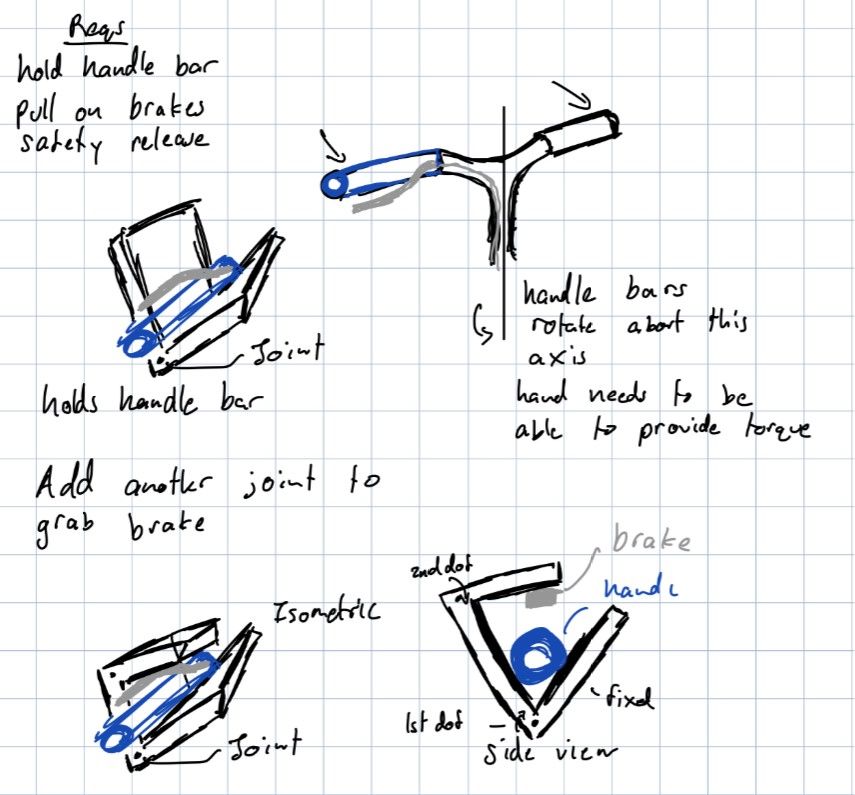
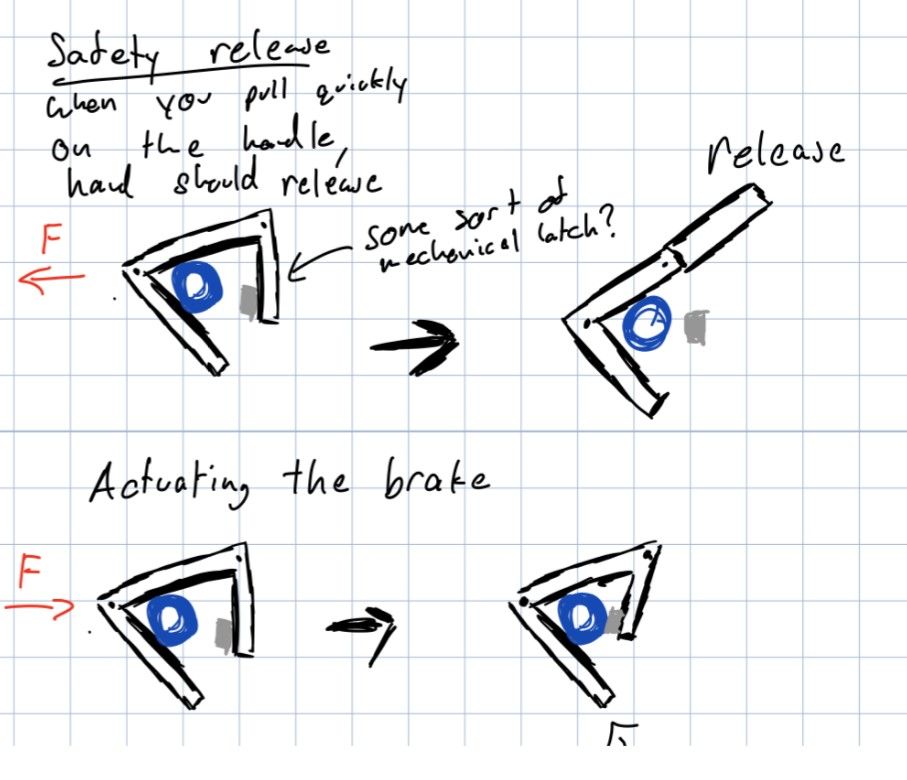
After our research, we drew some sketches on what our prototype could look like down below.
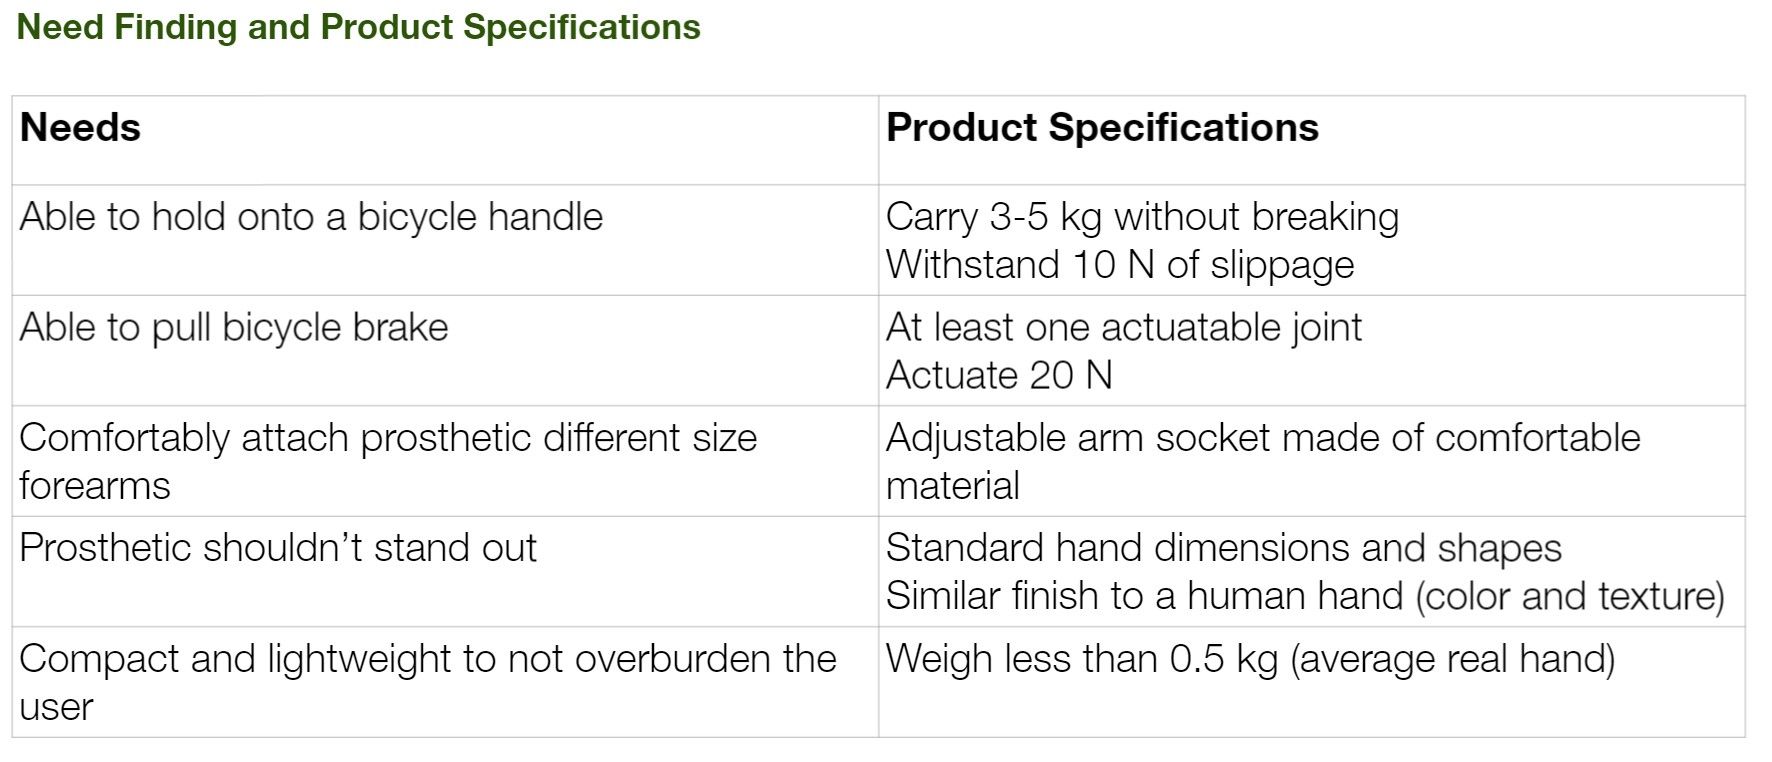
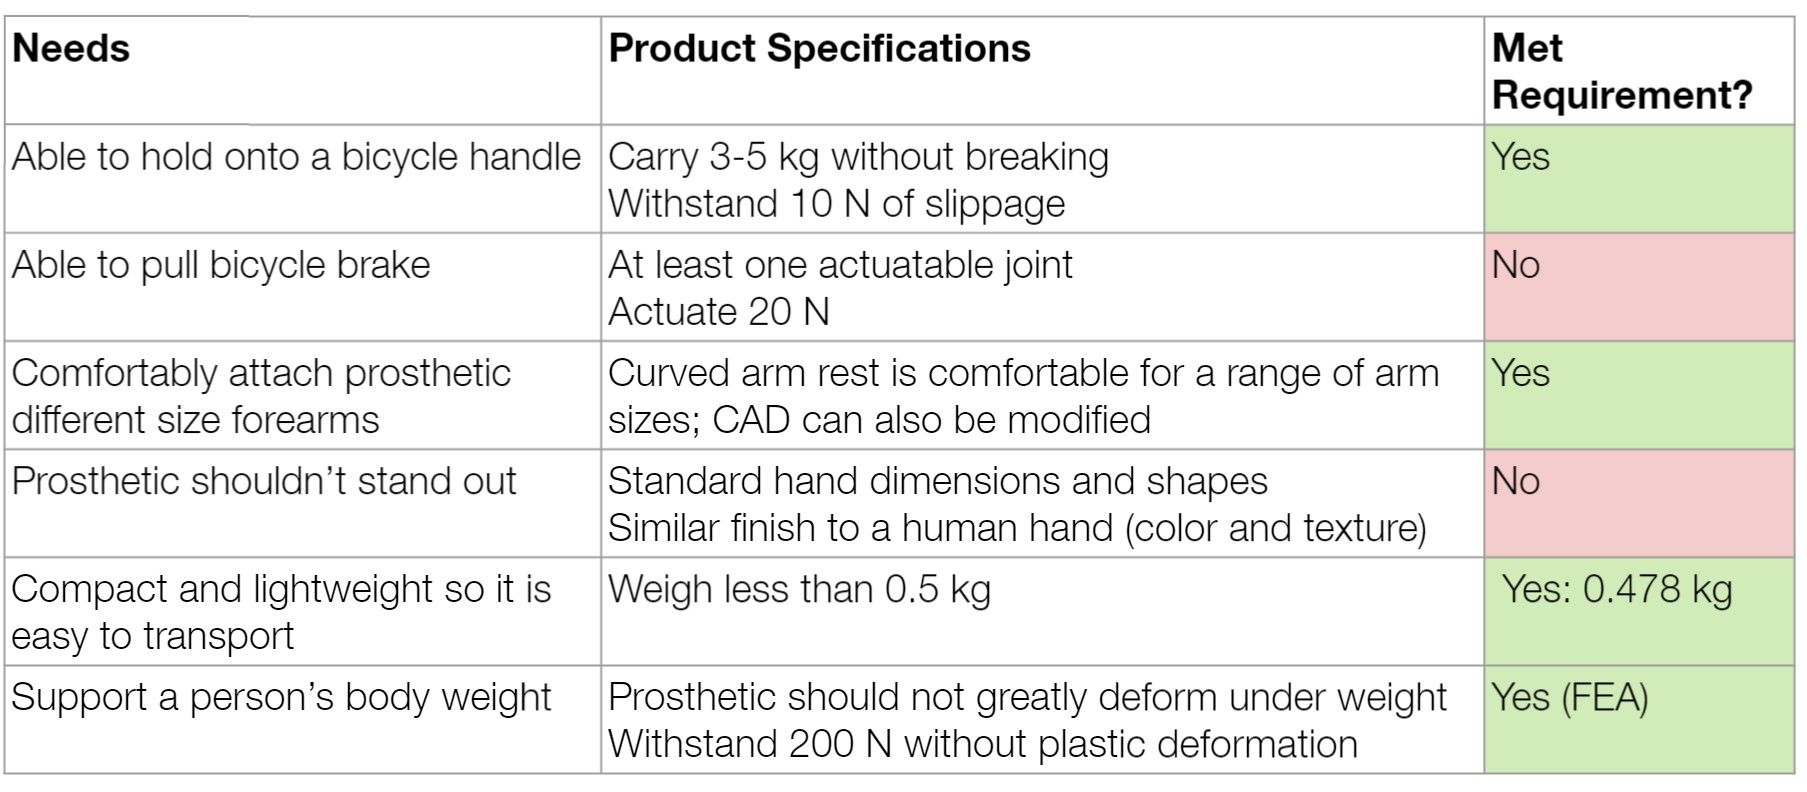
Since we redefined the final focus of the prosthetic, we also changed our needs and product specifications that we originally made. Besides changing the criteria for this specific task, we also made it more quantatative for testing purposes so we have it clearly outlined whether we passed or failed our goals.
For our design, we chose to create an attachment that slides onto the bike handle while still being tight enough to hold it. We believed that this attachment was a simple way to execute this task. Flexibility in the fingers aren't needed, being able to mor the wrist wasn't needed either. At the end of the day, we selected this attachment because of its simplicity, functionality, and versatility. If an attachment like this were to be made, then what's to say other attachments for different tasks can be made?
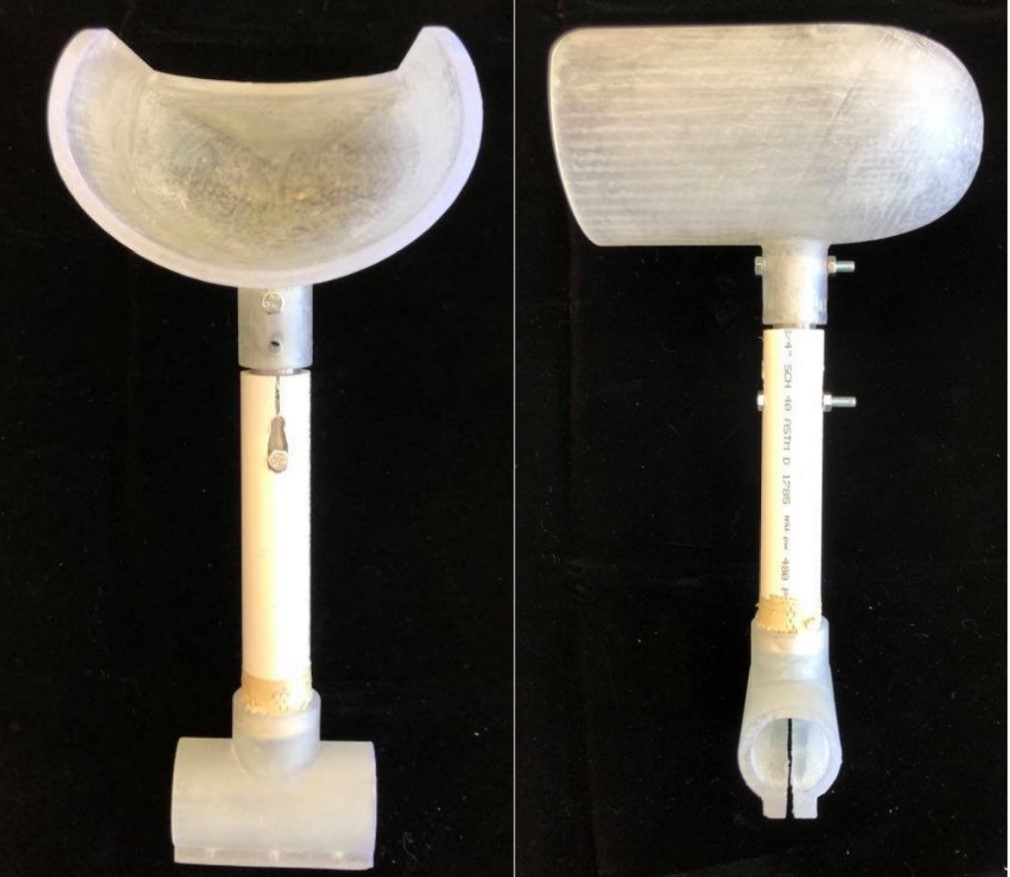
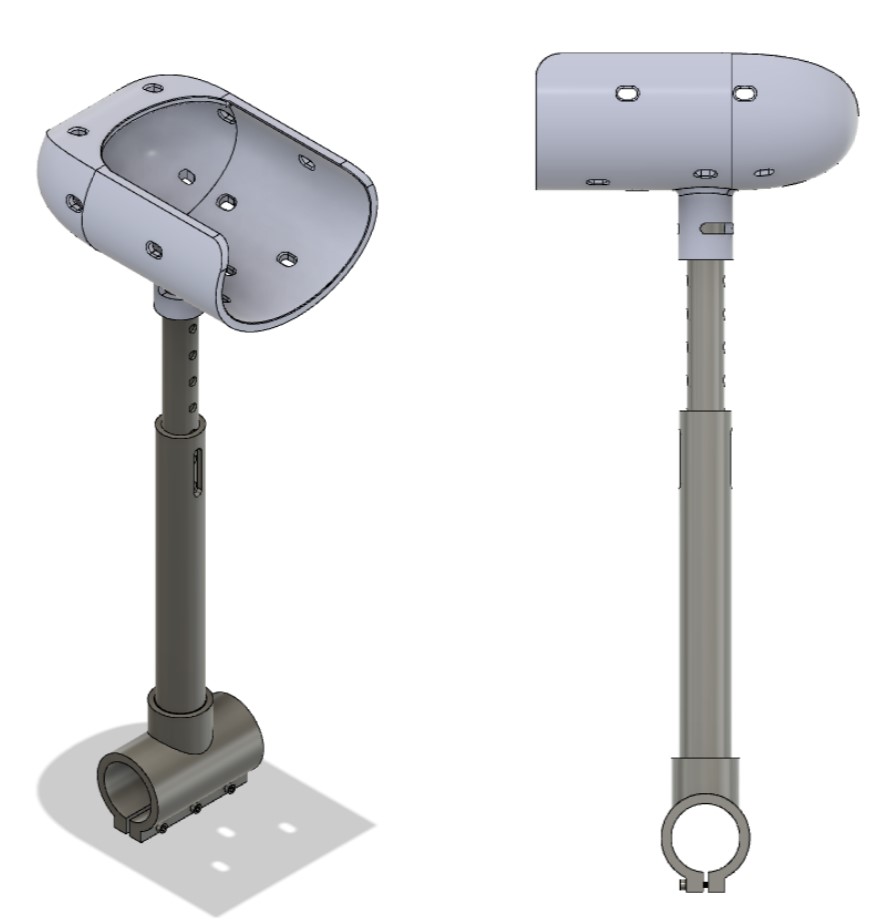
For this prototype we broke it down into different components: the shaft collar that will slip onto the bike, the outer rod that extends to the forearm/elbow, and the arm socket.
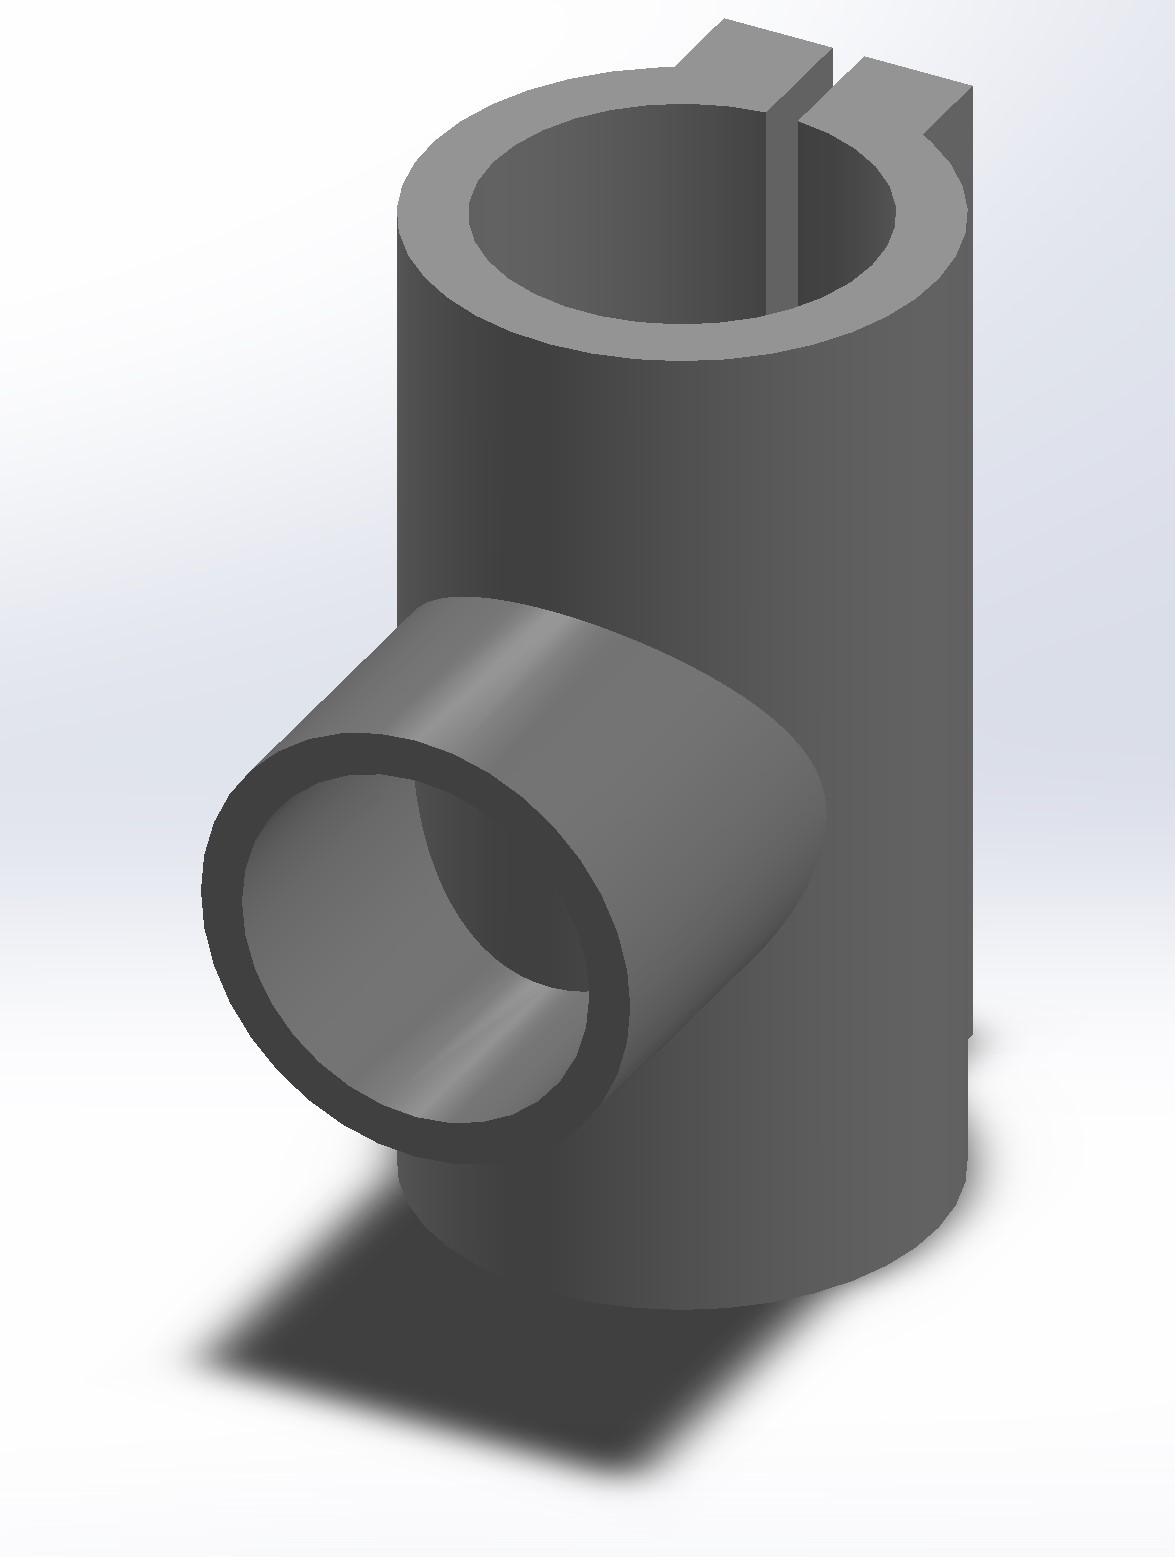

When working on the shaft collar, we had first used a bike at MIT, similar to the one provided by Science Camp, to measure how tight we needed to make the shaft. One of the shaft prototypes we first made didn't fit quite right, so we put clamps on it in the mean time to hold onto the bike. It took some time and testing to get the snug fit we were looking for. Once we got the measurement, the shaft worked perfectly.
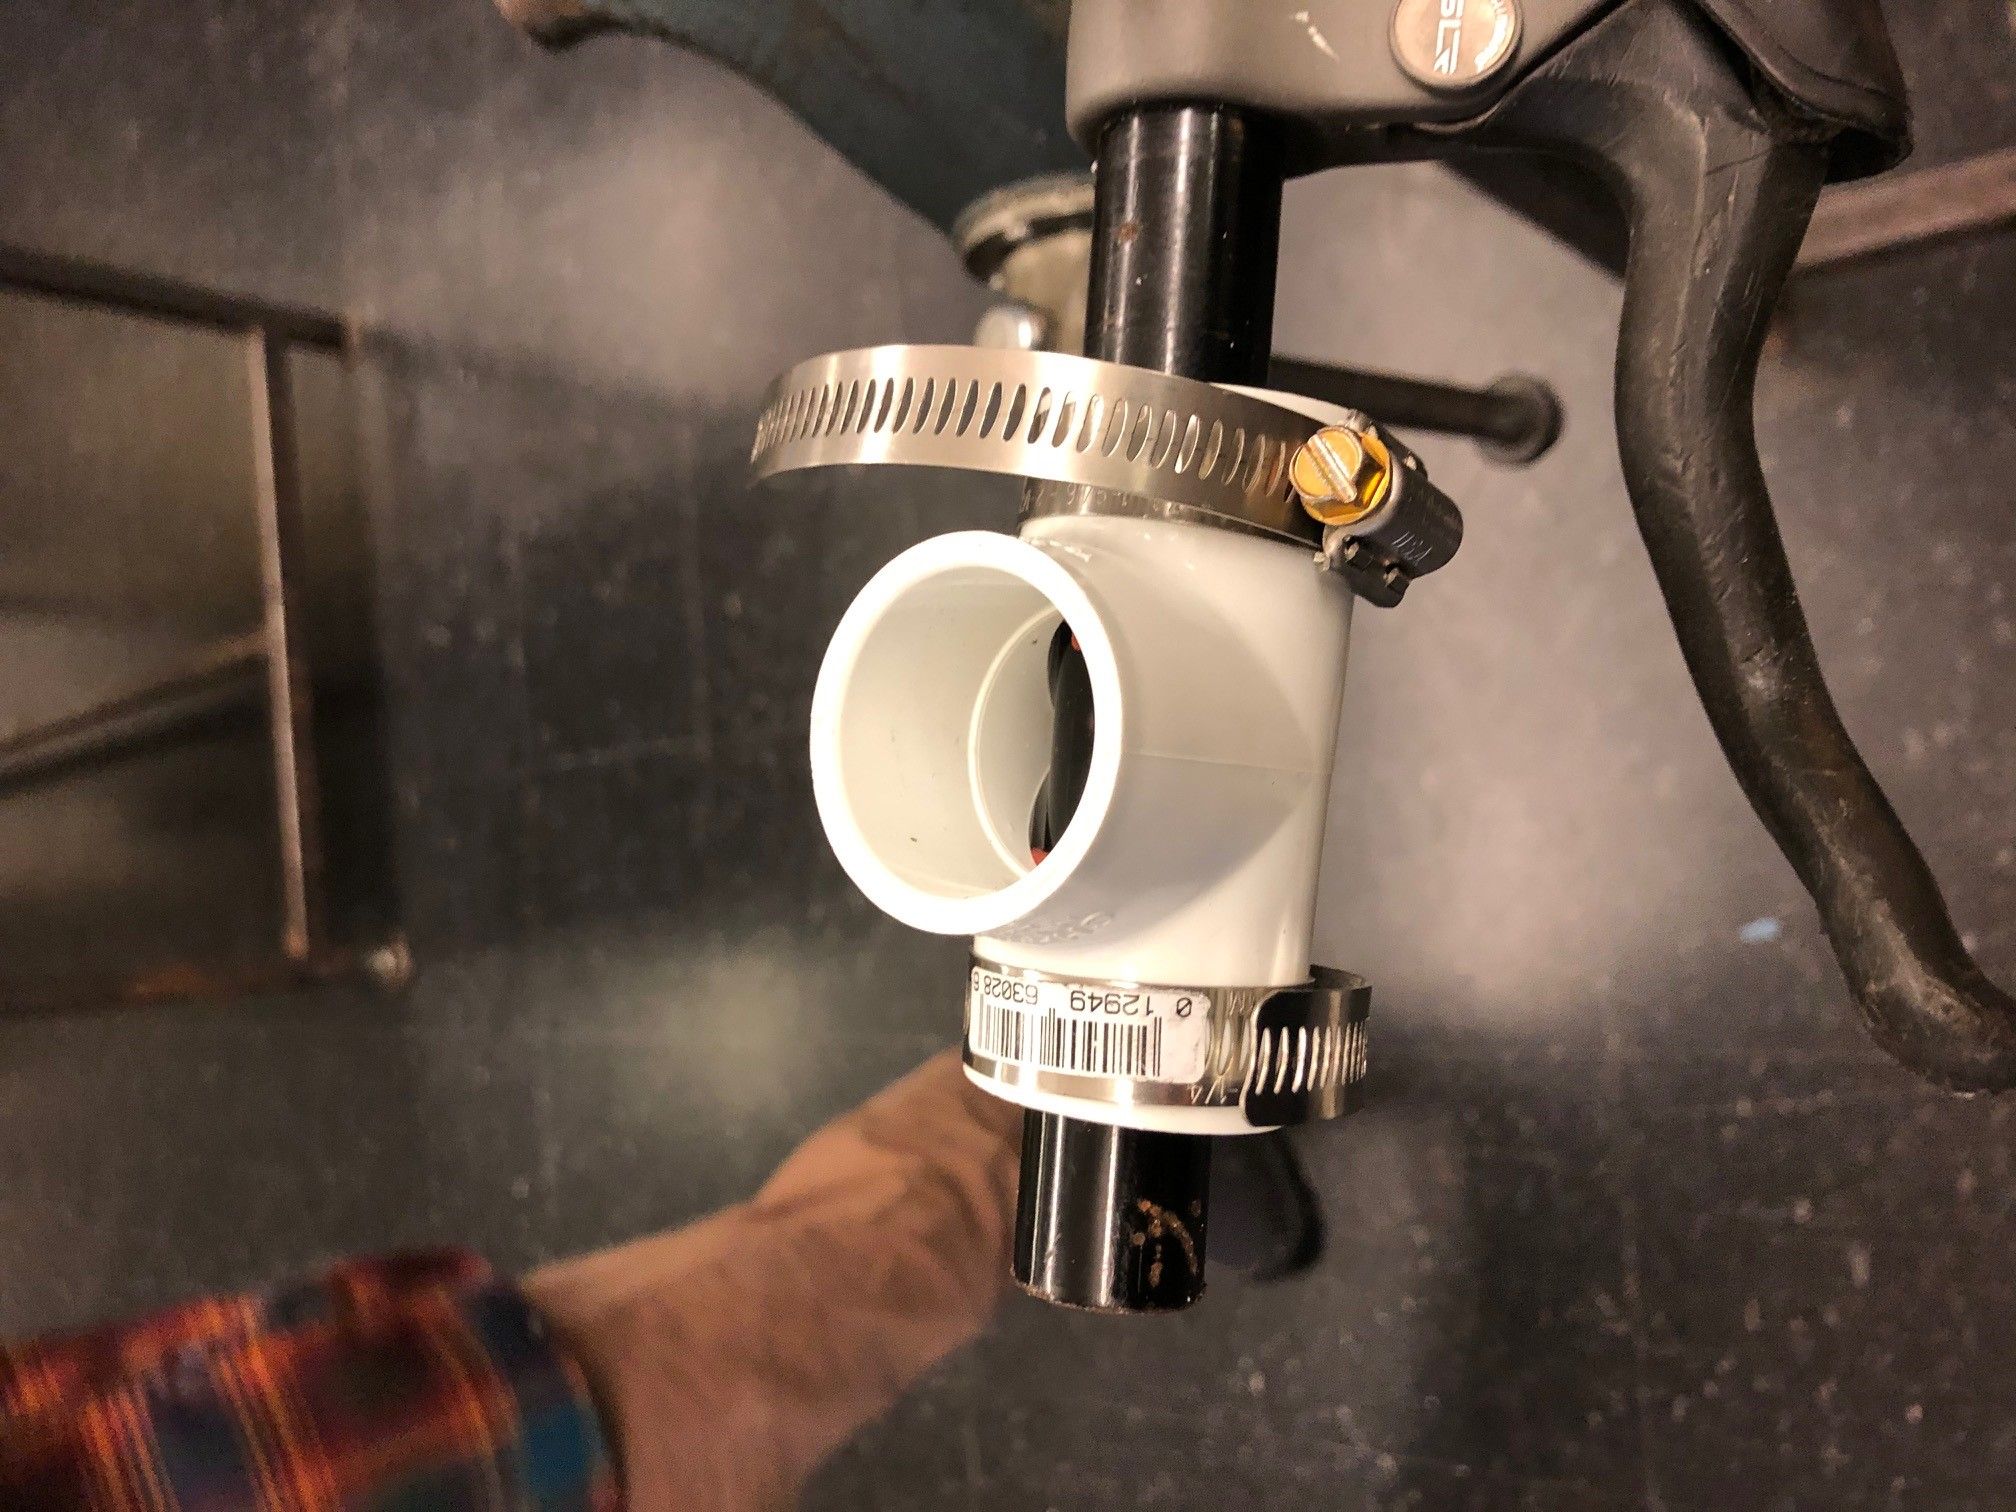
We created an outer rod for the attachment as a way to not only extend to the elbow, but also to protect that spring system that we put inside of it. The spring systems allows for the user to comfortably ride the bike, as it acts as a shock absorber for any jolts when bicycling. This is why the outer rod has a hole drilled near the top; this is where the screw attached to the spring can slide slightly.
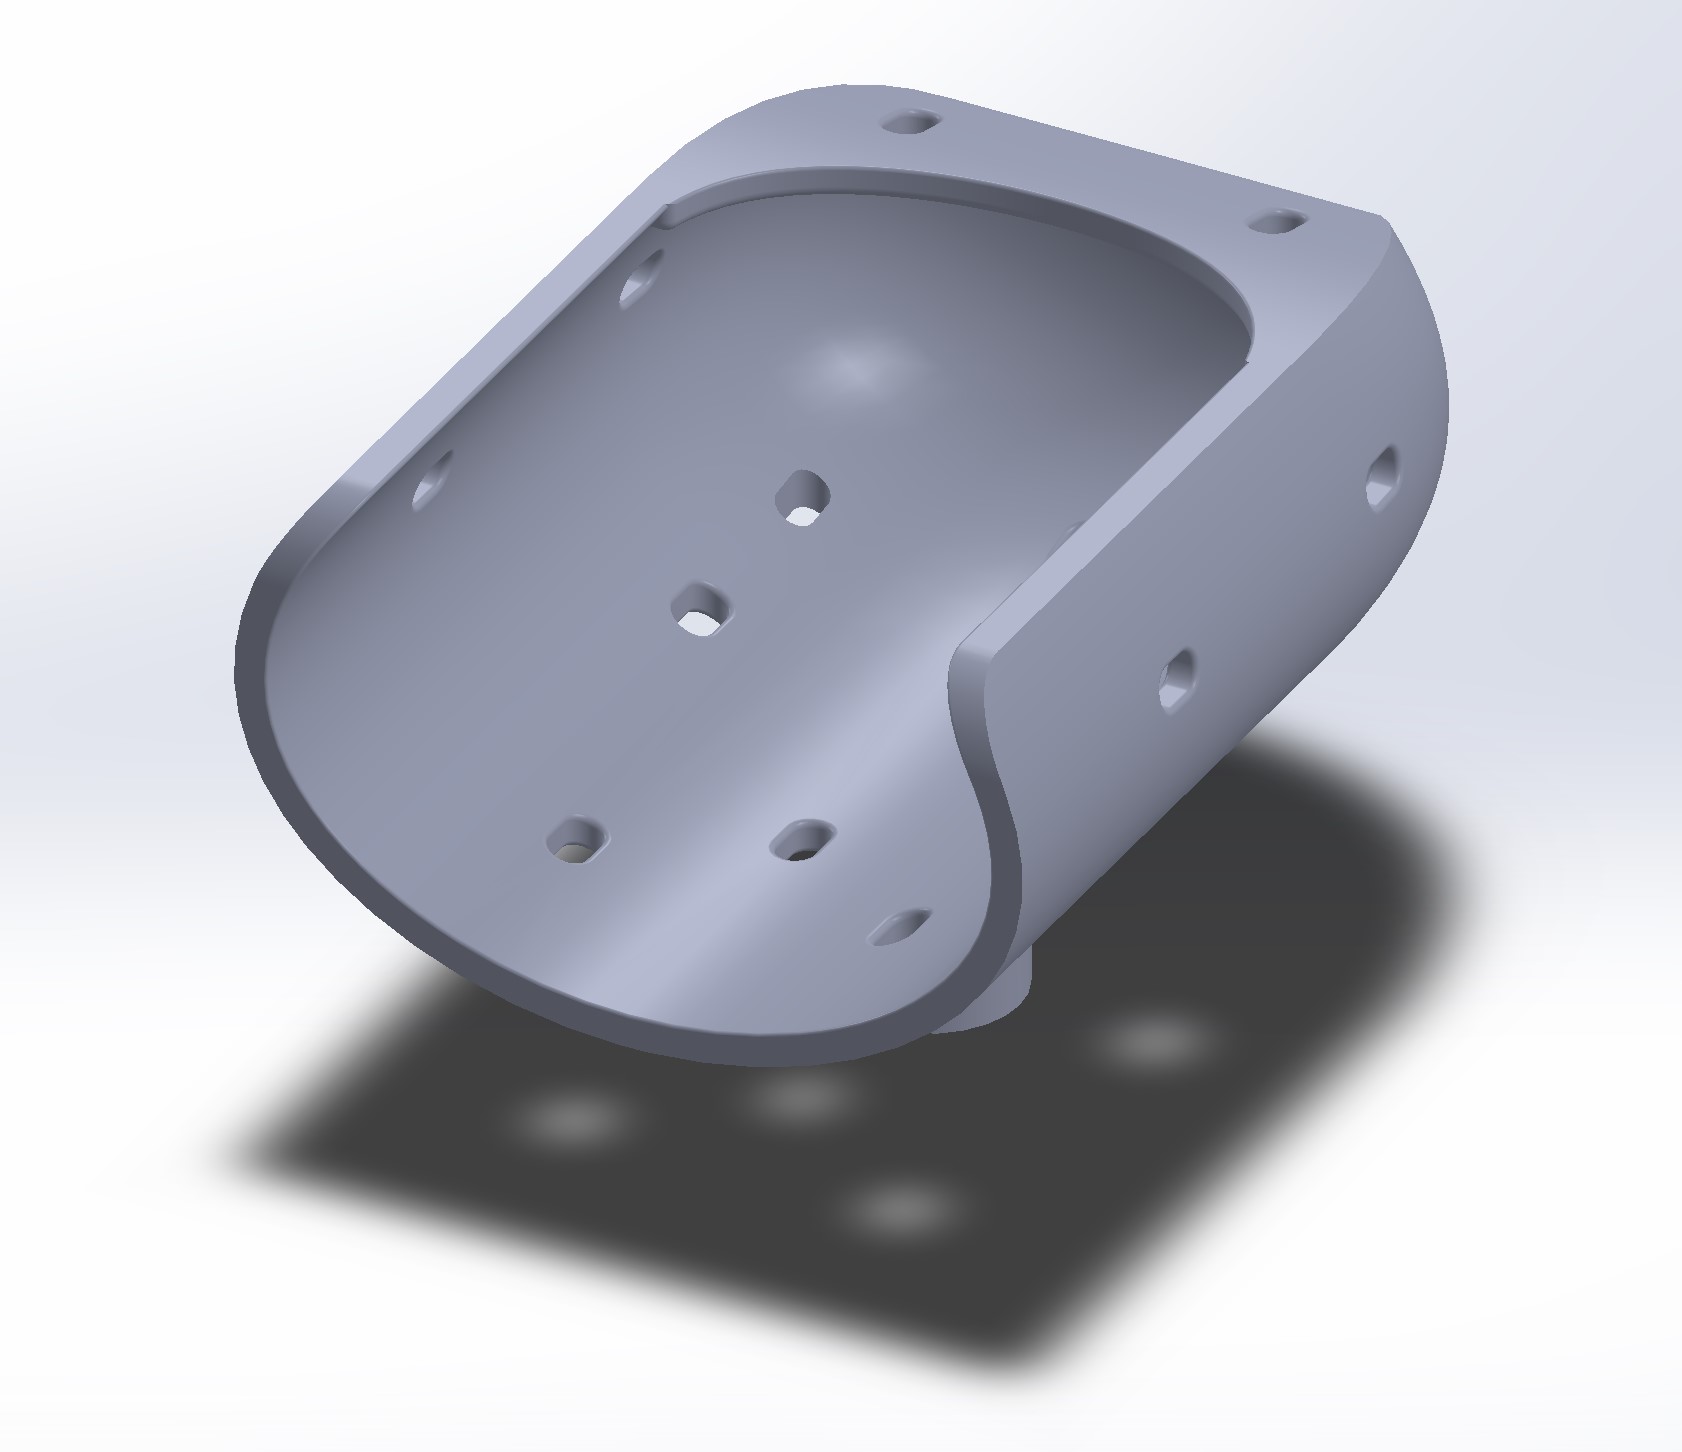
The final main component of this system is the arm socket. We changed this a few times in order to get the most comfortable shape that one would naturally fit into when using it. At first, we decided to go with a very simple curved shape, however, we had no walls on the rest. Thus, the arm would easily slide out of the attachment. Moreover, it felt very uncomfortable when using, as it didn't have enough surface area for the limb.
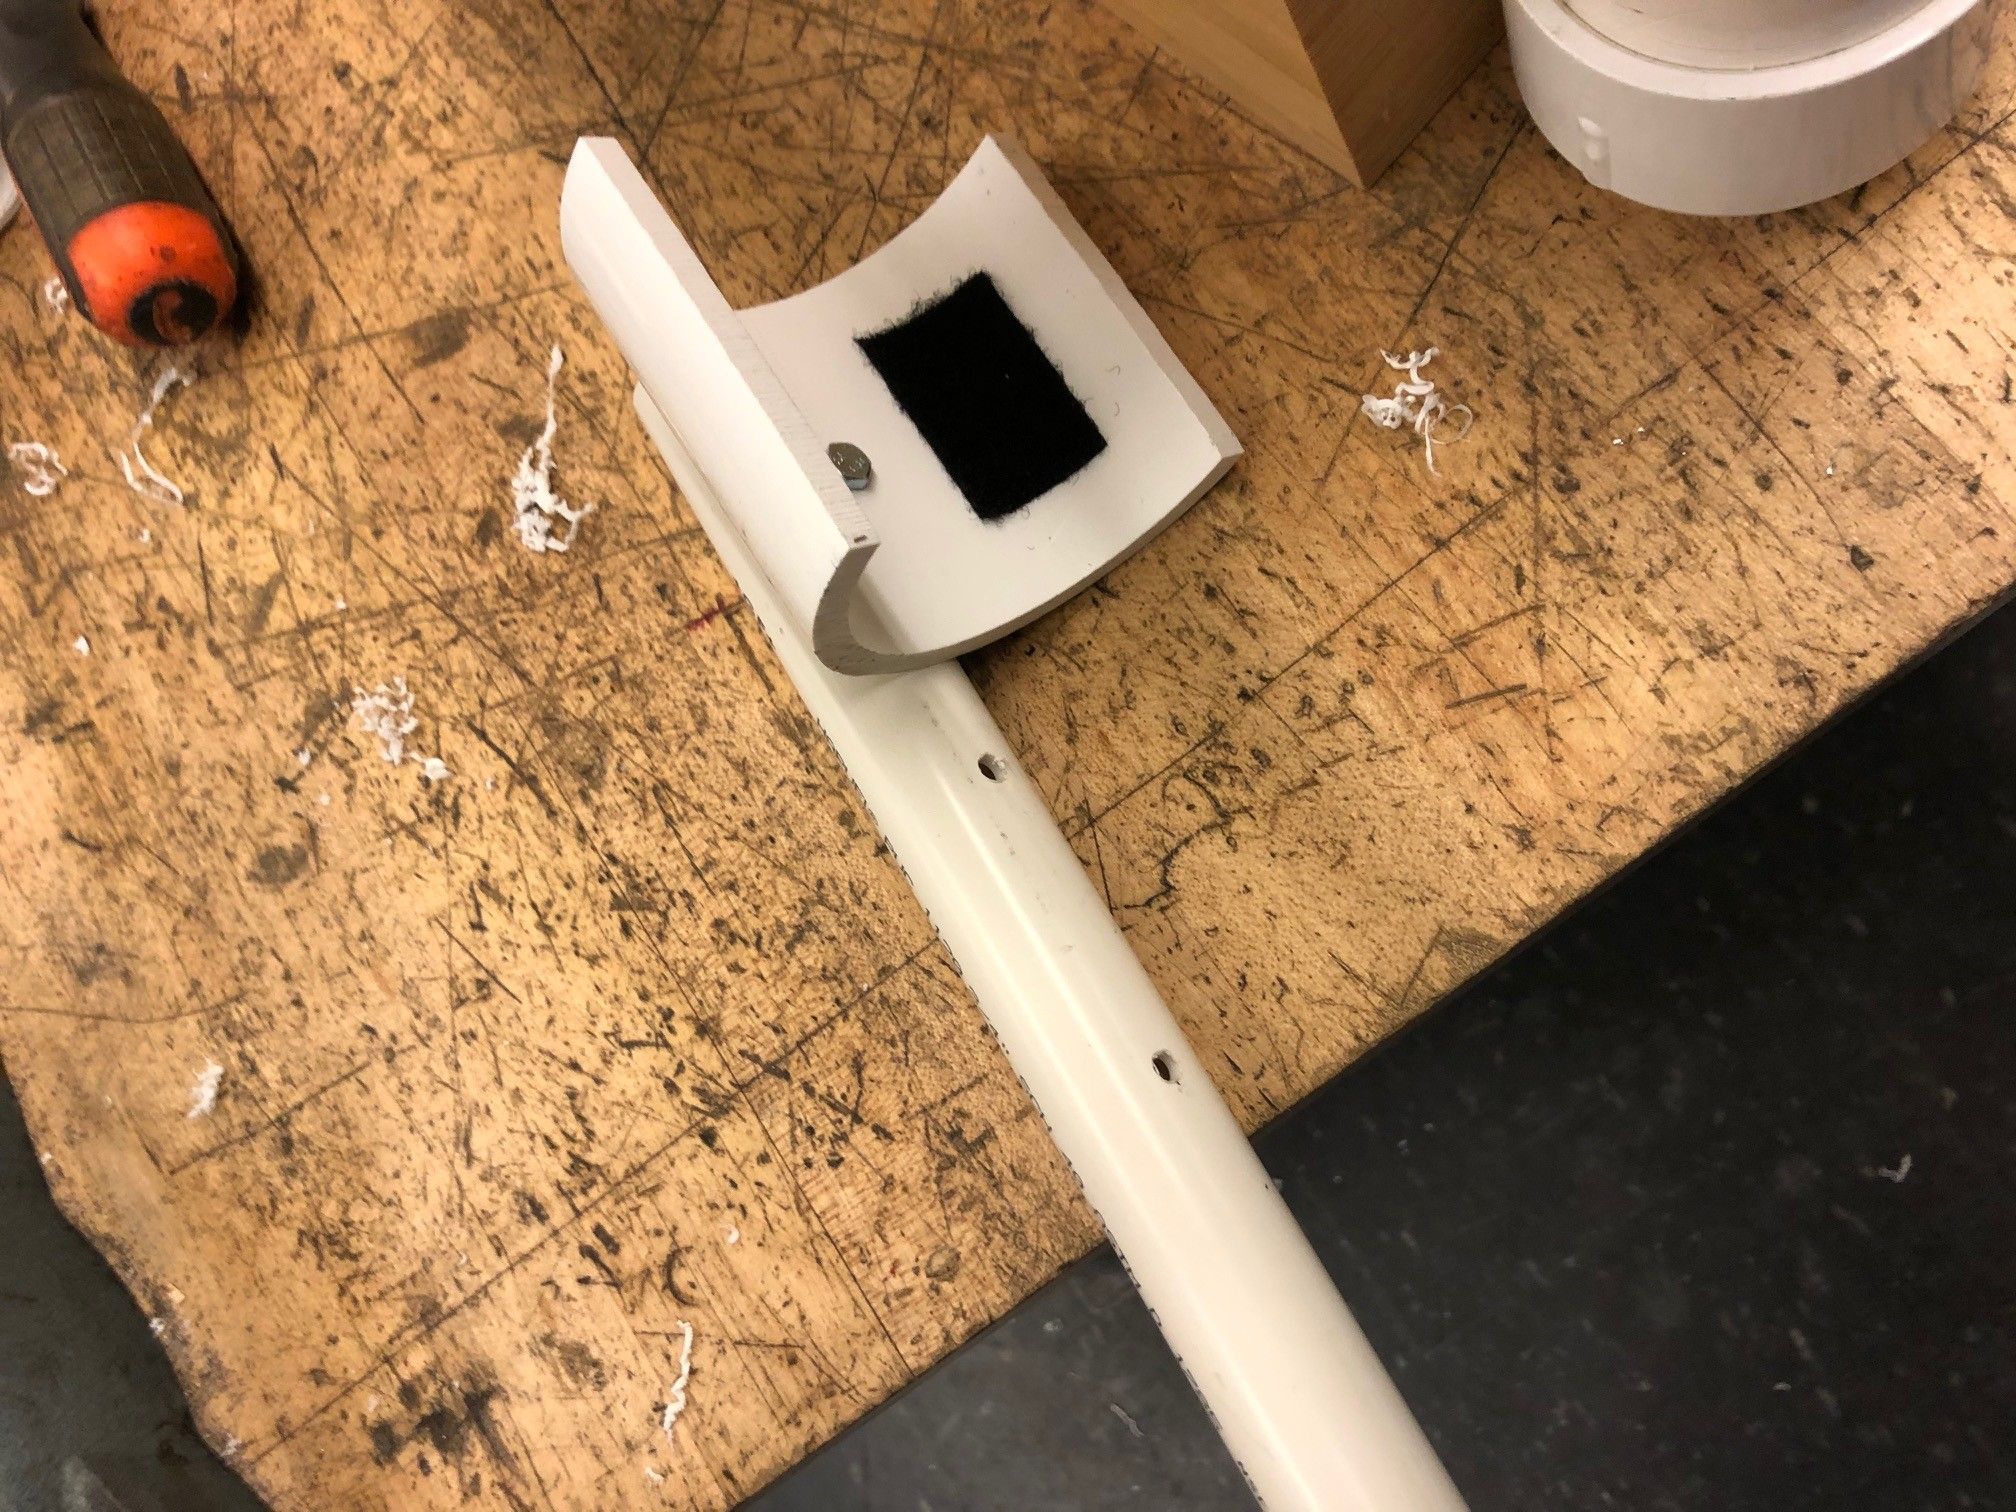
From these learnings, our team changed the shape of the socket to one with a greater surface area to minimize concentrated force on the limb, with holes to improve airflow, and with a wall on one to prevent the arm from easily slipping out of the socket. This design proved far superior than before the previous version.
Once we assembled versions of the prototype, we would run it through an extensive list of tests in order to make sure that the product met our lsited product specifications.
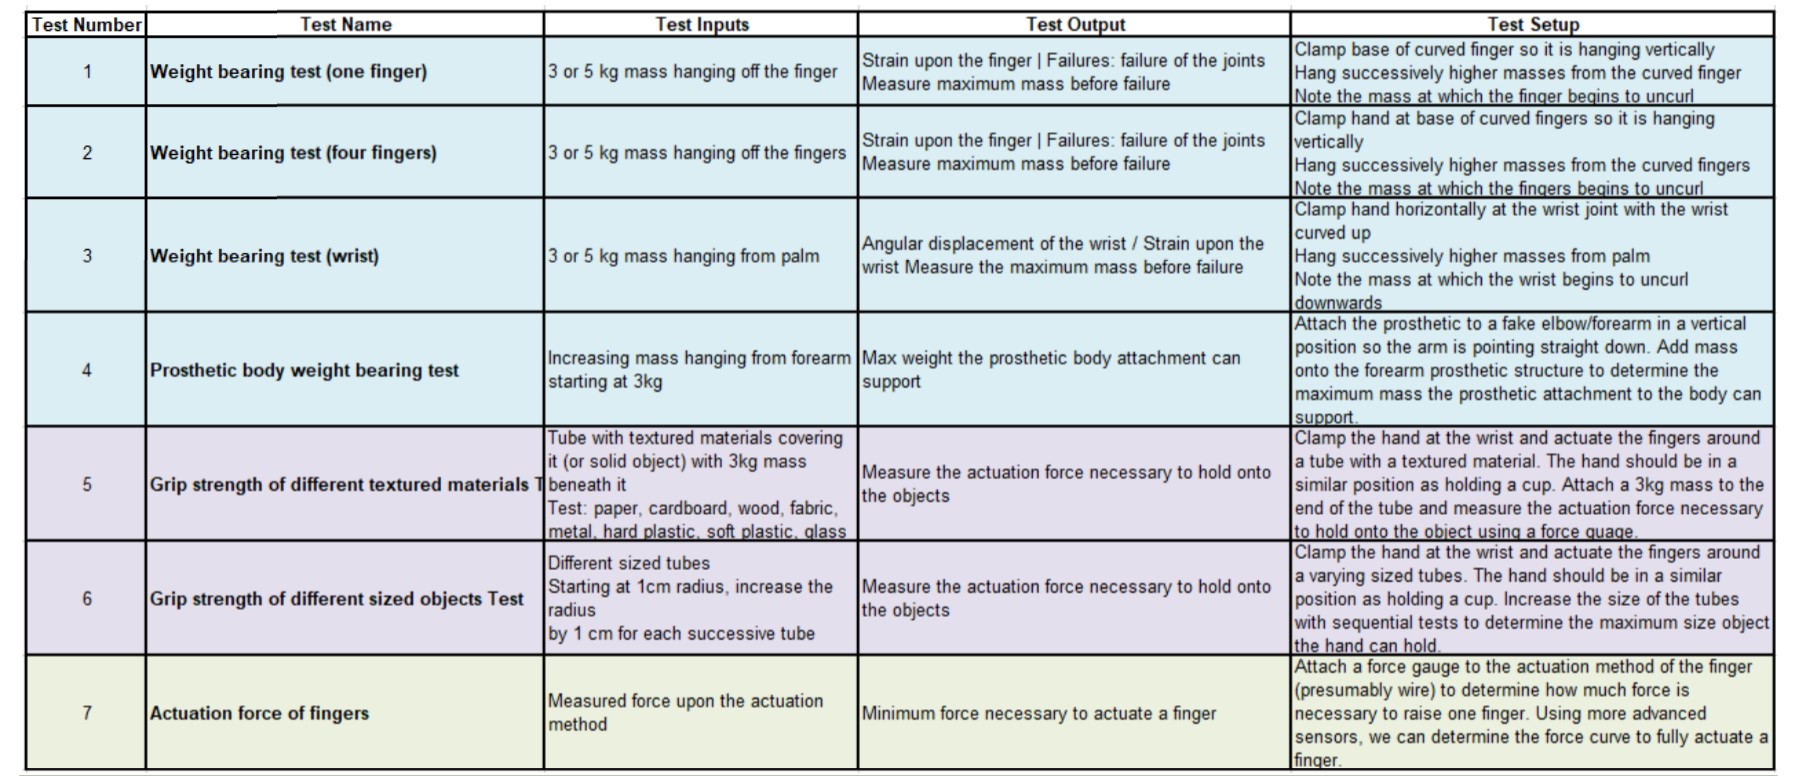
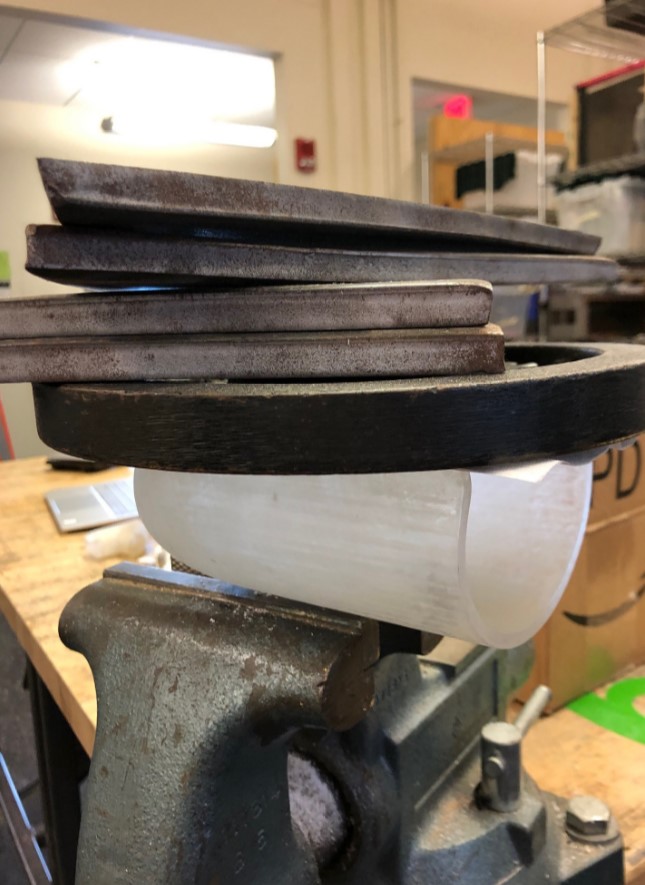
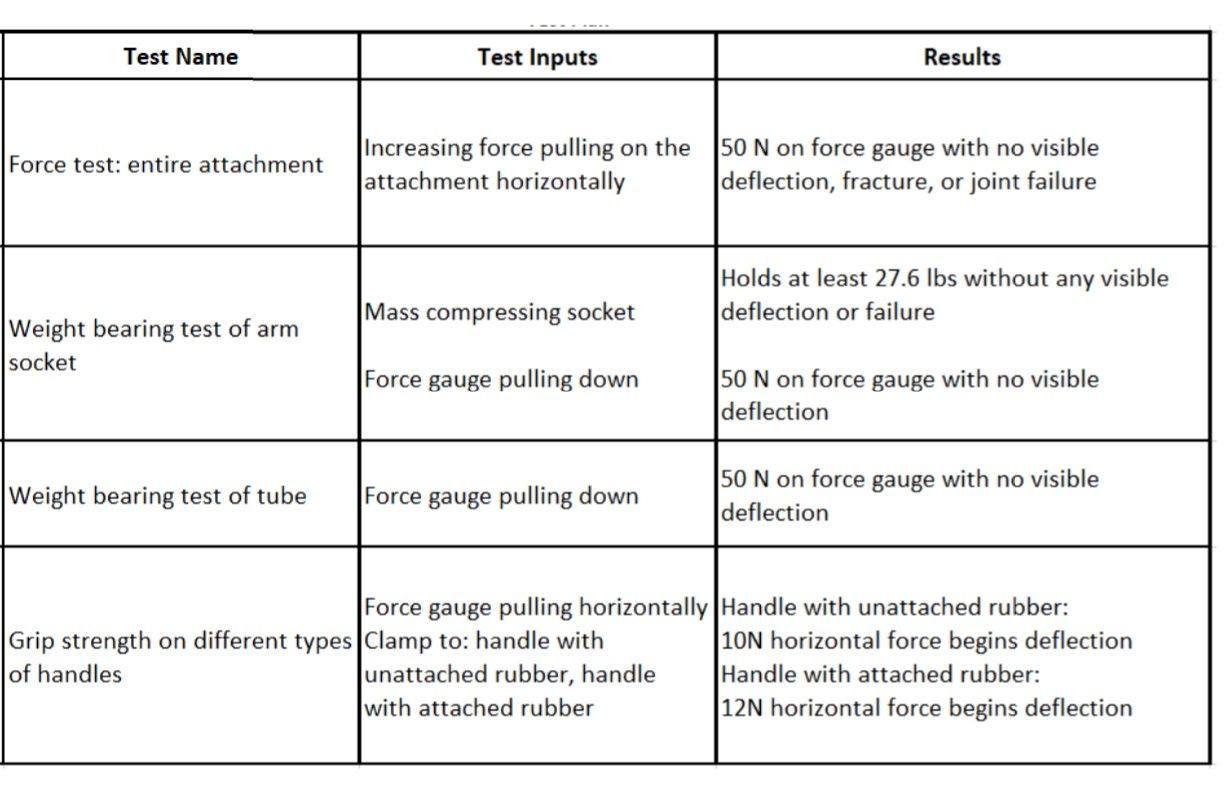
After conducting all the tests, we also created a table for the final results that were deemed most relevant for our prototype after discussing with Science Camp and our professors.
Besides the physical experiments we conducted ourselves, we also did FEA on the arm socket to assure it upheld its structural integrity when under weight. We ran this simulation with 200 N of downward force on the socket. We inspected displacement, strain, and stress.
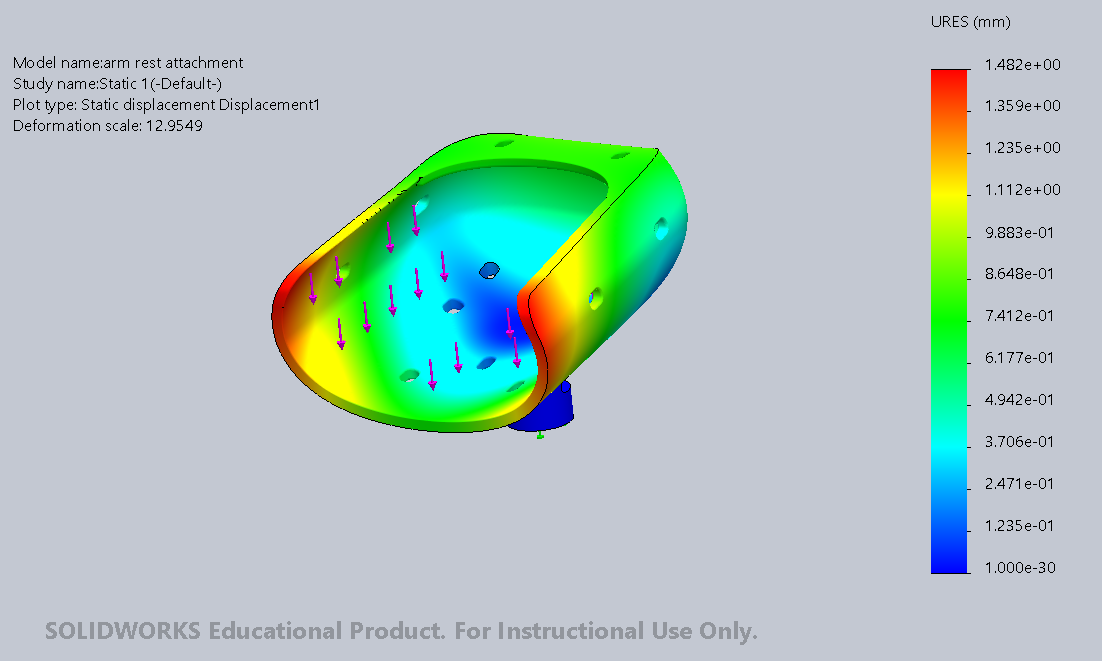
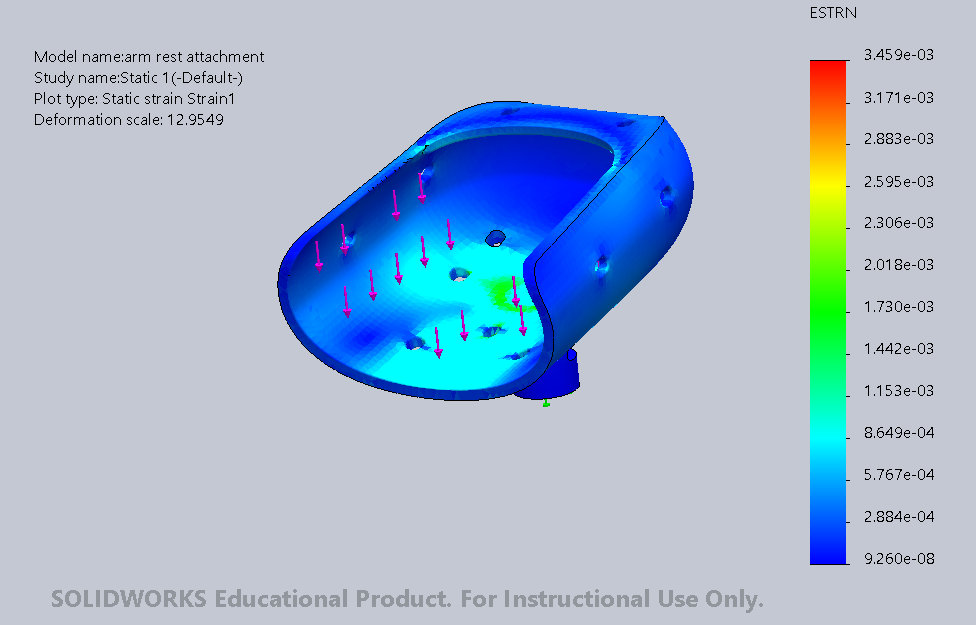
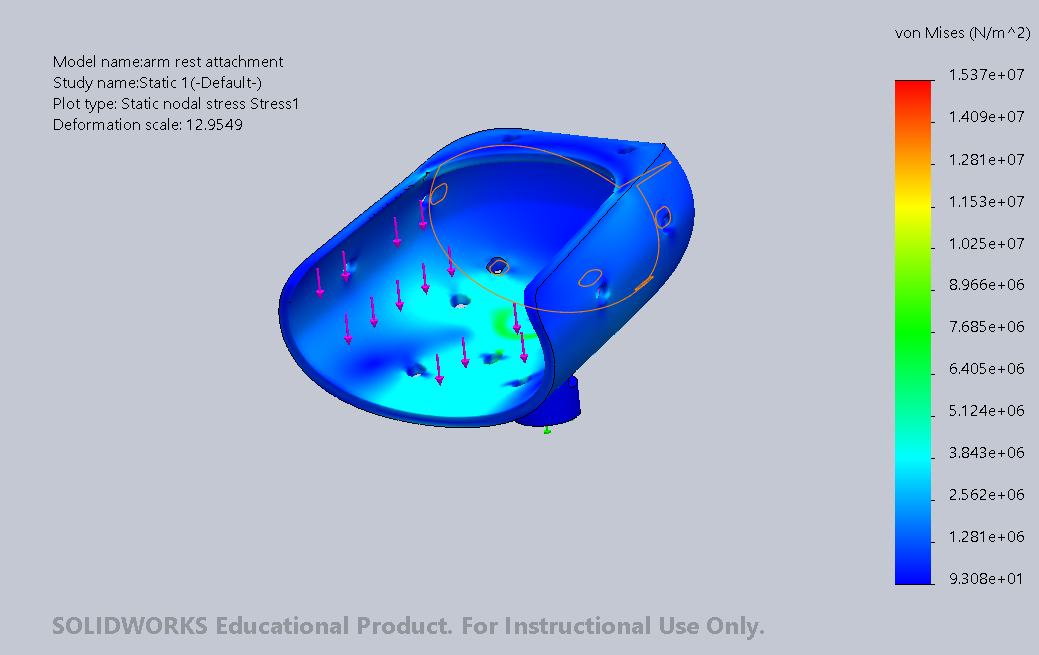
After many prototypes we completed the final version of our bicycle attachment prototype. This was a long journey where we went through many iterations of the prosthetic and even many iterations of what Science Camp asked of us to do.

Overall, this was an incredible, real-world problem my group and I got to tackle. We collaborated with international partners, we spoke with many potential users of this product, had design reviews, and we had to CAD, prototype, and manufacture the product. This was a very involved project that has bee one of my favorites so far.
return to projects page