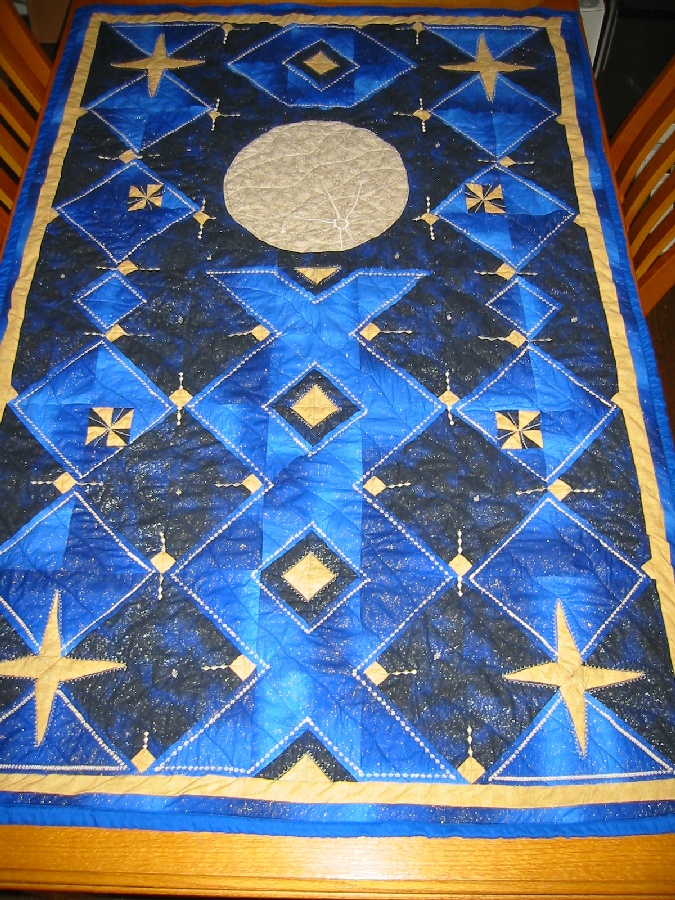
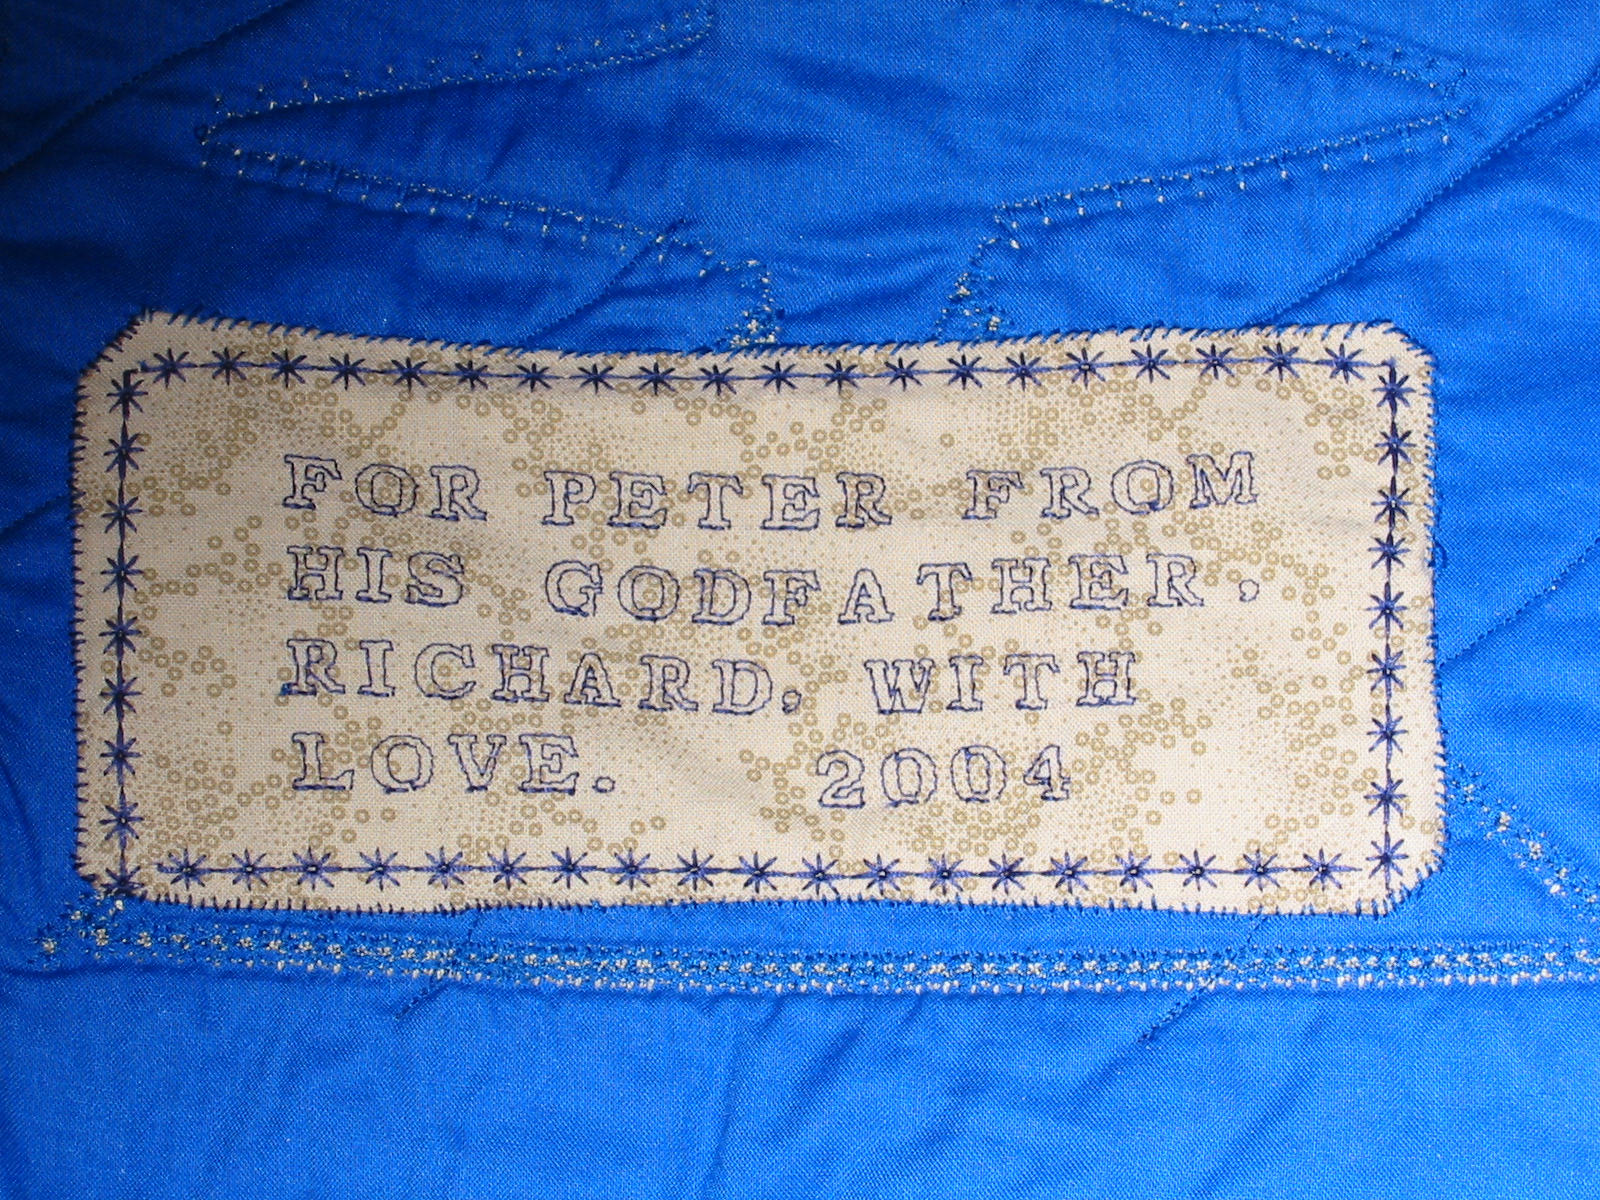
This is the baby quilt I made for my godson Peter, the first I have made entirely on my own, even designing the pattern myself. I completed the project in two weeks and then invited his mother over for tea to give them the surprise present on 26 August 2004. I hope they find it brings many years of cozy slumber.
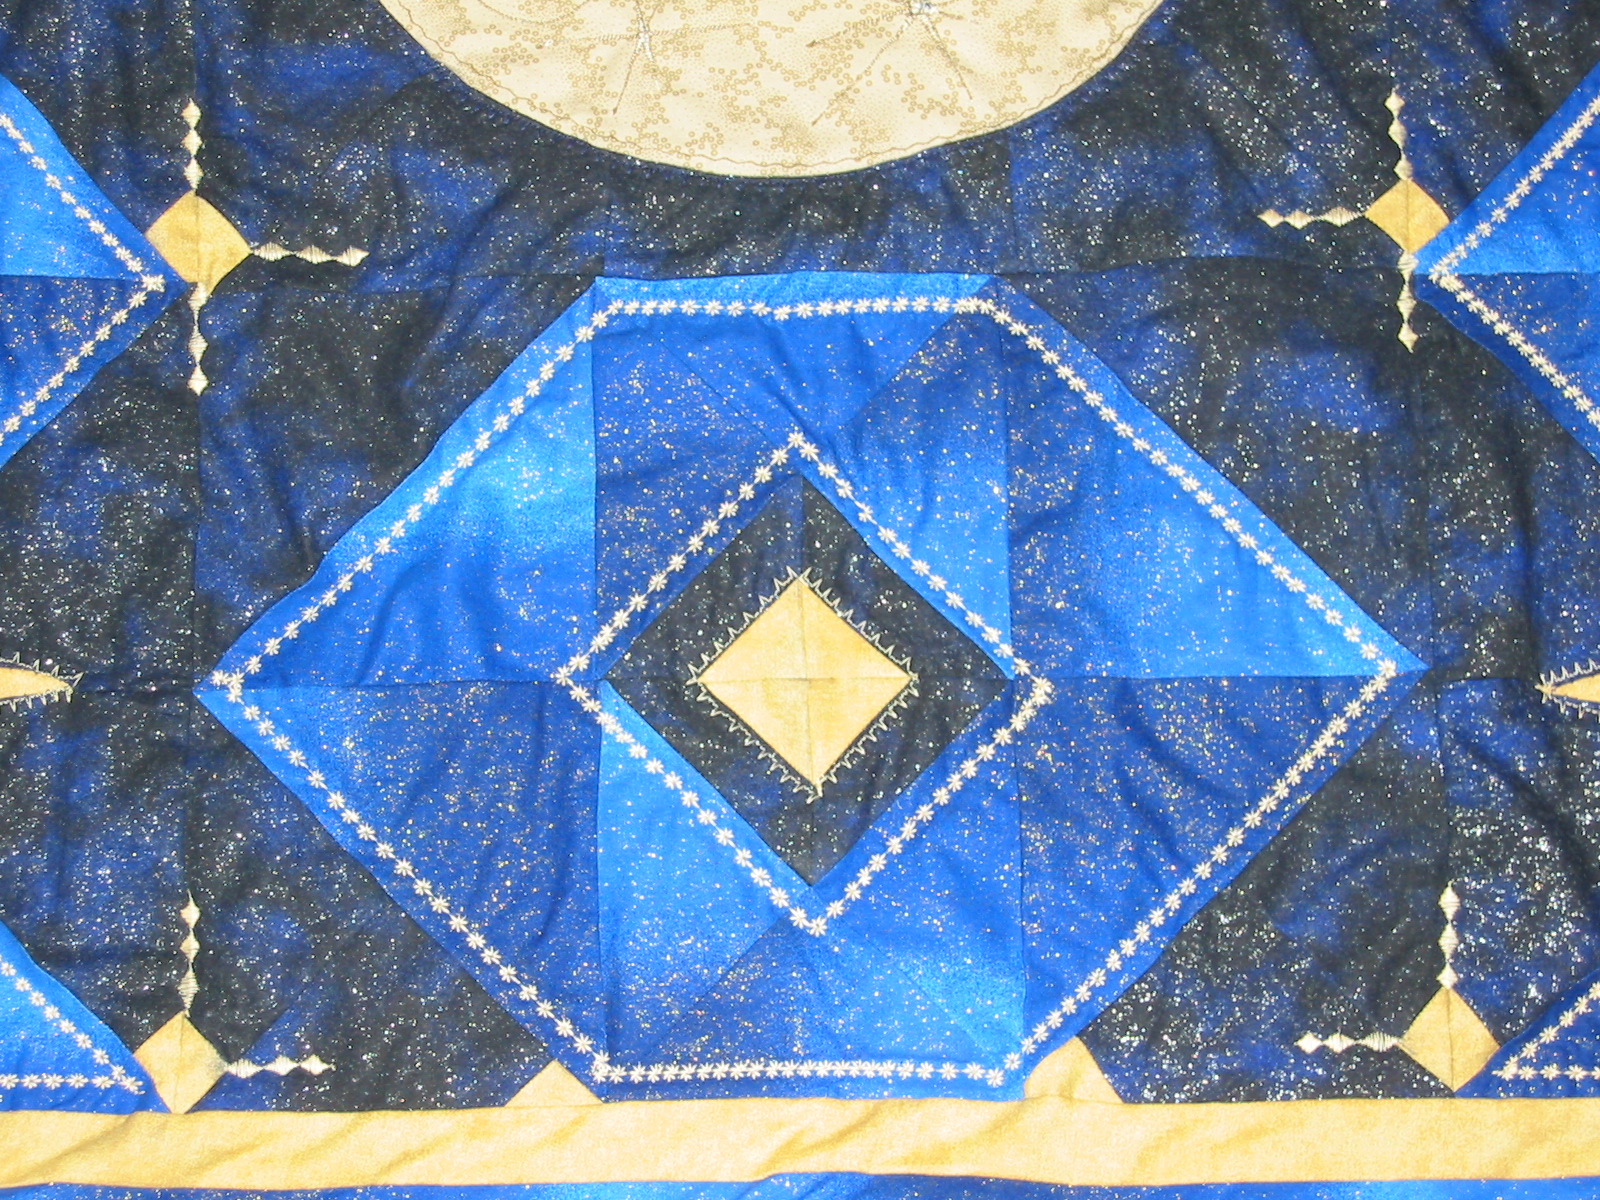
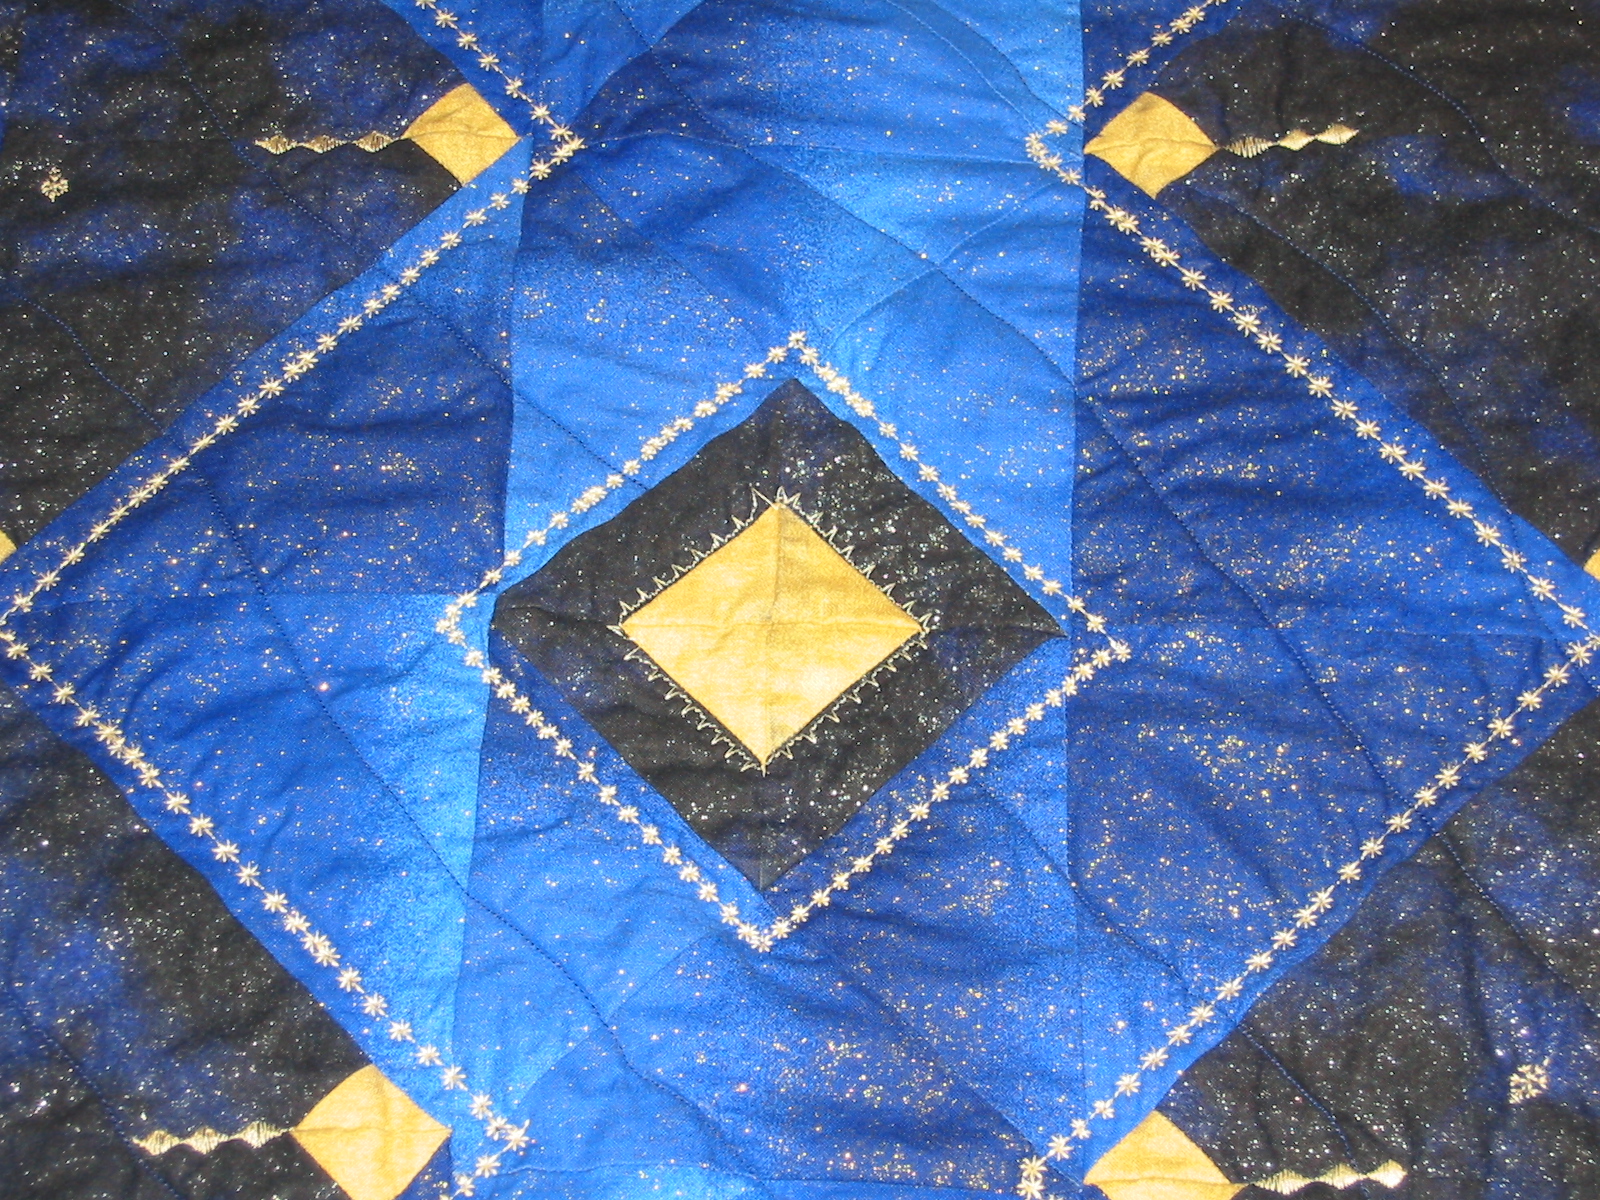
The descriptions here are mainly for my own benefit, to help me remember how I selected various options and developed the techniques used in this quilt, but also for anyone interested in making something similar. Feel free to browse the entire collection of photos. Nota bene: the camera flash often makes the fabric look brighter than reality due to the sparkly nature of the material. I tried in some shots to mitigate this effect, with mixed results.
Quilting is not generally a hobby taken up by men, so I thought a little history might give some perspective as to why I began this project. I have known how to sew, both by hand and by machine, for many years. Sewing is a useful and easy skill to acquire, showing its value in the mundanity of repairing a button or in the fantasy of transforming a building into a giant robot (not that I would know anything about such things). Early on I learned that a sewing machine is one of the coolest and most intricate power tools a man can wield. Through the influence of my wife, I also acquired some skill with related crafts, including needlepoint, which may rightly be regarded as a fine art.
I have a number of female friends who work on quilting projects regularly. I have been impressed with what I have seen them create. Quilting is essentially painting with cloth as the medium, and the results can be wonderfully artistic. The resulting product is warm and comforting and can last a lifetime. If only more art were both so practical and beautiful.
Quilting, however, is a recent hobby for me. I began by working on quilts with our service fraternity (Alpha Phi Omega) for Project Linus, a charity that donates blankets to severely ill children. Our chapter of APO has made a few simple patchwork quilts for the organization, including this one which I worked on with many other brothers. I brought my sewing machine to the chapter's office and donated its use for quilting and other projects for much of the past year.
When asked to be Peter's godfather by his parents, one of the first questions that came to mind was, "What could I offer this cute little guy?" A godfather's role, I think, is to provide for the spiritual and to some extent the physical and emotional needs of a child. I wanted to offer a gift for his baptism that would express caring, comfort, and creativity. Thinking this might also be a good opportunity to try a more serious quilting project, I began to think about making a simple baby quilt on my own.
Of course, "not just your basic, average, everyday, ordinary, run-of-the-mill" baby quilt would do. I wanted something that was not entirely effeminate. No pastel floral squares! No girlish pink hearts! No cutesy teddy bears! Such kitsch has its place, certainly, but I wanted to work on something a bit nicer, something that Peter could appreciate at all ages. I wanted a baby quilt that could grow along with him, becoming a lap quilt that could be enjoyed even when grown up.
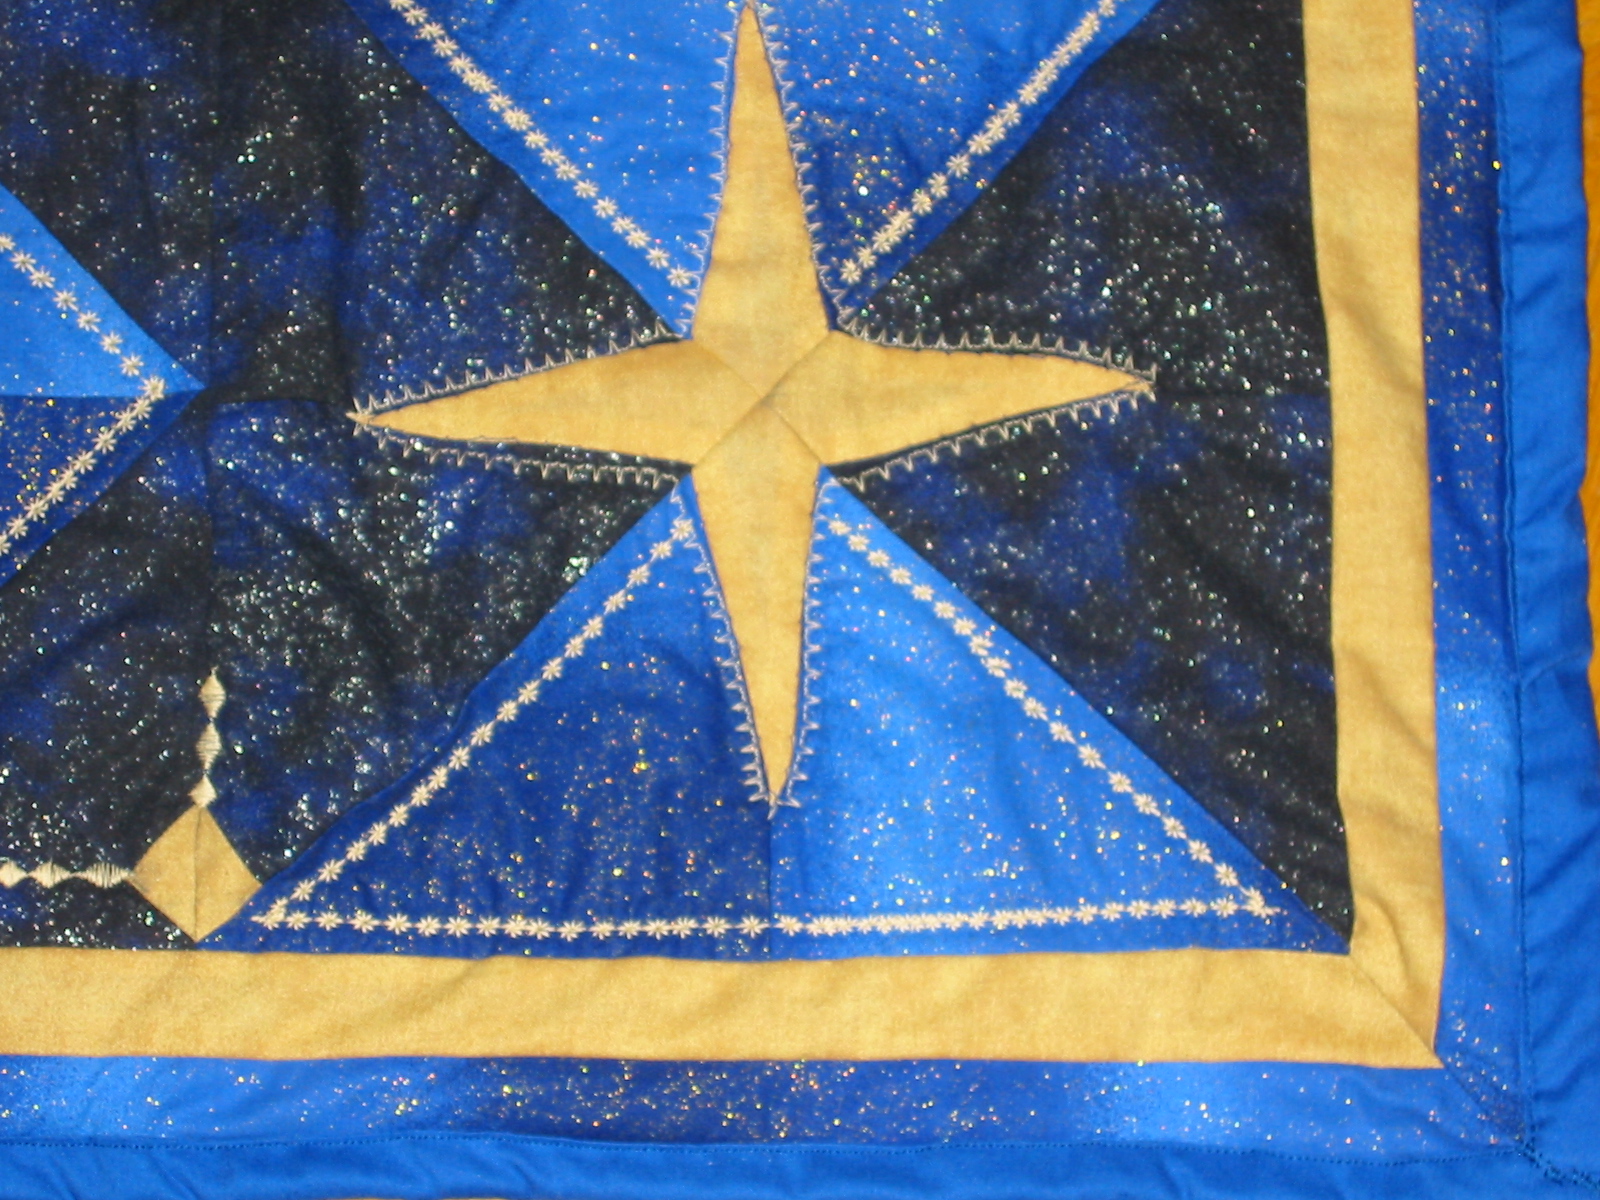
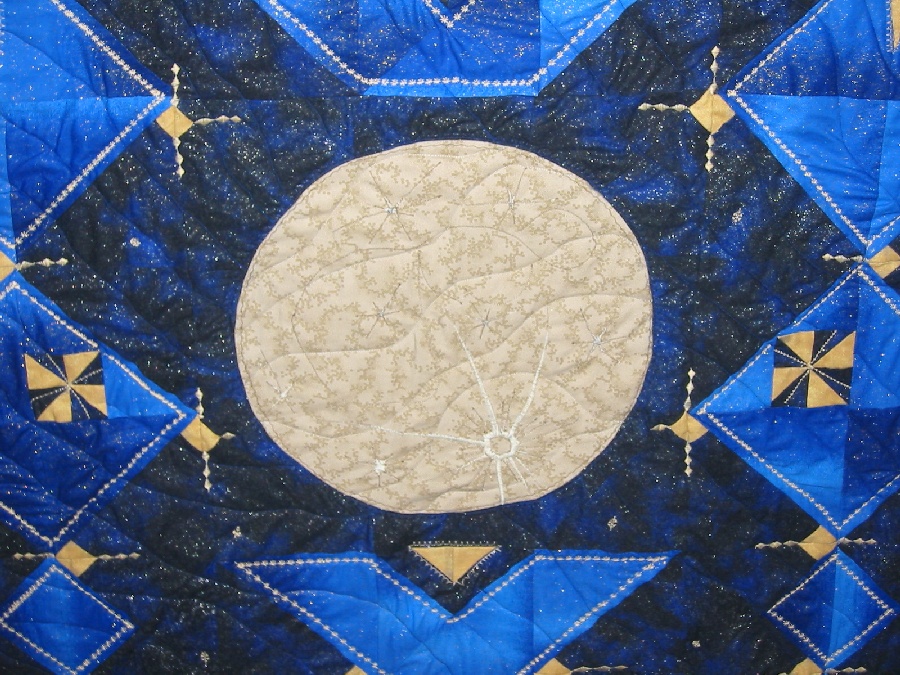
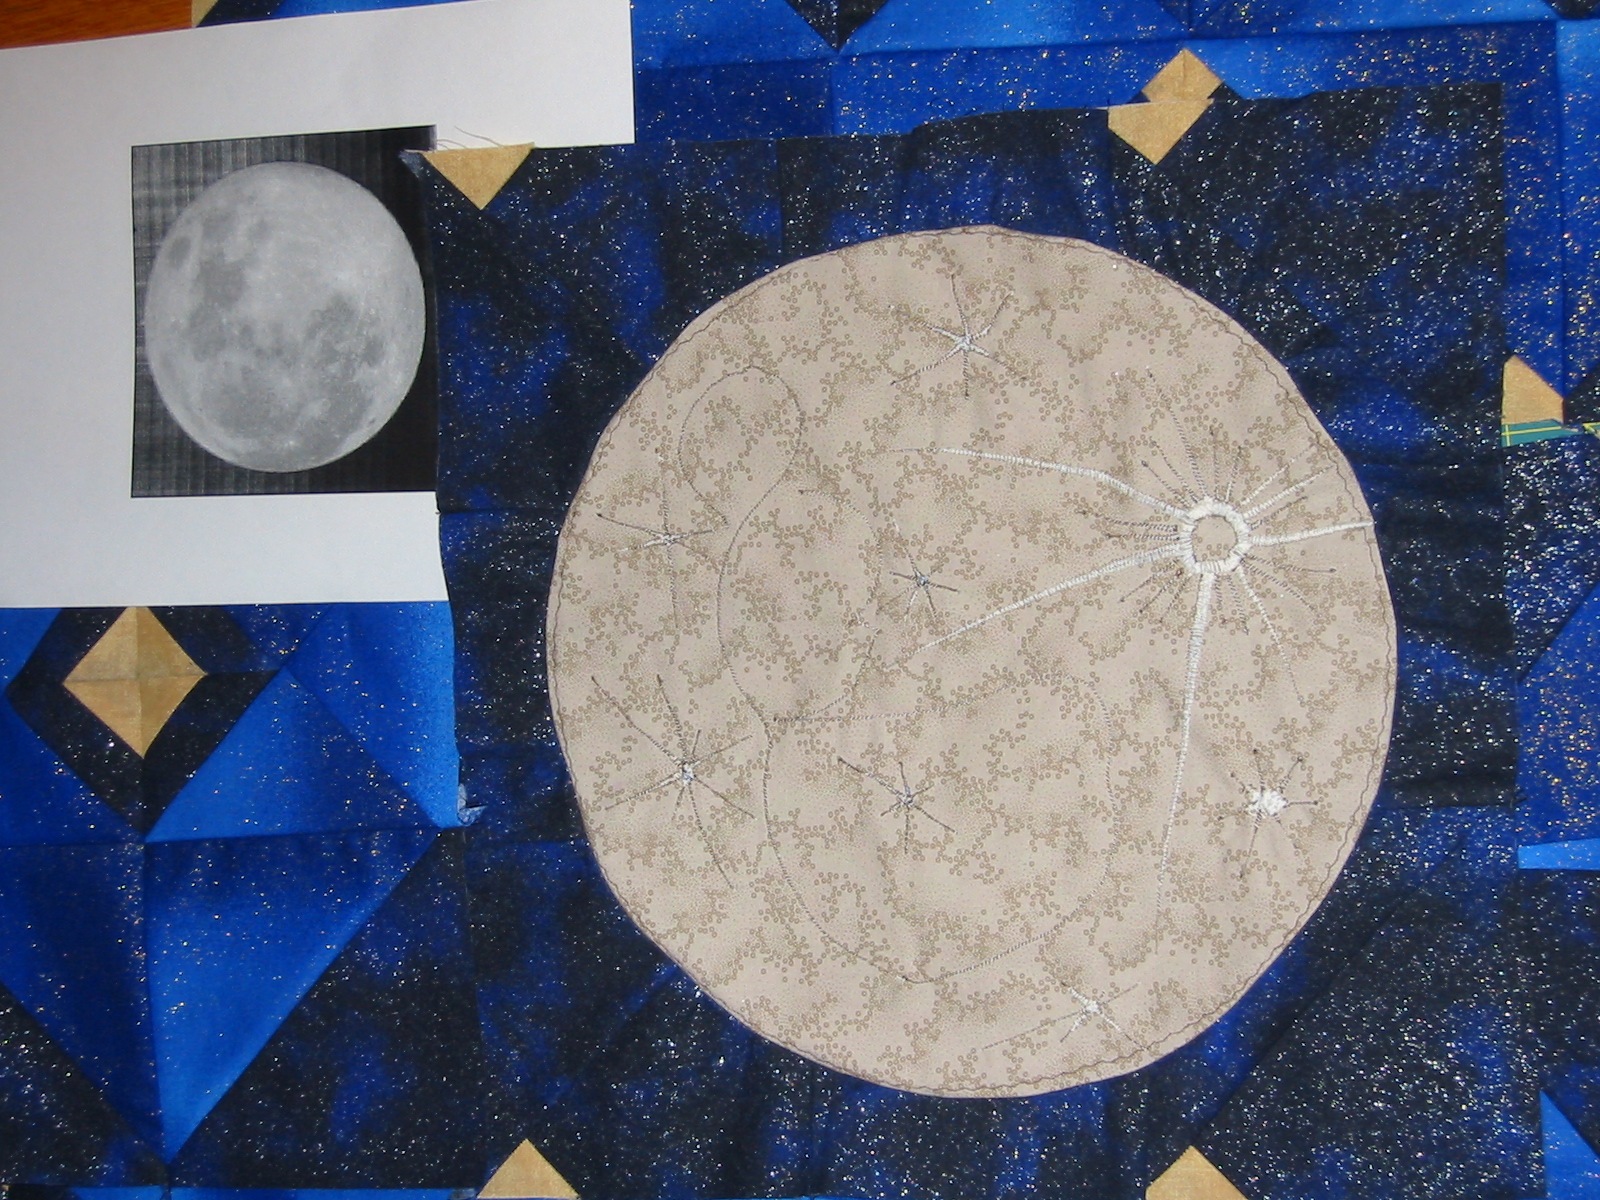
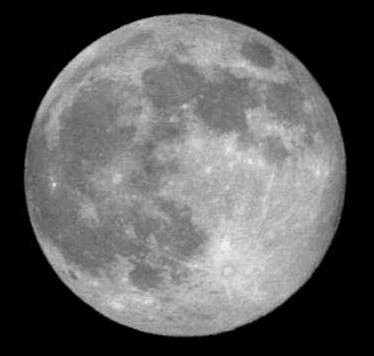
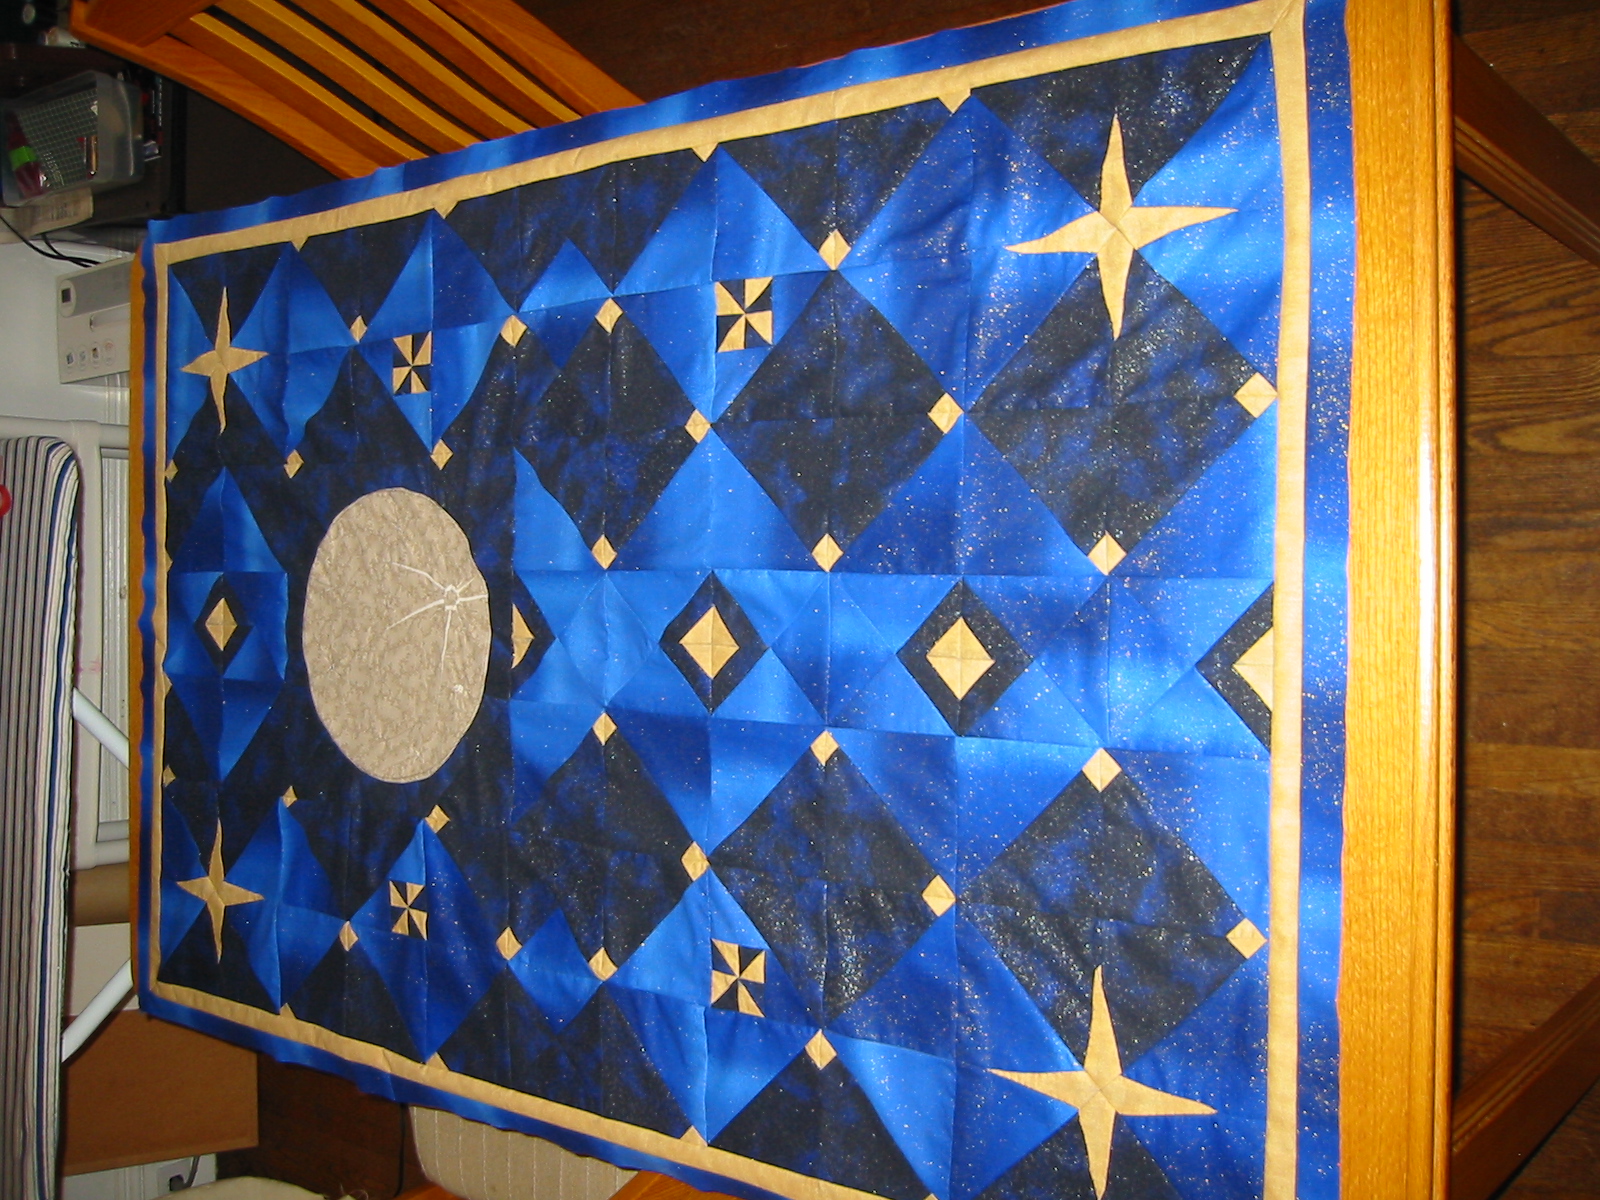
The inspiration for this quilt was the classic children's book, Goodnight Moon by Margaret Wise Brown. Peter has the board book, and I remember reading the enchanting story long ago. I thought the twinkling stars could help entice Peter to nap and the dark blue sky could present a good atmosphere for lulling him to sleep. Why anyone would make a bright, shining, or nearly fluorescent blanket for a baby and expect the child to be able to sleep well is beyond me. For something symbolic of bedtime, a crib quilt should have such qualities as an overall dark tone and sleepy theme.I also wanted a quilt that his parents might appreciate. As this was a baptism present, the use of cruciform stars provides fitting imagery for their faith. Peter's mom, Terri, grew up in Albuquerque, whose view of the heavens far surpasses that of cloudy Boston. I wanted to give a feel of that environment since Peter might have few opportunities to view the beauty of the night sky here. Nick, Peter's dad, is a major Star Wars fan. That said, any resemblance of this moon to the Death Star is purely coincidental; we need not give little Peter nightmares so soon. Unfortunately, the lunar phase was new when I began stitching the quilt, so I could not view that cosmic face directly. Still, I strove with artistic license to make the full moon be clearly recognizable, if not scientifically accurate; Tycho, Copernicus, and other major craters and maria may be compared with the full moon. I considered filling the quilt with constellations, but I thought that astronomy lesson could be better taught outdoors.
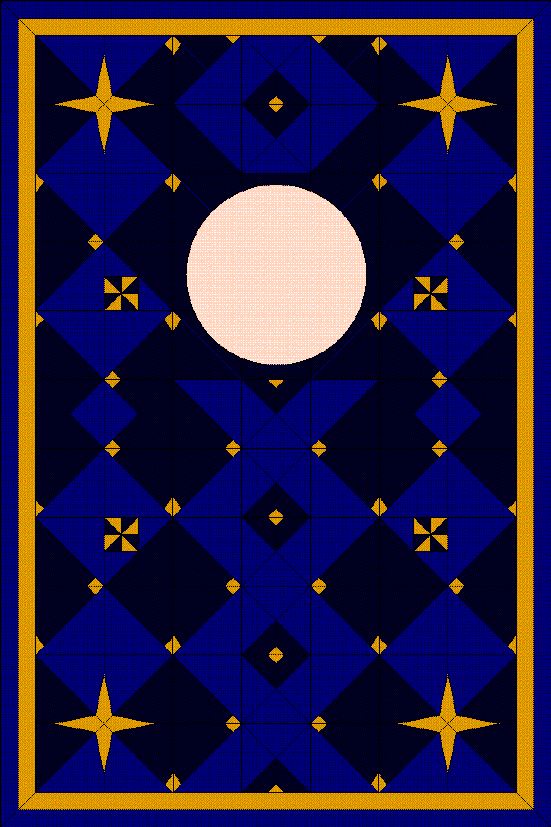
I also wanted a design that would really challenge me to develop a greater repertoire of quilting skills. A simplistic grid design would just be too easy. Instead, I decided to go with a more dynamic arrangement, basing nearly the entire design on triangles, as seen in this final sketch. While the ordering is similar to a 7 by 11 grid and many of the patches were assembled as squares, some non-traditional techniques had to be invented to deal with the special cases. These are described below for those interested in producing similar quilts.
While the basic design only took a day to figure out, I wanted to try some fancier stitches as well for the quilting. I thought for a long time about some of the machine stitches on my Singer, as well as various cross-stitch, needlepoint, and embroidery techniques, and settled on some ideas. But when I discovered that Terri had a computerized Brother that could automatically produce many decorative stitches, I asked to borrow her machine. Despite this, she claims not to have suspected my plotting on the quilt. The Brother also allowed me to devise a nice signature in far less time than needlepoint would have required. There was still plenty of hand-stitching to be done.
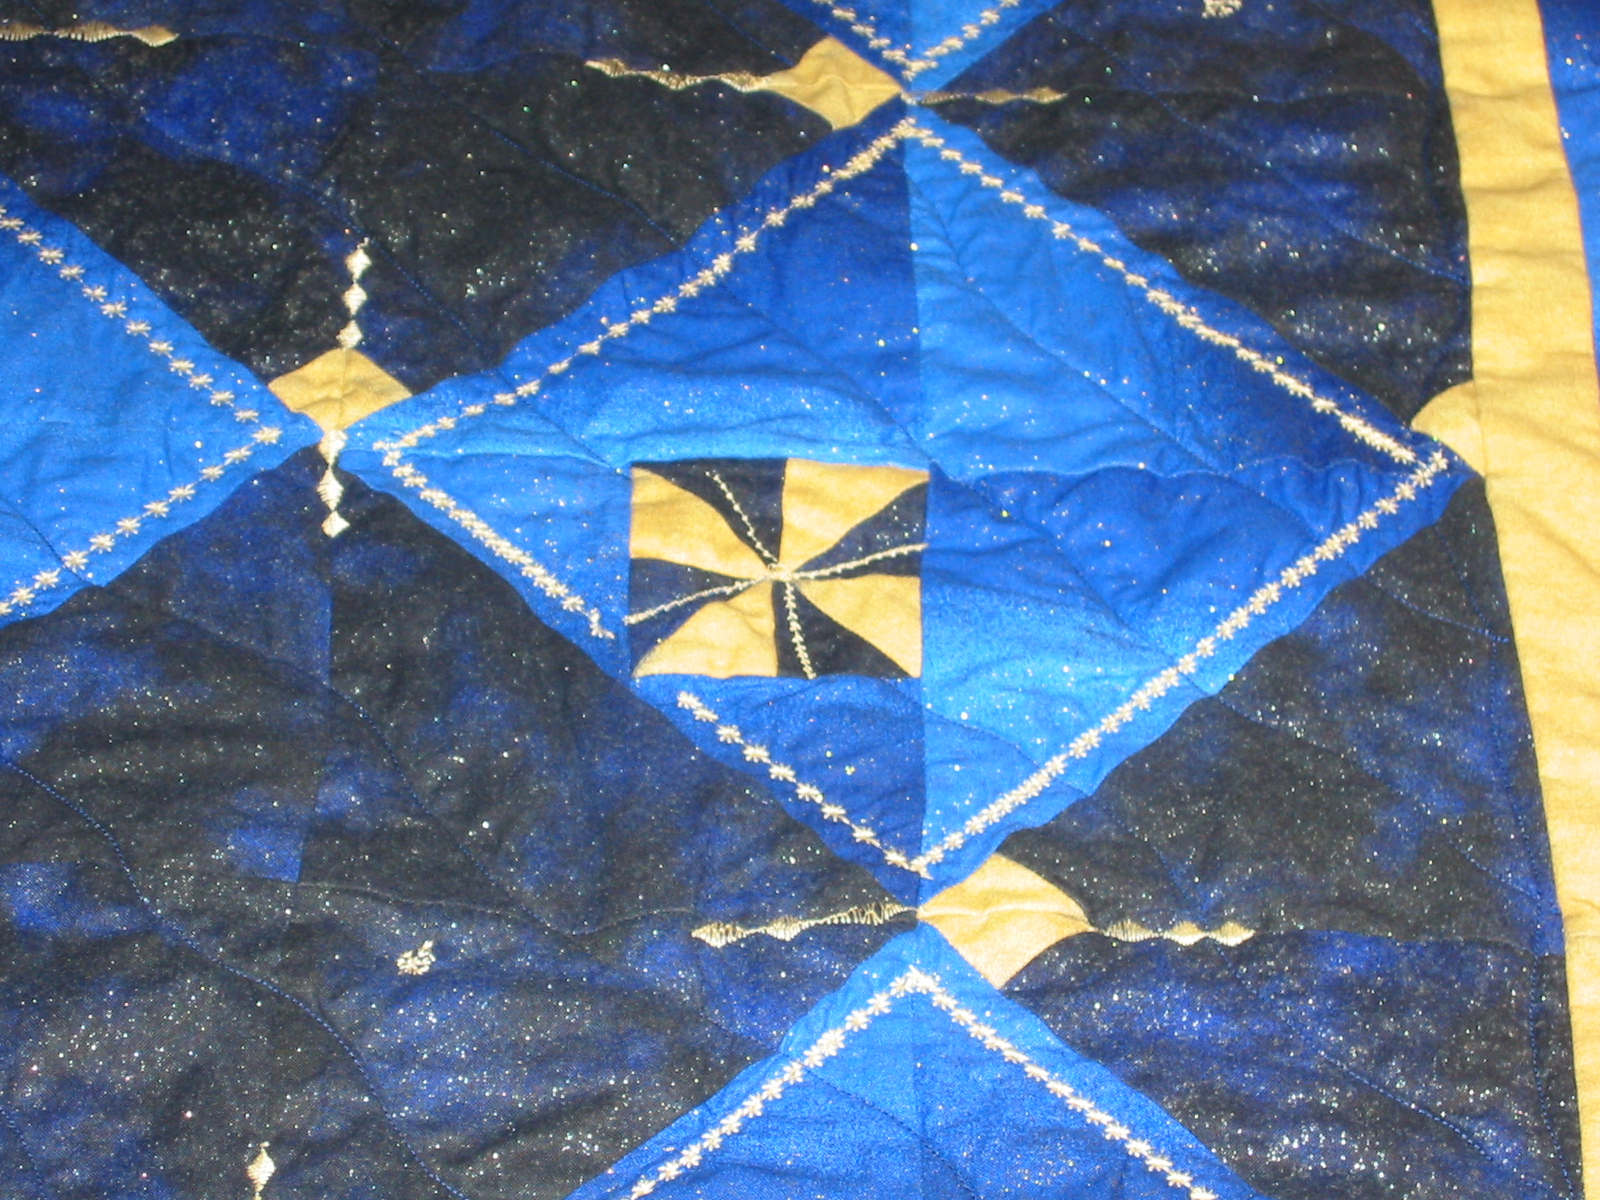
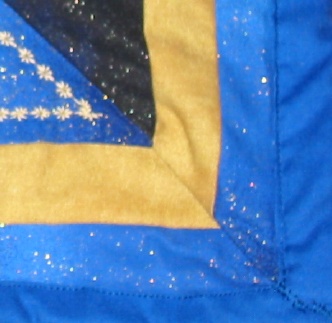
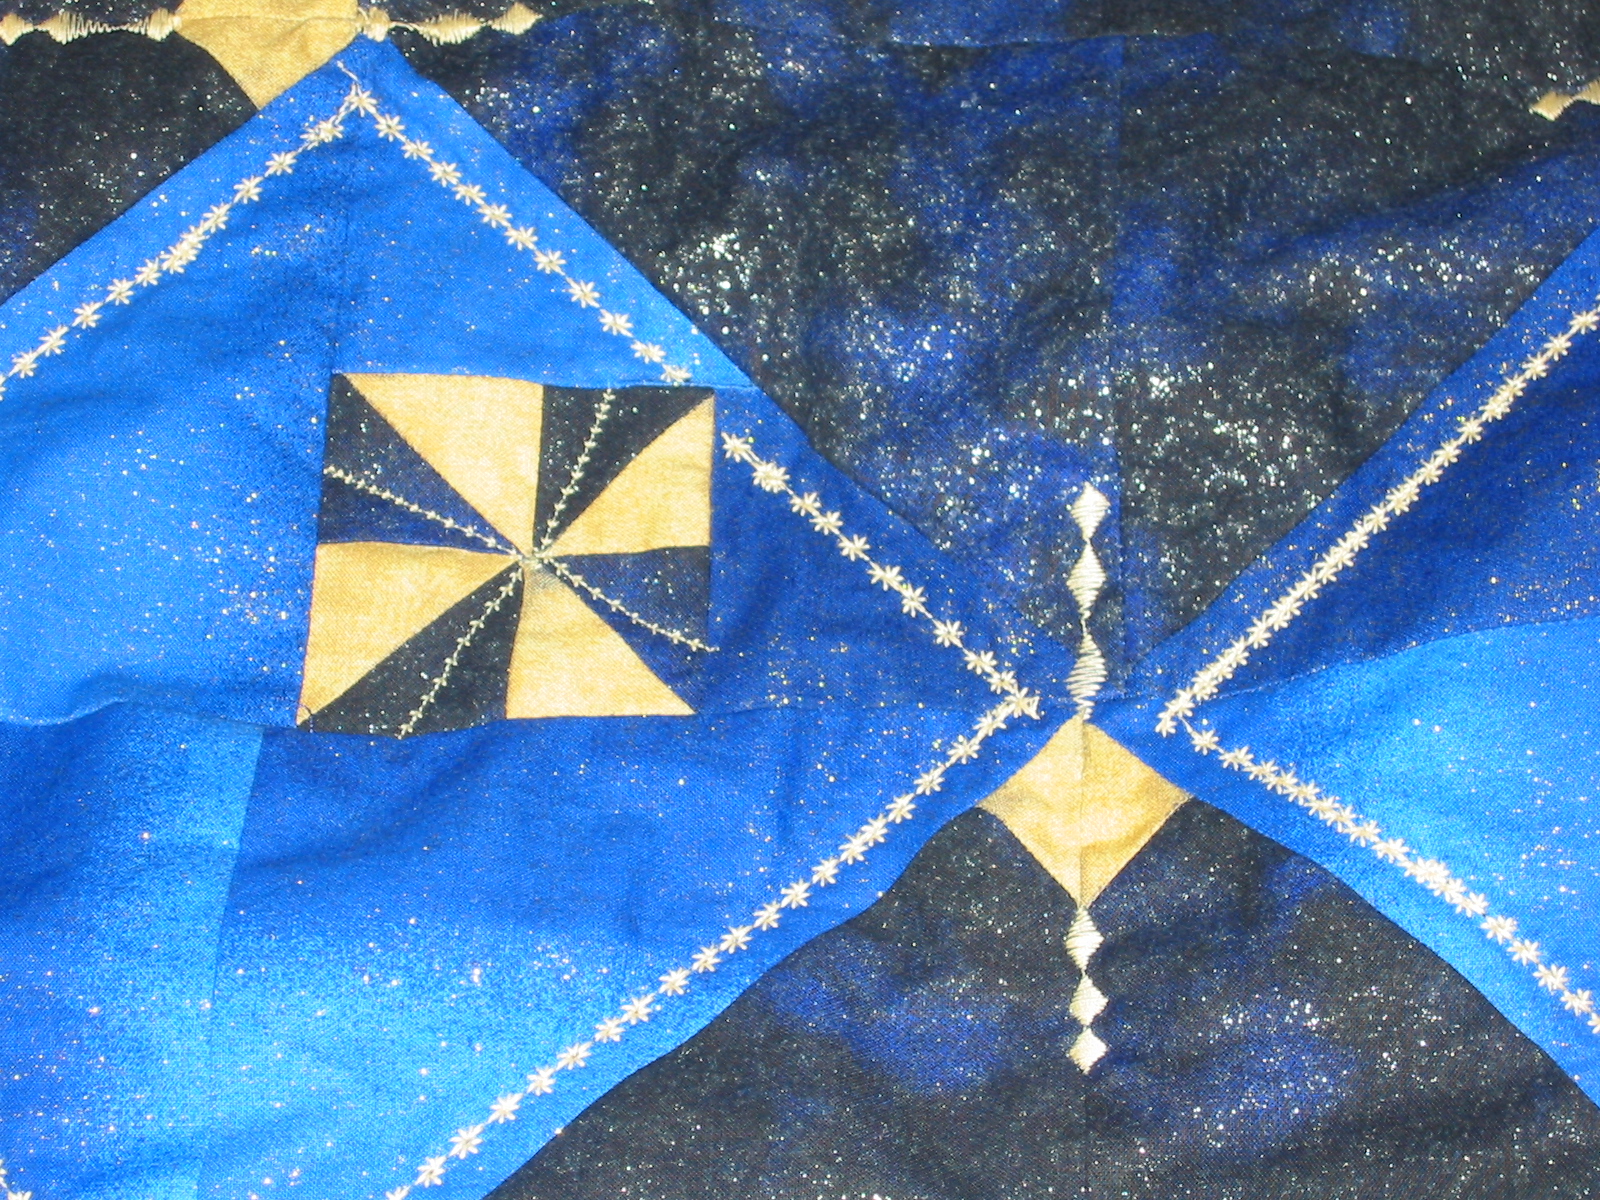
Although the overall design is symmetric, I purposefully varied some elements of the quilting to provide more interest. The wavy quilting lines of the sky fluctuate irregularly to give an airy feel, but the average spacing remains constant. The quilting lines of the moon are arranged on the opposite diagonal as those of the sky, and curve around the craters. In addition, a number of decorative stitches were used to outline design elements and emphasize their flow. Finally, twelve miniature starbursts were scattered among the larger dark voids of the sky. This style of symmetrical irregularity makes for a more interesting scene than one that would be rigidly aligned.
Creating a quilt, even a small one using good tools, is a large endeavor. This quilt essentially took two solid weeks of work from drafting the design to finishing the binding. (I actually began the project on August 6 and finished the night of August 24, but several intervening days were spent on baptism preparations, painting a friend's room, cat sitting, various service and social events, and other daily activities.) A quilter with more time and experience might find such a project to move more quickly.
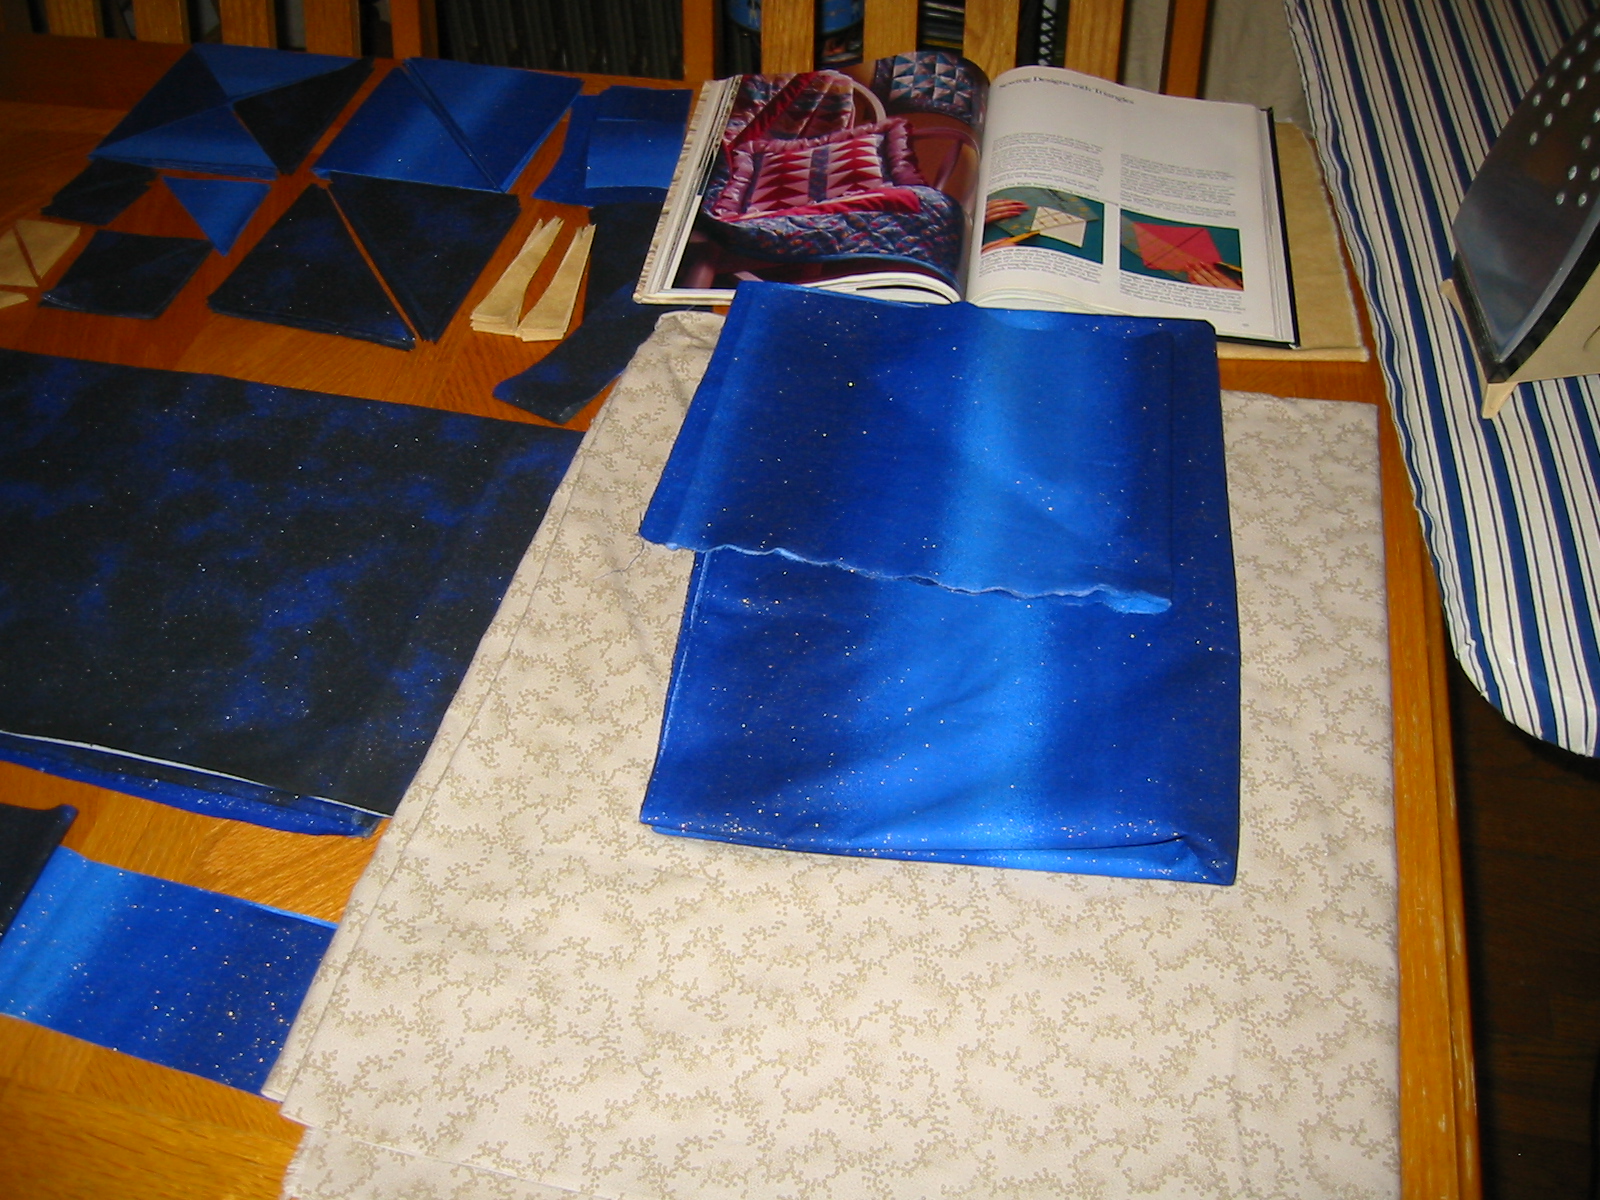
The basic plan for making a quilt is relatively simple. A typical quilt consists of three layers: the decorative top, the insulating batting, and the relatively plain bottom. For a baby quilt, the two outer fabric layers should be made from 100% cotton, preferably with a fine weave. I chose a thin polyester batting so that the quilt would be versatile for all seasons, rather than a much thicker and heavier layer appropriate only for winter. All the fabric should be washed in warm water, tested for color-fastness, and ironed before any work proceeds. Much of the work involves cutting up and reassembling fabric pieces to form the top. Once the top has been fully pieced together, the two fabric layers sandwich the batting; the layers are quilted to hold them together and trap air to improve the insulating property of the blanket; finally, the edges are sealed to finish the job.
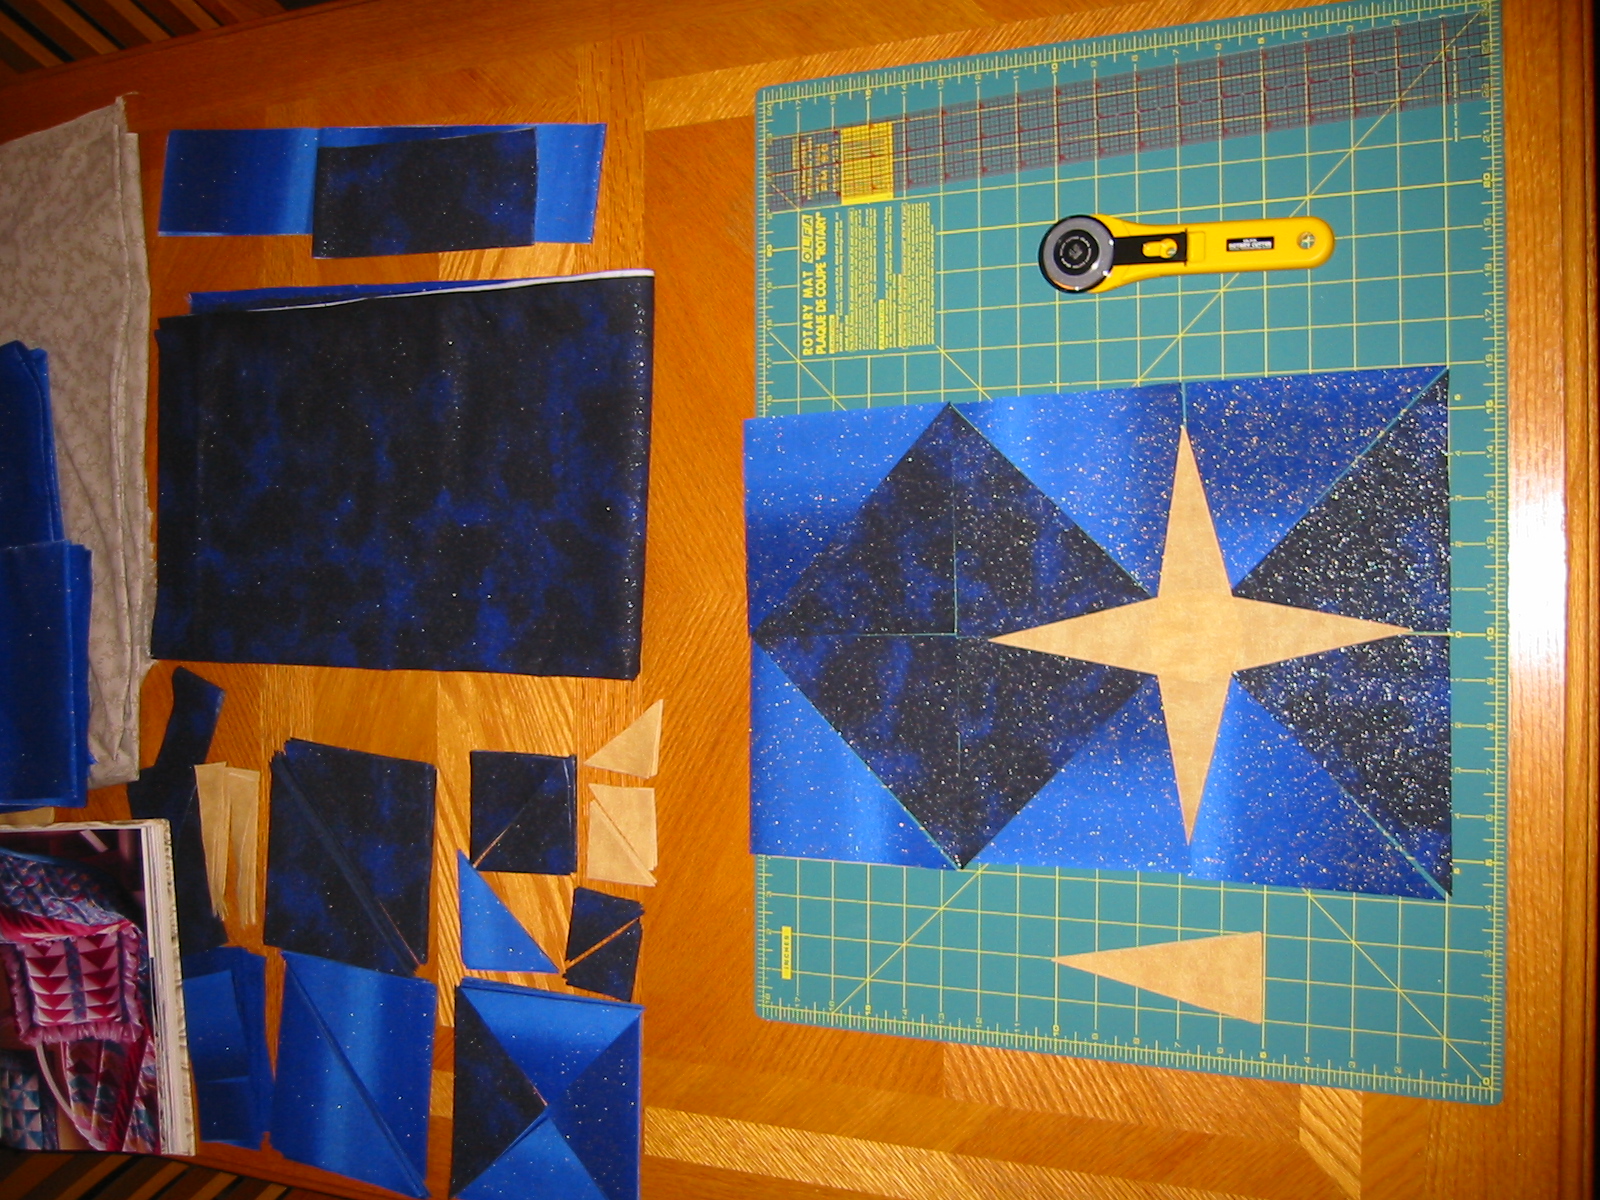
Several tools improve efficiency. Instead of cutting fabric with scissors, I invested in a transparent ruler, a rotary cutter, and an 18"x24" cutting mat, which allow for the rapid and precise cutting of multiple layers of fabric at once. When your project requires cutting out a total of 284 precisely dimensioned right isosceles triangles, the difference is greatly appreciated. Tools tend to be more expensive than the actual materials purchased for the quilt, so the casual crafter might not want to make the investment. Novices should at least check out a beginner's quilting book from their library; I found the Singer's Quilting by Machine helpful.
In terms of yardage, I estimate that the following was sufficient for this quilt top: 2yd dark blue (sky), 1.5yd light blue (sky), 0.5yd dark yellow (stars), 0.5yd light yellow (moon). In addition, 2yd light blue was needed for the backing, about 2 spools each of matching dark yellow and dark blue thread were needed for sewing, and one 45"x60" sheet of polyester batting was required. I actually purchased somewhat more than this, due to limits on bolt sizes at the fabric store, and had plenty of extra. All the fabric and tools were purchased from Winmil Fabrics, near Downtown Crossing in Boston, but any decent shop should have the required supplies.
Most quilters would use templates to cut out the pieces for the top. I decided not to bother with templates, instead simply performing the required mathematical calculations and measurements as I went along. People less adept at geometry will want to take the time to prepare templates.
Pieces must have the proper alignment with the fabric bias or the piece could stretch in unfortunate ways. For right isosceles triangles, the majority of pieces in this quilt, the bias could either be on the hypotenuse or on the other two sides, depending on which was to be aligned with the main axes of the quilt. For half-square triangles, a square is cut out 7/8" larger than the finished side, and then cut in half along one diagonal to produce two triangles. For quarter-square triangles, a square is cut out 1 1/4" larger than the finished hypotenuse, and then cut along both diagonals to produce four triangles. The extra measurement allows for a 1/4" seam allowance for sewing the pieces together. Proof of this is let as an exercise to the reader (hint, use the Pythagorean Theorem a couple times).
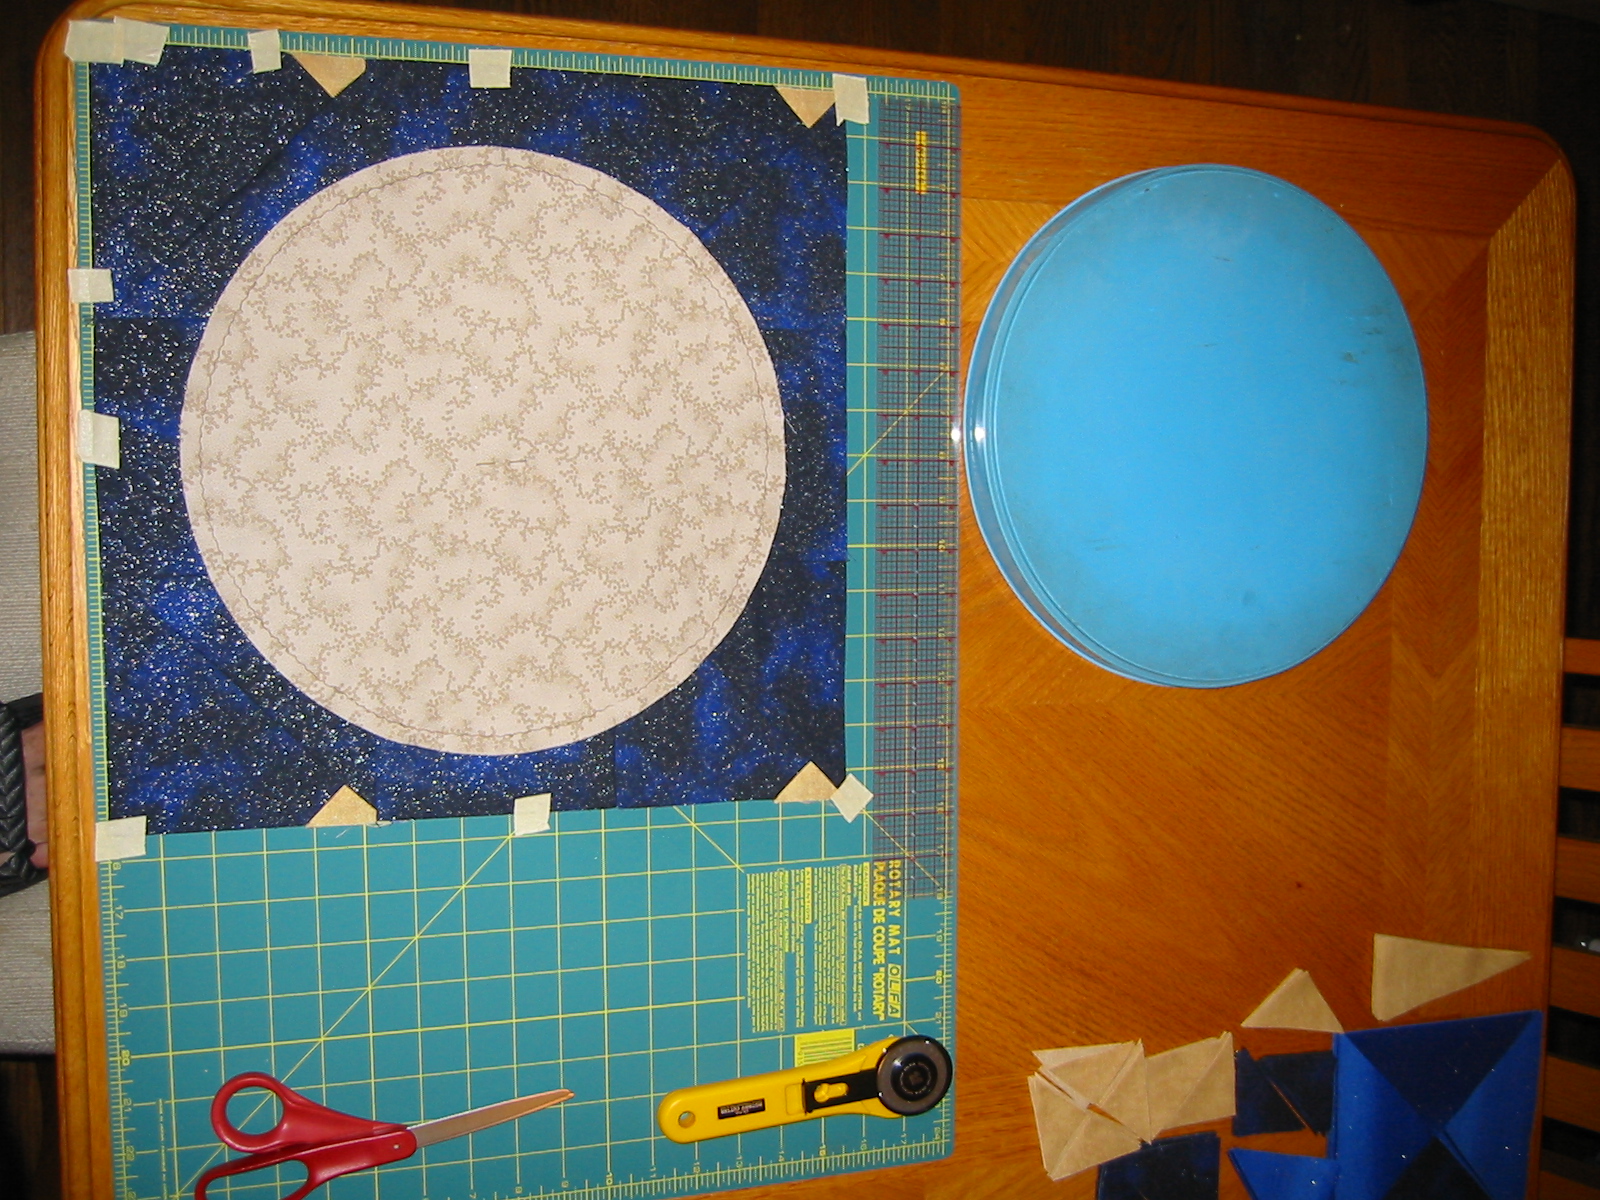
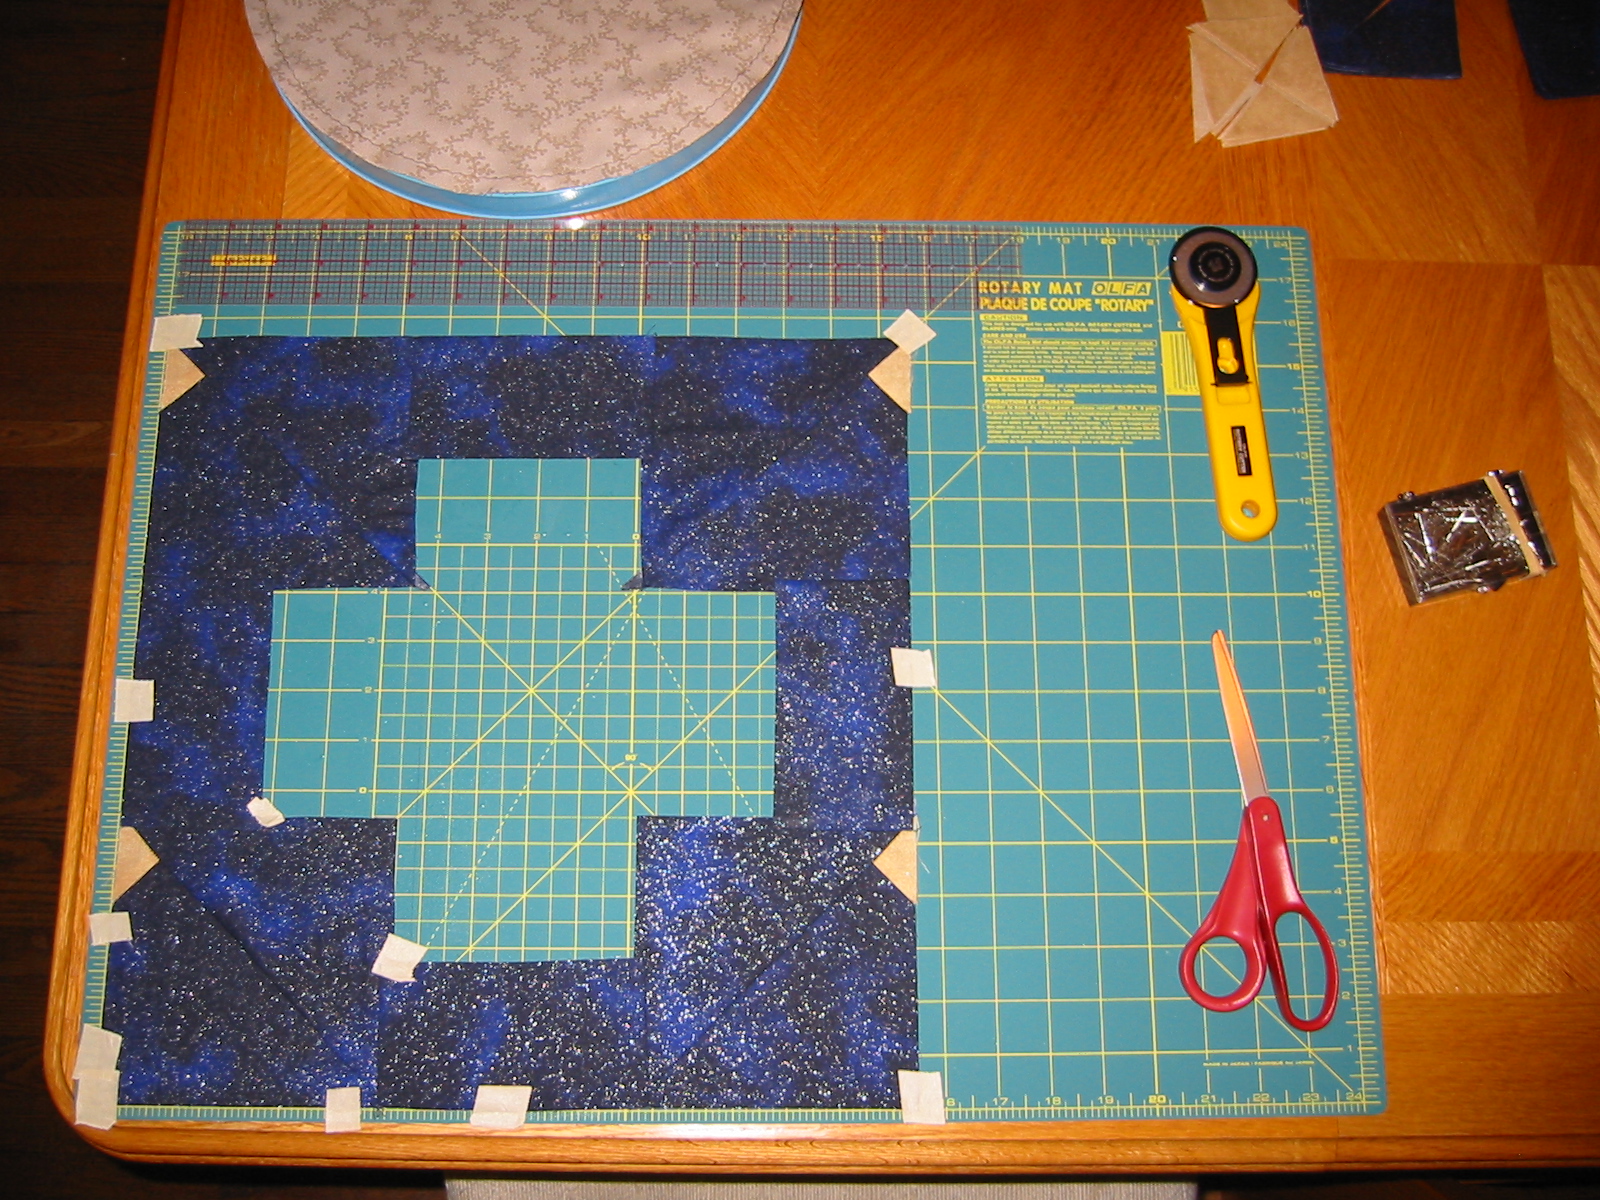
Other pieces may be calculated similarly. Border strips are simple rectangles, pieced together to form a long line along each edge of the quilt top. If producing mitered corners, ensure that there is enough length to extend past the unbordered edges. Acute isoceles triangles were used for the corner stars. The key measurements for these were the width of the base and the height, which were more flexible than for other triangles. Half-square rectangles are used for the cardinal points of the moon's background. Full squares could have been used here, and the moon appliqued, but I wanted to sew the moon fully instead to practice construction with curves. The moon itself was a double layer of fabric cut in 12" circles; two layers were used to add bulk and ensure that the dark background would not show through the light-colored material. A large cookie tin lid was used as a template for slicing the arc with a circular cutter. Inverting the stepped lid yielded a slightly smaller circle for removing the excess fabric from the sky background.
| Quantity | Size | Color | Shape | Placement | Key Dimension | Finished Length | Cutting Measurement | Cutting Style |
|---|---|---|---|---|---|---|---|---|
| 62 | large | dark blue | right isoceles triangles | sky | side | 5" | + 7/8" | half-cut square |
| 52 | large | light blue | right isoceles triangles | sky | side | 5" | + 7/8" | half-cut square |
| 16 | medium | dark blue | right isoceles triangles | 3 x 4 middle row, 2 x 2 top row | hypotenuse | 5" | + 1 1/4" | quarter-cut square |
| 28 | medium | light blue | right isoceles triangles | 3 x 8 center column, 4 middle row | hypotenuse | 5" | + 1 1/4" | quarter-cut square |
| 16 | small | dark blue | right isoceles triangles | 2 x 8 center column | side | 2 1/2" | + 7/8" | half-cut square |
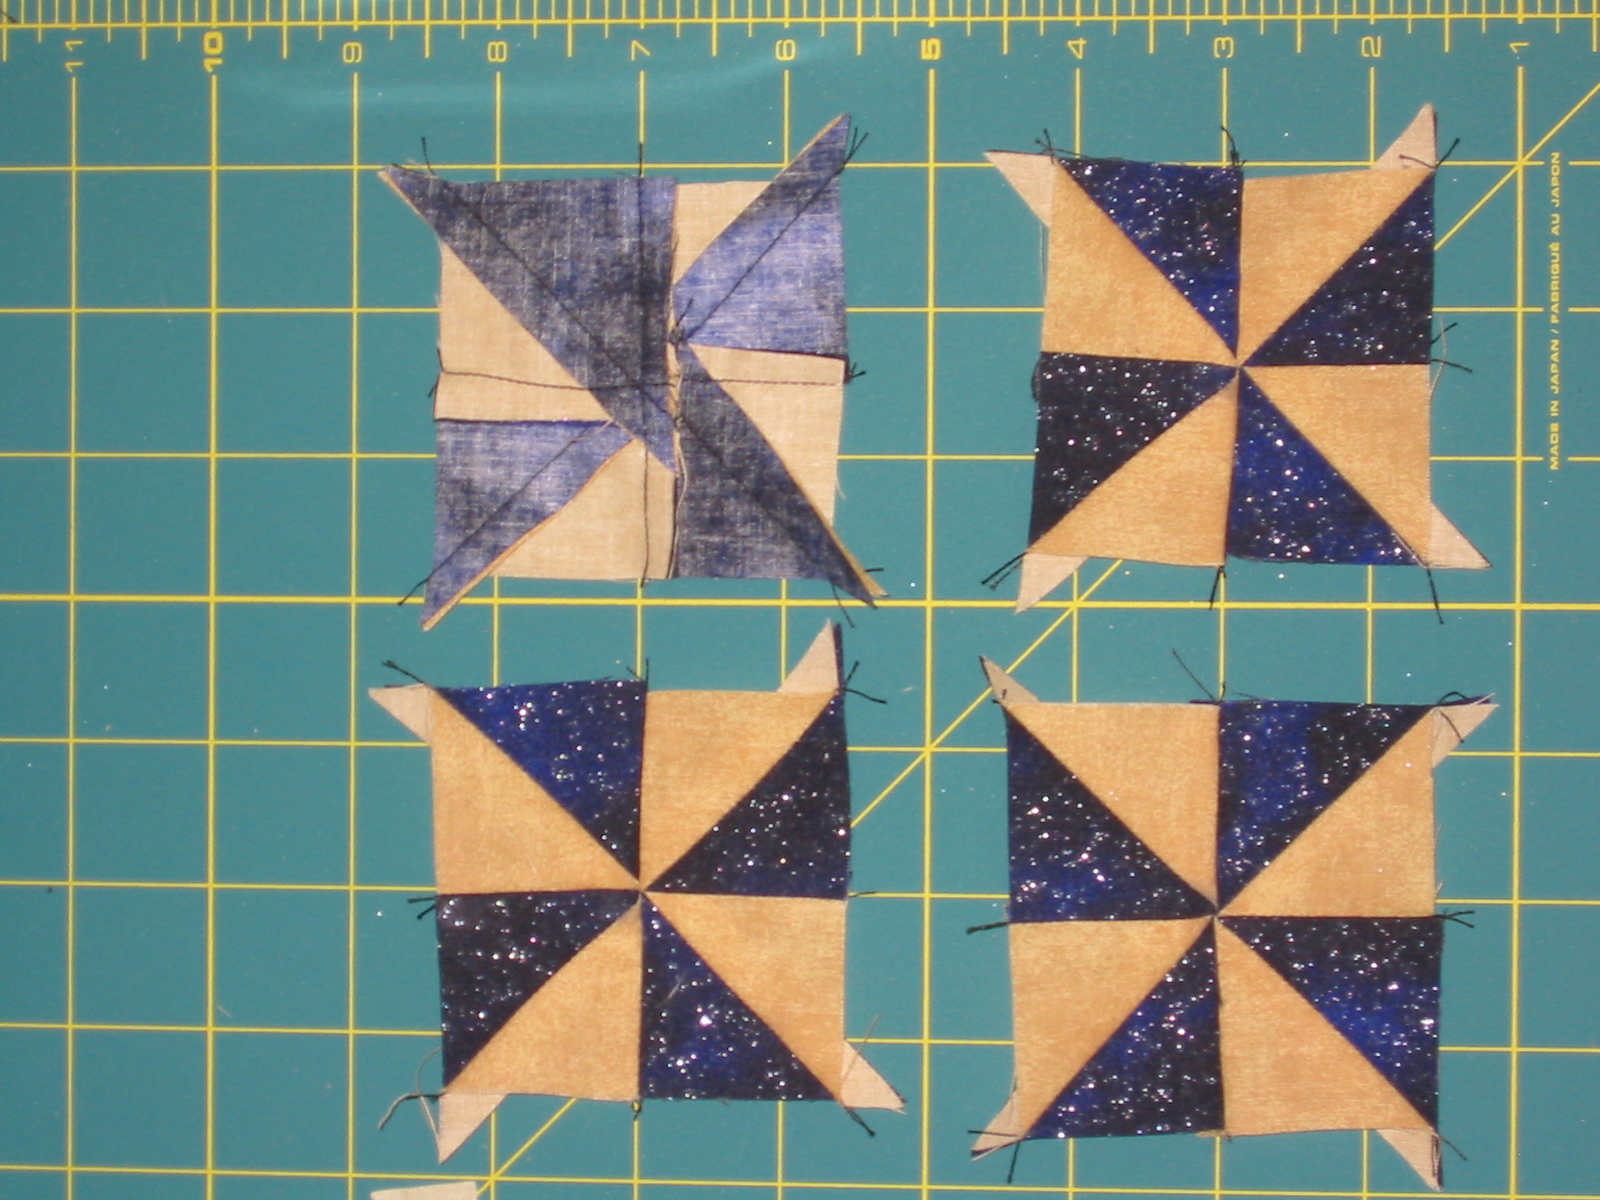
| 8 | small | light blue | right isoceles triangles | 2 x 4 pinwheels (beside) | side | 2 1/2" | + 7/8" | half-cut square |
| 16 | tiny | dark blue | right isoceles triangles | 4 x 4 pinwheels | side | 1 1/4" | + 7/8" | half-cut square |
| 16 | tiny | dark yellow | right isoceles triangles | 4 x 4 pinwheels | side | 1 1/4" | + 7/8" | half-cut square |
| 70 | tiny | dark yellow | right isoceles triangles | diamond points | hypotenuse | 1 1/4" | + 1 1/4" | quarter-cut square |
| 4 | large | dark blue | rectangles | around moon | long side | 5" | + 1/2" | half-cut square |
| 16 | long | dark yellow | acute isoceles triangles | corner stars | height by width | ~ 4" x 1" | 5" x 2" | direct cutting |
| 2 | large | light yellow | circles | moon | diameter | ~ 12" | + 1/2" | template |
| 4 | long | dark yellow | strips | border | width | 2 1/2" | + 1/2" | straight cutting |
| 4 | long | light blue | strips | border | width | 2 1/2" | + 1/2" | straight cutting |
Description of techniques, quilting stitches, and other choices will be coming soon. Until then, browse the photos.
Enjoy,