This part is effectively the two leg struts and right angle connector of a right triangle for which a green strut forms the hypotenuse.
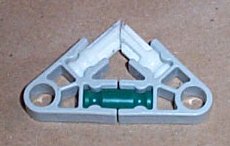
I call this part the whiteangle because it's basically a white strut which instead of being straight, has a 90 degree angle in it. If K'NEX were to manufacture this part, it would be desirable for there to be a hole (whose diameter is the same as those in the middle of a connector) at the angle so that struts can pass through.
|
This part is effectively the two leg struts and right angle connector of a right triangle for which a green strut forms the hypotenuse. |
|
|
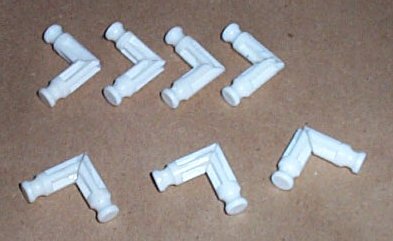
I've made a few of these for myself. You can too. See below. |
|
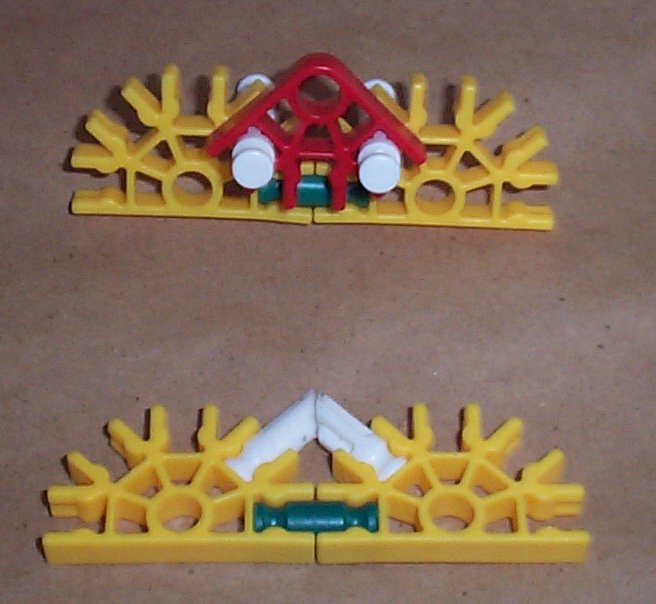
The whiteangle can be used to keep two connectors which are joined by a green strut from rotating relative to one another on the axis of that strut. This could also be achieved using a red connector and two white struts, but that arrangement is bulkier and requires more parts.
It's not hard to make this part at home. All one needs to do is make a miter cut in the middle of a white strut and then glue the two pieces together to form a right angle.
|
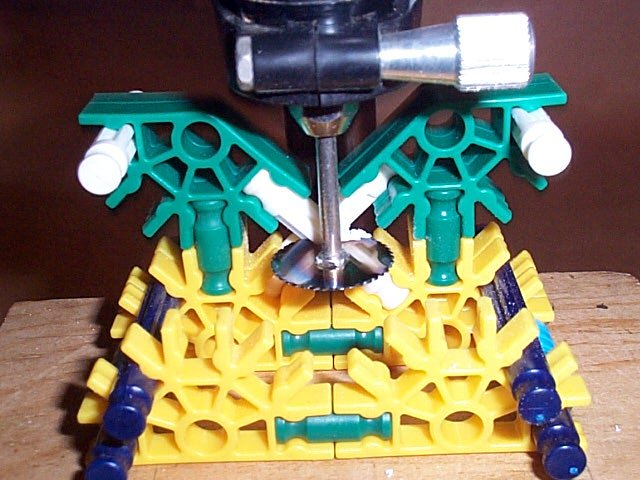
An accurate miter cut can be made using a Dremel tool with drill press accessory and a jig made out of K'NEX. With this jig one can cut two struts at a time, to eventually make two whiteangles. When mounting the two white struts in the jig, be sure that they both have the same axial orientation. This is because once the miter cuts are made, the top piece from one side of the jig will then be joined with the bottom piece on the same side of the jig. Since this piece is from the other strut and it is desirable for the ridges and grooves of the two pieces to line up with one another, the axial orientation must match before the cuts are made. |
|
|
It's important that the height of the cutting head is adjusted so that the cut is made right in the middle of the mounted struts. Line it up with the angle that is formed between the two struts on either side. Because of the limited diameter of the cutter, cuts must be made from both the front and back of the jig. The lowest speed setting was used to limit heat buildup and melting of the plastic struts. If one were using a band saw instead of a Dremel tool, one could lay the jig on its large end and make a cut between the green connectors, at a 90 degree orientation to the cut made here. |
|
|
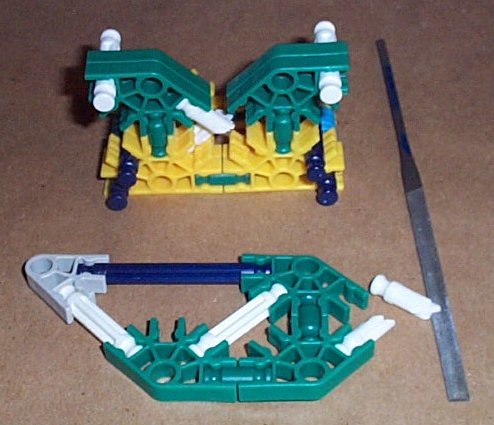
This picture shows one pair of cut parts being transferred from the cutting jig to the gluing jig. Note that the two halves of the whiteangle being made come from different struts. Any residual plastic left by the cutter can be removed with a small file. |
|
|
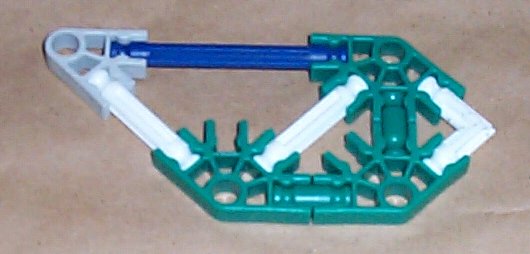
Both halves are now mounted in the gluing jig. They should be rotated axially in the jig so as to maximize the contact surface. The glue can now be applied. It may be appropriate to partially disassemble the gluing jig so that the glue can be applied to the contact surfaces. I got good results using a gap filling cyanoacrylate (such as Pacer "Zap-a-Gap"). I'd tried PC-7 epoxy (from Protective Coating Company) but it did not adhere well to the K'NEX plastic. |
|
|
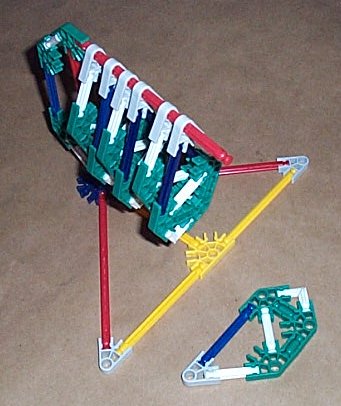
Once the glue is applied, the jig should be hung so that the uncured glue is not in contact with anything else. |
|