- Major: when something really important changes, e.g.
- v.1
- First public release of PWscf
- v.2
- Conversion from f77 to f90
- v.3
- Merge with the CP and FPMD codes (beginning of QUANTUM ESPRESSO)
- v.4
- New XML-based data file format
- v.5
- Major package and directory reorganization
- Minor: when some important new functionality is being added
- Bugfix: only bug fixes; occasionally, minor new functionalities that don't break any existing ones are allowed to sneak into a bugfix release.
Since release 5.2 (June 20, 2015), stable release are packaged at fixed dates. The initial schedule is a release every three to four months. Since v.5.4 bugfix releases are no longer packaged.
Releases are stored to qe-forge.org. Given the size of the complete distribution, the release is split into a ``core'' distribution and ``add-ons'', additional packages, that can be downloaded and installed on demand from the core distribution. ``External'' packages can be independently released, as long as there is no compatibility problem.
The automatic downloading of packages is implemented in file install/plugins_makefile and configured in file install/plugins_list. For independently released packages, it is sufficient to update links. For add-ons packages, not contained in the core distribution, there is however a catch-22: the core distribution must know the link to all packages it downloads, but these are known only after such packages are uploaded to qe-forge.org (and the only way to discover the exact link is to go over the released package with the mouse). The workaround is that the core distribution looks for generic names, written in file install/plugins_list. These names are translated by qe-forge.org into specific names. After all packages have been uploaded, file /var/lib/gforge/archives/index.php, residing on qe-forge.org, must be edited and links updated. This requires system privileges on the machine hosting qe-forge.org.
4.0.0.1 Preparing a release
When the release date approaches, development of new stuff is temporarily stopped: nothing new or potentially ''dangerous'' is added, and all attention is dedicated to fix bugs and to stabilize the distribution. This manual and the user manual have to be updated.Edit the script dev-tools/release.sh to make tarballs.
4.0.0.2 Updating web site
After the release is uploaded to qe-forge.org, the online documentation must be copied to directory /var/www/quantum_wp_db/wordpress-3.1.4/wp-content/uploads/Doc on the web site (this requires system privileges on the machine hosting the web server).
5 Structure of the distribution
Since v.5, the directory structure of QUANTUM ESPRESSO reflects its organization into packages. Each package is stored into a specific subdirectory. In addition, there is a set of directories, common to all packages, containing common code, libraries, installation utilities, general documentation.
Common files and directories in the espresso/ directory are:
   install/                 configure
   include/                 make.inc
   archive/                 Makefile
   dev-tools/               License
   pseudo/                  README
   Doc/                     environment_variables
   clib/                    bin/
   Modules/                 LR_Modules/
   COUPLE/                  upftools/
Apart from License and README whose meaning is obvious, the other files and directories are related to
- Installation (i.e. compilation and linking):
install/, dev-tools/, archive/, configure, .inc - Testing (running tests and examples):
pseudo/, environment_variables - General documentation (not package-specific): Doc/
- C and Fortran Libraries, modules: clib/, Modules/, COUPLE/ (the latter contains code and documentation useful to call QUANTUM ESPRESSO programs from external codes)
- Linear-response specific modules: LR_Modules/.
The core distribution also contains the three package-specific directories PW/, PP/, CPV/, for PWscf, PostProc, CP, respectively. Typical subdirectory structure of a directory containing a package (e.g. PW/):
   Makefile
   examples/
   tests/
   Doc/
   src/
Note that:
- tests/ contains automated post-installation tests (only in PW/ and CPV/) while examples/ are not suitable for automated checks;
- other packages may have a slightly different structure (in particular, PHonon has three directories for sources and none is called src/ ).
5.1 Installation Mechanism
Let us review the files related to compilation and linking:
- -
- install/: documentation and utilities for compilation and linking
- -
- configure: wrapper for install/configure script
- -
- .inc: produced by configure, contains machine-specific compilation and linking options
- -
- Makefile: contains dependencies and targets used by command make.
- -
- include/: files to be included into sources, to be pre-processed.
make target checks for dependencies, recursively goes into subdirectories executing make again. The behavior of make is thus determined by many Makefile's in the various directories. The most important files are Makefile's in the directories containing sources, e.g. Modules/Makefile, PW/src/Makefile.
Dependencies of Fortran files are contained in make.depend files in each source directory. These files must be updated if you change the sources, running script install/makedeps.sh or using command make depend.
5.1.0.1 make.inc
This file is produced by configure using the template in install/make.inc.in and contains all system-specific information on- C and Fortran compilers name, pre-processing and compilation options
- whether the Fortran compiler performs C-style preprocessing or not
- whether compiling for parallel or serial execution
- available optimized mathematical libraries, libraries to be downloaded
- Miscellanous stuff
5.1.0.2 Makefile
The top-level Makefile contains the instructions to download, unpack, compile and link what is required. Sample contents (comments in italic):include make.incContains machine- and QUANTUM ESPRESSO-specific definitions
default :
   @echo 'to install, type at the shell prompt:'
   ...
If no target specified, ask for one, giving a list of possibilities
pw : bindir mods liblapack libblas libs libiotk libenviron
    if test -d PW ; then \
    ( cd PW ; $(MAKE) TLDEPS= all || exit 1) ; fi
Target pw: first check the list of dependencies bindir
mods ... etc., do what is needed; then go into PW/ and give command
make all. Note the use of exit 1, which is required to forward
the exit status of the sub-directory make to this makefile, since the section
in parenthesis is run in a subshell and the if / fi block will otherwise
``hide'' its the return status and make will continue in case of errors.
neb : bindir mods libs pw
    ( cd install ; $(MAKE) -f plugins_makefile $@ || exit 1 )
Target neb: do all of the above, then go into directory
install/ where make neb using plugins_makefile
as Makefile will check if NEB is there, download from the network if not,
compile and link it
libblas : touch-dummy
     cd install ; $(MAKE) -f extlibs_makefile $@
Target libblas: this is an external library, that may or may
not be needed, depending upon what is written in make.inc. If
needed, go into directory install/ where make libblas using
extlibs_makefile as Makefile will check if BLAS are there, download
from the network if not,
compile and build the library
5.1.0.3 PW/Makefile
Second-level Makefile contains only targets related to a given subdirectory or package. Sample contents:
sinclude ../make.inc
default : all
all: pw pwtools
pw:
    ( cd src ; $(MAKE) all || exit 1 )

pwtools: pw
    ( cd tools ; $(MAKE) all || exit 1 )

...
Target pw: go into src/ if it exists, and (apart
from make wizardry) give command make pw. It is important
to note that pwtools has to depend on pw or else this
makefile will break when calling parallel make using make -j#
Other targets are quite similar: go into a subdirectory, e.g.
Doc/ and 'make something', e.g. make clean.
5.1.0.4 PW/src/Makefile
The most important and most complex Makefile is the one in the source directory. It is also the one you need to modify if you add something.include ../../make.incContains machine- and QUANTUM ESPRESSO-specific definitions
MODFLAGS= $(MOD_FLAG)../../iotk/src $(MOD_FLAG)../../Modules $(MOD_FLAG).\
          $(MOD_FLAG)../../FFTXlib $(MOD_FLAG)../../LAXlib
Location of needed modules; MOD_FLAG is defined in
make.inc
PWOBJS = \
pwscf.o
Object file containing main program (this is actually redundant)
PWLIBS = \
a2fmod.o \
...
wannier_enrg.o
List of objects - add here new objects, or delete from this list. Do not forget the backslash! It ensure continuation of the line
QEMODS=../../Modules/libqemod.a ../../FFTXlib/libqefft.a ../../LAXlib/libqela.aObjects from Modules/ are available from the above archive. The directory where F95 modules are must also be specified to the compiler!
TLDEPS=bindir mods libs liblapack libblas libenvironTLDEPS=Top-Level DEPendencieS: a machinery to ensure proper compilation with correct dependencies also if compiling from inside a package directory and not from top level
LIBOBJS = ../../clib/clib.a ../../iotk/src/libiotk.aAll needed QE-specific libraries
all : tldeps pw.x generate_vdW_kernel_table.xTargets that will be build - add here new executables
pw.x : $(PWOBJS) libpw.a $(LIBOBJS) $(QEMODS)
     $(LD) $(LDFLAGS) -o $@ \
     $(PWOBJS) libpw.a $(QEMODS) $(LIBOBJS) $(LIBS)
   - ( cd ../../bin; ln -fs ../PW/src/$@ . )
Target pw.x - produces executable with the same name.
It also produces a link to the executable in espresso/bin/.
Do not forget tabulators even if you do not see them!
All variables (introduced by $) are either defined locally
in Makefile or imported from make.inc
libpw.a : $(PWLIBS)
        $(AR) $(ARFLAGS) $@ $?
        $(RANLIB) $@
This builds the library libpw.a - again, do not forget tabulators
tldeps:
       test -n "$(TLDEPS)" && ( cd ../.. ;
       $(MAKE) $(TLDEPS) || exit 1) || :
second part of the TLDEPS machinery
clean :
    - /bin/rm -f *.x *.o *.a *~ *.F90 *.d *.mod *.i *.L
There should always be a ''clean'' target, removing all compiled (*.o)
or preprocessed (*.F90) stuff - compiled F95 modules may have different
filenames: the four last items cover most cases
include make.dependContains dependencies of objects upon other objects. Sample content of file make.depend (can be produced by install/makedep.sh):
a2fmod.o : ../../Modules/io_global.o
a2fmod.o : ../../Modules/ions_base.o
a2fmod.o : ../../Modules/kind.o
a2fmod.o : pwcom.o
a2fmod.o : start_k.o
a2fmod.o : symm_base.o
tells us that the listed objects must have been compiled prior to compilation of a2fmod.o - make will take care of this.
BEWARE: the Makefile system is in a stable but delicate equilibrium, resulting from many years of experiments on many different machines. Handle with care: what works for you may break other cases.
5.1.1 Preprocessing
Fortran-95 source code contains preprocessing option with the same syntax used by the C preprocessor cpp. Most F95 compilers understand preprocessing options -D ... or some similar form. Some compilers however do not support or do not implement properly preprocessing. In this case the preprocessing is done using cpp. Normally, configure takes care of this, by selecting the appropriate rule @f90rule@ below, in this section of file make.inc.in:
.f90.o:
	@f90rule@
and producing the appropriate file .inc.
Preprocessing is useful to
- account for machine dependency in a unified source tree
- distinguish between parallel and serial execution when they follow different paths (i.e. there is a substantial difference between serial execution and parallel execution on a single processor)
- introduce experimental or special-purpose stuff
Note: include/f_defs.h is obsolete and must not be used any longer.
The following capabilities of the C preprocessor are used:
- assign a value to a given expression. For instance, command #define THIS that, or the option in the command line: -DTHIS=that, will replace all occurrences of THIS with that.
- include file (command #include)
- expand macros (command #define)
- execute conditional expressions such as
  #if defined (__expression)
    ...code A...
  #else
    ...code B...
  #endif
If __expression is defined (with a #define command or from the command line with option -D__expression), then ...code A... is sent to output; otherwise ...code B... is sent to output.
#if defined (XXX), not
#if defined XXX or #ifdef XXX.
5.1.2 How to edit the configure script
The configure script is generated from its source file configure.ac by the GNU autoconf utility (http://www.gnu.org/software/autoconf/). Don't edit configure directly: whenever it gets regenerated, your changes will be lost. Instead, go to the install/ directory, edit configure.ac and/or files install/mt/*.m4, then run autoconf to regenerate configure. If you want to keep the old configure, make a copy first.
GNU autoconf is installed by default on most Unix/Linux systems. If you don't have it on your system, you'll have to install it. You will need a recent version (e.g. v.2.65) of autoconf, because our configure.ac file uses recent syntax.
configure.ac is a regular Bourne shell script (i.e., "sh" - not csh!), except that:
- -
- capitalized names starting with "AC_" are autoconf macros. Normally you shouldn't have to touch them.
- -
- square brackets are normally removed by the macro processor. If you need a square bracket (that should be very rare), you'll have to write two.
You may refer to the GNU autoconf Manual for more info.
make.inc.in is the source file for .inc, that configure generates: you might want to edit that file as well. The generation procedure is as follows: if configure.ac contains the macro "AC_SUBST(name)", then every occurrence of "@name@" in the source file will be substituted with the value of the shell variable "name" at the point where AC_SUBST was called.
Similarly, configure.msg is generated from configure.msg.in: this file is only used by configure to print its final report, and isn't needed for the compilation. We did it this way so that our configure may also be used by other projects, just by replacing the QUANTUM ESPRESSO-specific configure.msg.in by your own.
configure writes a detailed log of its operation to config.log. When any configuration step fails, you may look there for the relevant error messages. Note that it is normal for some checks to fail.
5.1.3 How to add support for a new architecture
In order to support a previously unsupported architecture, first you have to figure out which compilers, compilation flags, libraries etc. should be used on that architecture. In other words, you have to write a .inc that works: you may use the manual configuration procedure for that (see the User Guide). Then, you have to modify configure so that it can generate that .inc automatically.
To do that, you have to add the case for your architecture in several places throughout configure.ac:
- Detect architecture
Look for these lines:
  if test "$arch" = ""
  then
          case $host in
                  ia64-*-linux-gnu )      arch=ia64   ;;
                  x86_64-*-linux-gnu )    arch=x86_64 ;;
                  *-pc-linux-gnu )        arch=ia32   ;;
                  etc.
Here you must add an entry corresponding to your architecture and operating system. Run config.guess to obtain the string identifying your system. For instance on a PC it may be "i686-pc-linux-gnu", while on IBM SP4 "powerpc-ibm-aix5.1.0.0". It is convenient to put some asterisks to account for small variations of the string for different machines of the same family. For instance, it could be "aix4.3" instead of "aix5.1", or "athlon" instead of "i686"... - Select compilers
Look for these lines:
  # candidate compilers and flags based on architecture
  case $arch in
  ia64 | x86_64 )
        ...
  ia32 )
        ...
  aix )
        ...
  etc.
Add an entry for your value of $arch, and set there the appropriate values for several variables, if needed (all variables are assigned some reasonable default value, defined before the "case" block):
- "try_f90" should contain the list of candidate Fortran 90 compilers, in order of decreasing preference (i.e. configure will use the first it finds). If your system has parallel compilers, you should list them in "try_mpif90".
- "try_ar", "try_arflags": for these, the values "ar" and "ruv" should be always fine, unless some special flag is required (e.g., -X64 With sp4).
- you should define "try_dflags" if there is any preprocessing option specific to your machine: for instance, on IBM machines, "try_dflags=-D__AIX" . A list of such flags can be found in file include/defs.h.README.
You shouldn't need to define the following: - "try_iflags" should be set to the appropriate "-I" option(s) needed by the preprocessor or by the compiler to locate *.h files to be included; try_iflags="-I../include" should be good for most cases
For example, here's the entry for IBM machines running AIX:
   aix )
        try_mpif90="mpxlf90_r mpxlf90"
        try_f90="xlf90_r xlf90 $try_f90"
        try_arflags="-X64 ruv"
        try_arflags_dynamic="-X64 ruv"
        try_dflags="-D__AIX -D__XLF"
        ;;
The following step is to look for both serial and parallel fortran compilers:# check serial Fortran 90 compiler... ... AC_PROG_F77($f90) ... # check parallel Fortran 90 compiler ... AC_PROG_F77($mpif90) ... echo setting F90... $f90 echo setting MPIF90... $mpif90A few compilers require some extra work here: for instance, if the Intel Fortran compiler was selected, you need to know which version because different versions need different flags.At the end of the test,
- $mpif90 is the parallel compiler, if any; if no parallel compiler is found or if -disable-parallel was specified, $mpif90 is the serial compiler
- $f90 is the serial compiler
Next step: the choice of (serial) C and Fortran 77 compilers. Look for these lines:
  # candidate C and f77 compilers good for all cases
  try_cc="cc gcc"
  try_f77="$f90"

  case "$arch:$f90" in
  *:f90 )
        ....
  etc.
Here you have to add an entry for your architecture, and since the correct choice of C and f77 compilers may depend on the fortran-90 compiler, you may need to specify the f90 compiler as well. Again, specify the compilers in try_cc and try_f77 in order of decreasing preference. At the end of the test,- $cc is the C compiler
- $f77 is the Fortran 77 compiler, used to compile *.f files (may coincide with $f90)
- Specify compilation flags.
Look for these lines:
  # check Fortran compiler flags
  ...
  case "$arch:$f90" in
  ia64:ifort* | x86_64:ifort* )
        ...
  ia64:ifc* )
        ...
  etc.
Add an entry for your case and define:- "try_fflags": flags for Fortran 77 compiler.
- "try_f90flags": flags for Fortran 90 compiler. In most cases they will be the same as in Fortran 77 plus some others. In that case, define them as "$(FFLAGS) -something_else".
- "try_fflags_noopt": flags for Fortran 77 with all optimizations turned off: this is usually "-O0". These flags used to be needed to compile flib/dlamch.f; likely obsolete
- "try_ldflags": flags for the linking phase (not including the list of libraries: this is decided later).
- "try_ldflags_static": additional flags to select static compilation (i.e., don't use shared libraries).
- "try_dflags": must be defined if there is in the code any preprocessing option specific to your compiler (for instance, -D__INTEL for Intel compilers). Define it as "$try_dflags -D..." so that pre-existing flags, if any, are preserved.
- if the Fortran 90 compiler is not able to invoke the C preprocessor automatically before compiling, set "have_cpp=0" (the opposite case is the default). The appropriate compilation rules will be generated accordingly. If the compiler requires that any flags be specified in order to invoke the preprocessor (for example, "-fpp " - note the space), specify them in "pre_fdflags".
For example, here's the entry for ifort on Linux PC:
  ia32:ifort* )
          try_fflags="-O2 -tpp6 -assume byterecl"
          try_f90flags="\$(FFLAGS) -nomodule"
          try_fflags_noopt="-O0 -assume byterecl"
          try_ldflags=""
          try_ldflags_static="-static"
          try_dflags="$try_dflags -D__INTEL"
          pre_fdflags="-fpp "
          ;;
Next step: flags for the C compiler. Look for these lines:case "$arch:$cc" in *:icc ) ... *:pgcc ) ... etc.Add an entry for your case and define:- "try_cflags": flags for C compiler.
- "c_ldflags": flags for linking, when using the C compiler as linker. This is needed to check for libraries written in C, such as FFTW.
- if you need a different preprocessor from the standard one ($CC -E), define it in "try_cpp".
For example for XLC on AIX:
  aix:mpcc* | aix:xlc* | aix:cc )
          try_cflags="-q64 -O2"
          c_ldflags="-q64"
          ;;
Finally, if you have to use a nonstandard preprocessor, look for these lines:echo $ECHO_N "setting CPPFLAGS... $ECHO_C" case $cpp in cpp) try_cppflags="-P -traditional" ;; fpp) try_cppflags="-P" ;; ...and set "try_cppflags" as appropriate. - Search for libraries
To instruct configure to search for libraries, you must tell it two things: the names of libraries it should search for, and where it should search.
The following libraries are searched for:
- BLAS or equivalent. Some vendor replacements for BLAS that are supported by QUANTUM ESPRESSO are:
MKL on Linux, 32- and 64-bit Intel CPUs
Moreover, ATLAS is used over BLAS if available.
ACML on Linux, 64-bit AMD CPUs
ESSL on AIX
SCSL on sgi altix
SUNperf on sparc- LAPACK or equivalent. Some vendor replacements for LAPACK are supported by QUANTUM ESPRESSO, e.g.: Intel MKL, IBM ESSL
- FFTW (version 3) or another supported FFT library (e.g Intel DFTI, IBM ESSL)
- the IBM MASS vector math library
- an MPI library. This is often automatically linked by the compiler
If you have another replacement for the above libraries, you'll have to insert a new entry in the appropriate place.
This is unfortunately a little bit too complex to explain. Basic info:
"AC_SEARCH_LIBS(function, name, ...)" looks for symbol "function" in library "libname.a". If that is found, "-lname" is appended to the LIBS environment variable (initially empty). The real thing is more complicated than just that because the "-Ldirectory" option must be added to search in a nonstandard directory, and because a given library may require other libraries as prerequisites (for example, Lapack requires BLAS).
5.2 Libraries
Subdirectory clib/ contains libraries written in C
(*.c). There are currently two different ways to
ensure that fortran can call C routines. The new and recommanded
way uses the fortran-95 intrinsic iso_c_binding module.
See Modules/wrappers.f90 for inspiration and examples.
Reference documentation can be found for instance here:
https://gcc.gnu.org/onlinedocs/gfortran/Interoperable-Subroutines-and-Functions.html
The old way uses macros in C routines:
- F77_FUNC (func,FUNC) for function func, not containing underscore(s) in name
- F77_FUNC_(f_nc,F_NC) for function f_nc, containing underscore(s) in name
6 Algorithms
6.1 G
vectors and plane waves
``G
Concerning each orbital corresponding to a specific k point, you
use the condition
In order to manage the G
For example the kinetic energy corresponding to a given k
There is only one FFT for the wavefunctions so the grid does not depend
upon the k-points; however, for a given wavefunction, only the components
corresponding to a G
In calculations using only the
A side effect on parallelization is that G
The two main packages, PWscf and CP, support
restarting from interrupted calculations, Restarting is trivial
in CP: it is sufficient to save from time to time a
restart file containing wavefunctions, orthogonality matrix,
forces, atomic positions, at the current and previous time step.
Restarting is much more complicated in PWscf. Since v.5.1.
restarting from interrupted calculations is possible ONLY if the code
has been explicitly stopped by user. It is not practical to try to
restart from any possible case, such as e.g. crashes. This would
imply saving lots of data all the time. With modern machines, this is
not a good idea. Restart in PWscf currently works as follows:
The distinction between the dimensions of the FFT grid,
(nr1,nr2,nr3) and the physical dimensions of the array,
(nr1x,nr2x,nr3x) is done only because it is computationally
convenient in some cases that the two sets are not the same.
In particular, it is often convenient to have nrx1=nr1+1
to reduce memory conflicts.
In MPI parallelization, a number of independent processes are started
on as many processors, communicating via calls to MPI libraries
(the code will work even with more than one process per processor,
but this is not a smart thing to do). Each process has its own
set of variables and knows nothing about other processes' variables.
Variables that take little memory are replicated on all processors,
those that take a lot of memory (wavefunctions, G-vectors, R-space grid)
are distributed.
Calls to MPI libraries should be confined to a few selected places,
not scattered everywhere into the source code. The vast majority
of parallel operations consist either in broadcasts from one processor
to all others, or in global operations: parallel sums and transpose.
All you need is the MPI communicator (plus the ID of the root processor
for broadcasts), and the appropriate call to wrapper routines, contained
in espresso/Modules/mp.f90 and espresso/Modules/mp_base.f90.
For instance: mp_sum is a wrapper to mpi_reduce,
mp_bcast to mpi_bcast.
For efficiency reasons (latency is very significant), performing many
parallel operations on a small amount of data each must be avoided.
If you can, store a sizable amount of data and transmit it in a single
MPI call. An example of REALLY BAD code:
Calls to MPI libraries require variables contained into a
mpif.h file that is usually absent on serial machines.
In order to prevent compilation problems on serial machines,
the following rules must be followed:
mp_world.f90 is the module containing all processors
on which QE is running. world_comm
is the communicator between all such processors. In QE, its usage
should be confined to parallel environment initialization. It
should not be used in source code, unless this is used only by
stand-alone executables that perform simple auxiliary tasks
and do not allow for multiple parallelization levels.
Unless QE is started from an external code, world_comm
will in practice coincides with MPI_WORLD_COMM.
mp_image.f90 is the module containing information about
``image" parallelization, i.e. division into quasi-independent similar
calculations, each taking care of a different set of atomic
positions (NEB, PWscf) or of different irreps/phonon wavevectors
(PHonon). intra_image_comm is the communicator between
processors of the same image (most of the action will happen here);
inter_image_comm is the communicator between processors
belonging to different images (should be used only when communication
between images is necessary).
intra_image_comm and world_comm coincide if there
is just one image running.
mp_pools.f90 is the module containing information about k-point
(``pool") parallelization. intra_pool_comm is the communicator
between processors working on the same group (``pool") of k-points;
inter_pool_comm is the communicator between different
k-point pools. Note that:
mp_bands.f90 is the module containing information about band
parallelization. intra_bgrp_comm is the communicator between
processors of the same group of bands; inter_band_comm is the
communicator between processors belonging to different groups of bands.
Note that band parallelization is currently implemented only in CP and
for hybrid functionals in PW. When a sum over all bands is needed:
Plane waves (
Quantum ESPRESSO employ arrays whose memory requirements fall
into three categories.
QUANTUM ESPRESSO restart file specifications:
Paolo Giannozzi scripsit AD 2005-11-11,
Last modified by Andrea Ferretti 2006-10-29
Requirements: the data file should be
Format name: QEXML
The "restart file" is actually a "restart directory", containing
several files and sub-directories. For CP/FPMD, the restart directory
is created as "$prefix_$ndw/", where $prefix is the value of the
variable "prefix". $ndw the value of variable ndw, both read in
input; it is read from "$prefix_$ndr/", where $ndr the value of
variable ndr, read from input. For PWscf, both input and output
directories are called "$prefix.save/".
The content of the restart directory is as follows:
Short syntax, used only in a few cases:
First-level tags:
There are currently no strict guidelines for developers. You
should however follow at least the following loose ones:
New input variables should be added to
''Modules/input_parameters.f90'',
then copied to the code internal variables in the ''input.f90''
subroutine. The namelists and cards parsers are in
''Modules/read_namelists.f90'' and ''Modules/read_cards.f90''.
Files ''input_parameters.f90'', ''read_namelists.f90'',
''read_cards.f90'' are shared by all codes, while each code
has its own version of ''input.f90'' used to copy input values
into internal variables
EXAMPLE:
suppose you need to add a new input variable called ''pippo''
to the namelist control, then:
Subversion, also known as SVN, is a software that allows many
developers to work and maintain a single copy of a software in a
central location (repository).
It is installed by default on many Unix machines, or otherwise
it can be very easily installed.
For the end user, SVN is rather similar to CVS:
if no advanced features are used, the basic commands are the same.
More information on SVN can be found here:
http://subversion.apache.org/.
Current organization:
Follow the instructions in
http://qe-forge.org/gf/project/q-e/scmsvn,
under `Access Info'',
to check out (i.e. download) the SVN repository.
The distribution will appear in directory trunk/espresso/.
Branches (i.e. sub-versions) will appear as separate directories.
Important notice: since v.5.3 the SVN repository is no longer accessible
read-only to everybody.
To update the code to the current version:
Sometimes, the conflict is not so easy to solve. In this case, you
can selectively update your repository at a given date, or at a given
revision number, using command (XXXXX=revision number)
In order to merge a branch back into the trunk, the simplest procedure is
to align first the branch with the trunk and commit it, as above; then,
in a clean, not locally modified, trunk:
Note the following very useful property: SVN can merge anything with anything!
The following web page may be useful:
http://www.math-linux.com/spip.php?article118
Git is a very populare versioning control system for collaborative development
nowadays. The web is full of tutorials and guide about how to use it, covering
simple novice concepts to master the most sophisticated functionalities. The
following links contain an introduction to git:
The QUANTUM ESPRESSO test-suite is used to ensure continuous integration and long-term numerical stability of the code.
The test-suite is also used by different Buildbot test-farm to automatically test the code nightly after a commit to the SVN qe-forge repository has been detected.
Two currently (2017) active test-farm can be accessed:
Let us take the example of adding a new test for the TDDFPT module.
Once this is done. We can clean all the unwanted files and we should be left with a clean folder that can be committed to the svn repo. In our case the test folder contains the following files:
It is very important to then re-run the tests in parallel (4 cores) to be sure that the results are within the accepted tolerance.
You have to create a new folder following the convention prog_name and test_name and then follow the structure outline above.
If you want to test new physical quantities, you need to parse them using the script extract-PROG_NAME.x. Finally, the new test should
be added in jobconfig.
Fortran books:
This document was generated using the
LaTeX2HTML translator Version 2012 (1.2)
Copyright © 1993, 1994, 1995, 1996,
Nikos Drakos,
Computer Based Learning Unit, University of Leeds.
The command line arguments were:
The translation was initiated by on 2017-03-03
![]()
![]() E
E![]() c = 4Ewc
c = 4Ewc
(1)
![]() Ewc
Ewc
(2)
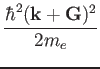
 g2kin(1:ngk(ik)) = ( ( xk(1,ik) + g(1,igk_k(1:ngk(ik),ik)) )**2 + &
                      ( xk(2,ik) + g(2,igk_k(1:ngk(ik),ik)) )**2 + &
                      ( xk(3,ik) + g(3,igk_k(1:ngk(ik),ik)) )**2 ) * tpiba2
where tpiba2
= (2![]() /a)2
/a)2
![]() (
(![]() +
+![]() )2/2me
)2/2me![]() Ewc
Ewc
6.2 Gamma tricks
![]()
![]() (G) =
(G) = ![]() (- G).
(- G).
![]()
![]() (r) =
(r) = ![]() (r) + i
(r) + i![]() (r)
(r)
![]() (G)
(G)
![]() (G) =
(G) = ![]() ,
,![]() (G) =
(G) = ![]() .
.
6.3 Restart
As of April 2013 only the electronic loop is organized ths way. Loops
on nuclear positions will be organized in the same manner once their
re-organization is completed. To be done:
7 Format of arrays containing charge density, potential, etc.
The index of arrays used to store functions defined on 3D meshes is
actually a shorthand for three indices, following the FORTRAN convention
("leftmost index runs faster"). An example will explain this better.
Suppose you have a 3D array psi(nr1x,nr2x,nr3x). FORTRAN
compilers store this array sequentially in the computer RAM in the following way:
        psi(   1,   1,   1)
        psi(   2,   1,   1)
        ...
        psi(nr1x,   1,   1)
        psi(   1,   2,   1)
        psi(   2,   2,   1)
        ...
        psi(nr1x,   2,   1)
        ...
        ...
        psi(nr1x,nr2x,   1)
        ...
        psi(nr1x,nr2x,nr3x)
etc
Let ind be the position of the (i,j,k) element in the above list:
the following relation
ind = i + (j - 1) * nr1x + (k - 1) * nr2x * nr1x
holds. This should clarify the relation between 1D and 3D indexing. In real
space, the (i,j,k) point of the FFT grid with dimensions
nr1 (![]()
![]()
![]()
![]()
![]() +
+ 
![]() +
+ 
![]()
![]()
![]() =
=
![]() =
=
![]() =
=
8 Parallelization (MPI)
8.1 General rules
   COMPLEX, ALLOCATABLE :: wfc(:,:), swfc(:,:)
   ALLOCATE (wfc(npwx,m),swfc(npwx,m))
   DO i=1,m
      DO j=1,m
         ps = zdotc(npw,wfc(1,i),1,swfc(1,j)1)
         CALL mp_sum(ps,intra_bgrp_group)
      END DO
   END DO
MUCH better code, both for serial and parallel speed:
   COMPLEX, ALLOCATABLE :: ps(:,:), wfc(:,:), swfc(:,:)
   ALLOCATE (ps(m,m), wfc(npwx,m),swfc(npwx,m))
   CALL zgemm ('c', 'n', m, m, npw, (1.d0, 0.d0), wfc, &
               npwx, swfc, npwx, (0.d0, 0.d0), ps, m)
   CALL mp_sum(ps,intra_bgrp_group)
8.1.1 Preprocessing for parallel usage
\#if defined (__MPI)}
to prevent compilation and usage in the serial case. Note that
some compilers do not like empty files or modules containing nothing!
\#if defined (__MPI)} are needed
only when the flux of parallel and serial execution differ.
__PARA is obsolete and must not be used.
8.2 Parallelization levels and communicators
intra_pool_comm and intra_image_comm coincide if there
is just one k-point pool.
![]()
intra_bgrp_comm and intra_pool_comm coincide
if there is just one band group.
![]()
![]() +
+ ![]()
![]()
![]()
![]() |
|![]()
![]()
The same holds for real-space FFT's grid.
![]()
8.3 Tricks and pitfalls
IF ( ionode ) THEN
   OPEN ( ..., IOSTAT=ierr )
   ...
END IF
CALL mp_bcast( ierr, ... , intra_image_comm )
CALL errore( 'routine','error', ierr )
The same applies to all operations performed on a single processor,
or a subgroup of processors: any error code must be broadcast before
the check.
8.4 Data distribution
Their size decreases linearly with the number of processors in a pool.
Their size decreases linearly with the number of processors in a ortho
or diag group.
The size of these arrays is independent on the number of processors.
9 File Formats
9.1 Data file(s)
9.1.1 Rationale
Solutions:
Integration with other packages:
9.1.2 General structure
Format version: 1.4.0
data-file.xml          which contains:
                       - general information that doesn't require large data set:
                         atomic structure, lattice, k-points, symmetries,
                         parameters of the run, ...
                       - pointers to other files or directories containing bulkier
                         data: grids, wavefunctions, charge density, potentials, ...

charge_density.dat     contains the charge density
spin_polarization.dat  contains the spin polarization (rhoup-rhodw) (LSDA case)
magnetization.x.dat
magnetization.y.dat    contain the spin polarization along x,y,z
magnetization.z.dat    (noncollinear calculations)
lambda.dat             contains occupations (Car-Parrinello dynamics only)
mat_z.1                contains occupations (ensemble-dynamics only)

<pseudopotentials>     A copy of all pseudopotential files given in input

<k-point dirs>         Subdirectories K00001/, K00002/, etc, one per k-point.
Each k-point directory contains:
    evc.dat                wavefunctions for spin-unpolarized calculations, OR
    evc1.dat
    evc2.dat               spin-up and spin-down wavefunctions, respectively,
                           for spin polarized (LSDA) calculations;
    gkvectors.dat          the details of specific k+G grid;
    eigenval.xml           eigenvalues for the corresponding k-point
                           for spin-unpolarized calculations, OR
    eigenval1.xml          spin-up and spin-down eigenvalues,
    eigenval2.xml          for spin-polarized calculations;
in a molecular dynamics run, also wavefunctions at the preceding time step:
    evcm.dat               for spin-unpolarized calculations OR
    evcm1.dat
    evcm2.dat              for spin polarized calculations;
9.1.3 Structure of file "data-file.xml"
XML Header: whatever is needed to have a well-formed XML file

Body: introduced by <Root>, terminated by </Root>. Contains first-level tags
      only. These contain only other tags, not values. XML syntax applies.

First-level tags: contain either
     second-level tags, OR
     data tags:   tags containing data (values for a given variable), OR
     file tags:   tags pointing to a file
data tags syntax ( [...] = optional ) :
      <TAG type="vartype" size="n" [UNIT="units"] [LEN="k"]>
      values (in appropriate units) for variable corresponding to TAG:
      n elements of type vartype (if character, of length k)
      </TAG>
where TAG describes the variable into which data must be read;
"vartype" may be "integer", "real", "character", "logical";
if type="logical", LEN=k" must be used to specify the length
of the variable character; size="n" is the dimension.
Acceptable values for "units" depend on the specific tag.
<TAG attribute="something"/> .
For instance:
<FFT_GRID nr1="NR1" nr2="NR2" nr3="NR3"/>
defines the value of the FFT grid parameters nr1, nr2, nr3
for the charge density
9.1.4 Sample
Header:
 <?xml version="1.0"?>
 <?iotk version="1.0.0test"?>
 <?iotk file_version="1.0"?>
 <?iotk binary="F"?>
These are meant to be used only by iotk (actually they aren't)
  - <HEADER>         (global information about fmt version)
  - <CONTROL>        (miscellanea of internal information)
  - <STATUS>         (information about the status of the CP simulation)
  - <CELL>           (lattice vector, unit cell, etc)
  - <IONS>           (type and positions of atoms in the unit cell etc)
  - <SYMMETRIES>     (symmetry operations)
  - <ELECTRIC_FIELD> (details for an eventual applied electric field)
  - <PLANE_WAVES>    (basis set, cutoffs etc)
  - <SPIN>           (info on spin polarizaztion)
  - <MAGNETIZATION_INIT>     (info about starting or constrained magnetization)
  - <EXCHANGE_CORRELATION>
  - <OCCUPATIONS>    (occupancy of the states)
  - <BRILLOUIN_ZONE> (k-points etc)
  - <PARALLELISM>    (specialized info for parallel runs)
  - <CHARGE-DENSITY>
  - <TIMESTEPS>      (positions, velocities, nose' thermostats)
  - <BAND_STRUCTURE_INFO>    (dimensions and basic data about band structure)
  - <EIGENVALUES>    (eigenvalues and related data)
  - <EIGENVECTORS>   (eigenvectors and related data)


* Tag description

  <HEADER>
     <FORMAT>    (name and version of the format)
     <CREATOR>   (name and version of the code generating the file)
  </HEADER>

  <CONTROL>
     <PP_CHECK_FLAG>    (whether file is complete and suitable for post-processing)
     <LKPOINT_DIR>      (whether kpt-data are written in sub-directories)
     <Q_REAL_SPACE>     (whether augmentation terms are used in real space)
     <BETA_REAL_SPACE>  (whether projectors are used in real space, not implemented)
  </CONTROL>

  <STATUS>  (optional, written only by CP)
     <STEP>   (number $n of steps performed, i.e. we are at step $n)
     <TIME>   (total simulation time)
     <TITLE>  (a job descriptor)
     <ekin>   (kinetic energy)
     <eht>    (hartree energy)
     <esr>    (Ewald term, real-space contribution)
     <eself>  (self-interaction of the Gaussians)
     <epseu>  (pseudopotential energy, local)
     <enl>    (pseudopotential energy, nonlocal)
     <exc>    (exchange-correlation energy)
     <vave>   (average of the potential)
     <enthal> (enthalpy: E+PV)
  </STATUS>

  <CELL>
     <NON-PERIODIC_CELL_CORRECTION>
     <BRAVAIS_LATTICE>
     <LATTICE_PARAMETER>
     <CELL_DIMENSIONS>  (cell parameters)
     <DIRECT_LATTICE_VECTORS>
        <UNITS_FOR_DIRECT_LATTICE_VECTORS>
        <a1>
        <a2>
        <a3>
     <RECIPROCAL_LATTICE_VECTORS>
        <UNITS_FOR_RECIPROCAL_LATTICE_VECTORS>
        <b1>
        <b2>
        <b3>
  </CELL>

  <MOVING_CELL> (optional, PW only)
     <CELL_FACTOR>

  <IONS>
     <NUMBER_OF_ATOMS>
     <NUMBER_OF_SPECIES>
     <UNITS_FOR_ATOMIC_MASSES>
     For each $n-th species $X:
        <SPECIE.$n>
           <ATOM_TYPE>
           <MASS>
           <PSEUDO>
        </SPECIE.$n>
     <PSEUDO_DIR>
     <UNITS_FOR_ATOMIC_POSITIONS>
     For each atom $n of species $X:
        <ATOM.$n SPECIES="$X" INDEX=nt tau=(x,y,z) if_pos=...>
  </IONS>

  <SYMMETRIES> (optional, PW only)
     <NUMBER_OF_SYMMETRIES>
     <NUMBER_OF_BRAVAIS_SYMMETRIES>
     <INVERSION_SYMMETRY>
     <DO_NOT_USE_TIME_REVERSAL>
     <TIME_REVERSAL_FLAG>
     <NO_TIME_REV_OPERATIONS>
     <NUMBER_OF_ATOMS>
     <UNITS_FOR_SYMMETRIES>
     For each symmetry $n:
        <SYMM.$n>
           <INFO>
           <ROTATION>
           <FRACTIONAL_TRANSLATION>
           <EQUIVALENT_IONS>
        </SYMM.$n>
     For the remaining bravais symmetries:
        <SYMM.$n>
           <INFO>
           <ROTATION>
        </SYMM.n>
  </SYMMETRIES>

  <ELECTRIC_FIELD>  (optional, sawtooth field in PW only))
     <HAS_ELECTRIC_FIELD>
     <HAS_DIPOLE_CORRECTION>
     <FIELD_DIRECTION>
     <MAXIMUM_POSITION>
     <INVERSE_REGION>
     <FIELD_AMPLITUDE>
  </ELECTRIC_FIELD>

  <PLANE_WAVES>
     <UNITS_FOR_CUTOFF>
     <WFC_CUTOFF>
     <RHO_CUTOFF>
     <MAX_NUMBER_OF_GK-VECTORS>
     <GAMMA_ONLY>
     <FFT_GRID>
     <GVECT_NUMBER>
     <SMOOTH_FFT_GRID>
    <SMOOTH_GVECT_NUMBER>
    <G-VECTORS_FILE>       link to file "gvectors.dat"
    <SMALLBOX_FFT_GRID>
  </PLANE_WAVES>

  <SPIN>
     <LSDA>
     <NON-COLINEAR_CALCULATION>
     <SPIN-ORBIT_CALCULATION>
        <SPINOR_DIM>
     <SPIN-ORBIT_DOMAG>
  </SPIN>

  <MAGNETIZATION_INIT>
     <CONSTRAINT_MAG>
     <NUMBER_OF_SPECIES>
     For each species X:
        <SPECIE.$n>
           <STARTING_MAGNETIZATION>
           <ANGLE1>
           <ANGLE2>
           <CONSTRAINT_1,2,3>
        </SPECIE.$n>
        <FIXED_MAGNETIZATION_1,2,3>
        <MAGNETIC_FIELD_1,2,3>
        <TWO_FERMI_ENERGIES>
           <UNITS_FOR_ENERGIES>
           <FIXED_MAGNETIZATION>
           <ELECTRONS_UP>
           <ELECTRONS_DOWN>
           <FERMI_ENERGY_UP>
           <FERMI_ENERGY_DOWN>
        <LAMBDA>
  </MAGNETIZATION_INIT>

  <EXCHANGE_CORRELATION>
     <DFT>
     <LDA_PLUS_U_CALCULATION>
     if LDA_PLUS_U_CALCULATION
        <NUMBER_OF_SPECIES>
        <HUBBARD_LMAX>
        <HUBBARD_L>
        <HUBBARD_U>
        <LDA_PLUS_U_KIND>
        <U_PROJECTION_TYPE>
        <HUBBARD_J>
        <HUBBARD_J0>
        <HUBBARD_ALPHA>
        <HUBBARD_BETA>
     endif
     if <NON_LOCAL_DF>
          <VDW_KERNEL_NAME>
     if <DFT_D2>
          <SCALING_FACTOR>
          <CUTOFF_RADIUS>
     if <XDM>
     if <TKATCHENKO-SCHEFFLER>
          <ISOLATED_SYSTEM>
  </EXCHANGE_CORRELATION>

  if hybrid functional
      <EXACT_EXCHANGE>
        <x_gamma_extrapolation>
        <nqx1>
        <nqx2>
        <nqx3>
        <exxdiv_treatment>
        <yukawa>
        <ecutvcut>
        <exx_fraction>
        <screening_parameter>
      </EXACT_EXCHANGE>
  endif

  <OCCUPATIONS>
     <SMEARING_METHOD>
     if gaussian smearing
        <SMEARING_TYPE>
        <SMEARING_PARAMETER>
     endif
     <TETRAHEDRON_METHOD>
     if use tetrahedra
        <NUMBER_OF_TETRAHEDRA>
        for each tetrahedron $t
           <TETRAHEDRON.$t>
     endif
     <FIXED_OCCUPATIONS>
     if using fixed occupations
        <INFO>
        <INPUT_OCC_UP>
        if lsda
           <INPUT_OCC_DOWN>
        endif
     endif
  </OCCUPATIONS>

  <BRILLOUIN_ZONE>
     <NUMBER_OF_K-POINTS>
     <UNITS_FOR_K-POINTS>
     <MONKHORST_PACK_GRID>
     <MONKHORST_PACK_OFFSET>
     For each k-point $n:
        <K-POINT.$n>
     <STARTING_F_POINTS>
     For each starting k-point $n:
        <K-POINT_START.$n> kx, ky, kz, wk
     <NORM-OF-Q>
  </BRILLOUIN_ZONE>

  <PARALLELISM>
     <GRANULARITY_OF_K-POINTS_DISTRIBUTION>
     <NUMBER_OF_PROCESSORS>
     <NUMBER_OF_PROCESSORS_PER_POOL>
     <NUMBER_OF_PROCESSORS_PER_IMAGE>
     <NUMBER_OF_PROCESSORS_PER_TASKGROUP>
     <NUMBER_OF_PROCESSORS_PER_POT>
     <NUMBER_OF_PROCESSORS_PER_BAND_GROUP>
     <NUMBER_OF_PROCESSORS_PER_DIAGONALIZATION>
  </PARALLELISM>

  <CHARGE-DENSITY>
      link to file "charge_density.rho"
  </CHARGE-DENSITY>

  <TIMESTEPS>  (optional)
     For each time step $n=0,M
       <STEP$n>
          <ACCUMULATORS>
          <IONS_POSITIONS>
             <stau>
             <svel>
             <taui>
             <cdmi>
             <force>
          <IONS_NOSE>
             <nhpcl>
             <nhpdim>
             <xnhp>
             <vnhp>
          <ekincm>
          <ELECTRONS_NOSE>
             <xnhe>
             <vnhe>
          <CELL_PARAMETERS>
             <ht>
             <htve>
             <gvel>
          <CELL_NOSE>
             <xnhh>
             <vnhh>
          </CELL_NOSE>
  </TIMESTEPS>

  <BAND_STRUCTURE_INFO>
     <NUMBER_OF_BANDS>
     <NUMBER_OF_K-POINTS>
     <NUMBER_OF_SPIN_COMPONENTS>
     <NON-COLINEAR_CALCULATION>
     <NUMBER_OF_ATOMIC_WFC>
     <NUMBER_OF_ELECTRONS>
     <UNITS_FOR_K-POINTS>
     <UNITS_FOR_ENERGIES>
     <FERMI_ENERGY>
  </BAND_STRUCTURE_INFO>

  <EIGENVALUES>
     For all kpoint $n:
         <K-POINT.$n>
             <K-POINT_COORDS>
             <WEIGHT>
             <DATAFILE>                  link to file "./K$n/eigenval.xml"
         </K-POINT.$n>
  </EIGENVALUES>

  <EIGENVECTORS>
     <MAX_NUMBER_OF_GK-VECTORS>
     For all kpoint $n:
         <K-POINT.$n>
             <NUMBER_OF_GK-VECTORS>
             <GK-VECTORS>                link to file "./K$n/gkvectors.dat"
             for all spin $s
                <WFC.$s>                 link to file "./K$n/evc.dat"
                <WFCM.$s>                link to file "./K$n/evcm.dat" (optional)
                                         containing wavefunctions at preceding step
         </K-POINT.n>
  </EIGENVECTORS>
9.2 Restart files
10 Modifying/adding/extending QUANTUM ESPRESSO
10.1 Programming style (or lack of it)
#if defined (XXX), not #if defined XXX
or #ifdef XXX
    INTEGER, INTENT(IN)   :: N
    REAL(dp), INTENT(OUT) :: A(N)
in this order (some compilers complain if you put the second line
before the first).
10.2 Adding or modifying input variables
              INTEGER :: pippo = 0
              NAMELIST / control / ....., pippo
Remember: always set an initial value!
               subroutine control_default( prog )
              ...
              IF( prog == 'PW' ) pippo = 10
              ...
              end subroutine
This routine sets the default value for pippo (can be different in
different codes)
                subroutine control_bcast( )
                ...
                call mp_bcast( pippo, intra_image_comm )
                ...
                end subroutine
QUANTUM ESPRESSOis maintained in a Subversion (SVN) repository. Developers can have
read-write access when needed, read-only otherwise. Note that the latest
(development) version may occasionally not work properly: carefully
verify the results before using it in production work.
11 Using SVN
11.1 SVN operations
svn update
in the directory containing the distribution.
To see the difference between the current version and your modified
copy:
svn diff
To save your modified version into the repository:
(read-write access only):
svn commit
Please explain in a few words what your commit is about! Use option
-m"comment" or the editor of your choice (set it using the
SVN_EDITOR environment variable).
If you want to add a new file, or a new directory, before commiting
give command
svn add
To remove a file/directory (if empty):
svn delete
You can move a file (a directory, a group of files, ...) into a different
directory using command
svn mv dir1/file1 [dir1/file2 ...] dir2/
or, if you prefer to make a copy of the file, retaining the history:
svn cp svn+ssh://myusername@qeforge.qe-forge.org/svnroot/q-e/trunk/espresso/DIR1/file.1 svn+ssh://myusername@qeforge.qe-forge.org/svnroot/q-e/trunk/espresso/DIR2/file2
then run svn update to have it applied locally.
After such operations are done, run the install/makedeps.sh script
or type make depend to update files make.depend in the
various subdirectories. It is preferrable to commit the moved files/modified
directories and the affected Makefiles/make.depend in a single command.
When you update your working copy of the repository,
you may encounter two types of conflicts:
11.2 Removing conflicts
Here we are concerned with kind 1. of conflicts, those that
are noticed by SVN and produce, in addition to a message with
a "C" in the first column before the conflicting file name:
Look into the conflicting section(s): in most cases, conflicts are trivial
(format changes, white spaces) or easily solved (the part of the code you
were modifying has been moved to another place, or a variable has meanwhilke
changed name, for instance). Edit conflicting-file, remove all other
copies of conflicting-file.*, commit.
   <<<<<<<
     (your version)
   =======
     (SVN version)
   >>>>>>>
svn update -r XXXXX
You can also select a date, using {"date"} instead of the revision number.
In this way you can locate which change(s) is (are) the culprit(s).
The web-SVN interface:
http://qe-forge.org/gf/project/q-e/scmsvn
will also be very helpful in locating the problem.
Of course, communication with other developers will also help.
The above paragraph applies as well to case 2. os conflicts, in
presence or in absence of explicit SVN conflicts. If the reason for
malfunctioning is not evident, you have to figure out when the
problem started. Once this is done, itis usually straightforward
to figure out why.
Let us assume that you have created a branch and that you are working
in the directory of your branch. The simplest way to keep it aligned
with the trunk is the following command:
11.3 Merging branch and trunk
svn merge ^/trunk/espresso
The caret (^) syntax is a shorthand for the entire URL of the trunk.
Then you have to remove conflicts that can arise from incompatible changes
made in the trunk. Then you can commit your "aligned" branch (beware:
the commit message is very large in size if you haven't merged recently;
if so, it may never reach the q-e-commits mailing list).
svn merge --reintegrate ^/branches/my-espresso-branch
then, commit.
It is possible to download other repositories into the main QUANTUM ESPRESSO repository.
Currently, this possibility works for GIPAW and West (for authorized users).
From the trunk/ subdirectory (the one containing espresso/), type
``svn propedit svn:externals espresso''.
An editor will open. Type the name of the subdirectory of ``espresso/''
where you want the repository to be downloaded, followed by the address of
the repository, exit (not quit!) the editor. Currently:
11.4 Including a repository into the trunk
West  http://qeforge.qe-forge.org/svn/west/trunk
GIPAW http://qeforge.qe-forge.org/svn/qe-gipaw/trunk
12 Using git
https://git-scm.com/book/en/v2/Getting-Started-Git-Basics
https://git-scm.com/course/svn.html
Very quick guide to git commands for the impatient:
In order to align the local repository to the svn mirror (equivalent to
svn update), it is a good idea to use fetch before
pull. Then:
git add
git commit
git merge
In order to save incomplete work and avoid local conflicts, one can use
stash:
git stash save (save and remove modified files)
The stash can be cleared using git clear. A few useful commands:
git pull (update files)
git stash apply (overwrite with locally modified files)
git status
git diff
13 The QUANTUM ESPRESSO test-suite
13.1 How to add tests for a new executable
[tddfpt_*/]
program = TDDFPT
This means that all the new tests related to TDDFPT must be placed in a folder with a name that starts with tddfpt_. You can also add it to a new category.
make run-custom-test testdir=tddfpt_CH4
We can then rename the output by doing
cp test.out.030117.inp=CH4.pw-in.args=1 benchmark.out.SVN.inp=CH4.pw-in.args=1
We now have a reference file for the first step of the calculation. We can do the same for the two other steps.
benchmark.out.SVN.inp=CH4.pw-in.args=1
benchmark.out.SVN.inp=CH4.tddfpt_pp-in.args=3
benchmark.out.SVN.inp=CH4.tddfpt-in.args=2
CH4.tddfpt-in
C.pz-vbc.UPF
CH4.pw-in
CH4.tddfpt_pp-in
H.pz-vbc.UPF
13.2 How to add tests for an existing executable
14 Bibliography
On-line tutorials:
(info courtesy of Goranka Bilalbegovic)
About this document ...
Developer's Manual for
QUANTUM ESPRESSO (v.6.1)
Copyright © 1997, 1998, 1999,
Ross Moore,
Mathematics Department, Macquarie University, Sydney.
latex2html -t 'Developer's Manual for Quantum-ESPRESSO' -html_version 3.2,math -toc_depth 3 -split 3 -toc_stars -show_section_numbers -local_icons -image_type png developer_man.tex
![]()
![]()
![]()
2017-03-03