

We have 19 hexagons on the left, 19 hexagons on the right, and a space in between them with room for 19 hexagons. The hexagons on the right are partially transparent—they have outlines of bars that match the bars on the left-side solid hexagons. If you play with the hexes interactively, you’ll find that if you overlap them, the ones on the right always lie over the top of the ones on the left.
This all suggests you need to put the 19 left-side hexagons into the layout space, and put the 19 right-side hexagons on top of them. You can tell the correct rotation for all the left-side solid hexes because of the shades of yellow/orange/brown, but you can’t yet tell the correct orientation for the right-side transparent hexes.
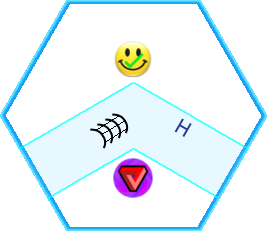
Also, as you play with lining the hexagons up, you may find that any time you put three of them together to form a triangle, it forms an impossible tri-bar, also known as a Penrose triangle. If you form a quadrilateral with four of them, it’s a perfectly possible real-world structure, like a perspective view of a square picture frame. Five hexes produce an impossible shape known as the impossible four-bar. Six hexes produce one of several real world possible structures, such as one that traces several edges of a cube.
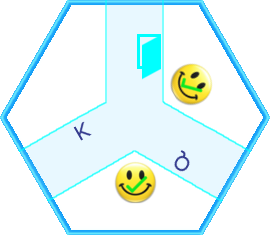
The leap at this point is to realize that the symbols floating on the transparent right-side hexes are meant to indicate whether the region they go on top of is possible or impossible. The smiley face with a tick indicates it’s possible, the purple swirly reality vortex with a red tri-bar means impossible, and the blue-sky cloud means this area is connected to the background.

Armed with this interpretation, it’s now possible to arrange all the hexes correctly. A helpful insight at this stage is that this piece:
needs to be the internal concave corner of a possible shape containing at least six hexes. It also helps to guess that the two pieces with two adjacent smiley faces might go next to each other:
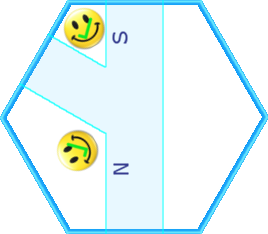
A little experimentation shows the only way to pair these two intersections to line up the colors is the way on the left (in the way on the right, the orange and brown are inverted).
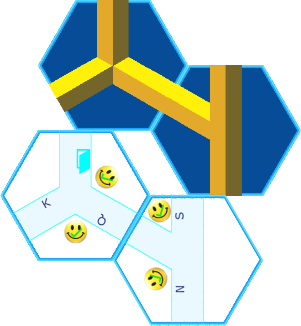

If this is correct, then the space underneath this pairing must be a possible space containing at least six hexes, so it seems likely the internal concave corner piece must nestle underneath these two pieces. From here you can logically assemble the rest of the figure.
With the figure completed, how do you extract a message? At the top center, there’s a prominent person shape. At a distant part of the figure there’s a cyan door. It seems like you need to find a route to get the figure to the door. The figure will need to cross from one side of a bar to another a few times—the patches of curved lines going from one visible side of a bar to another provide enough crossings to do this. The route is drawn below:
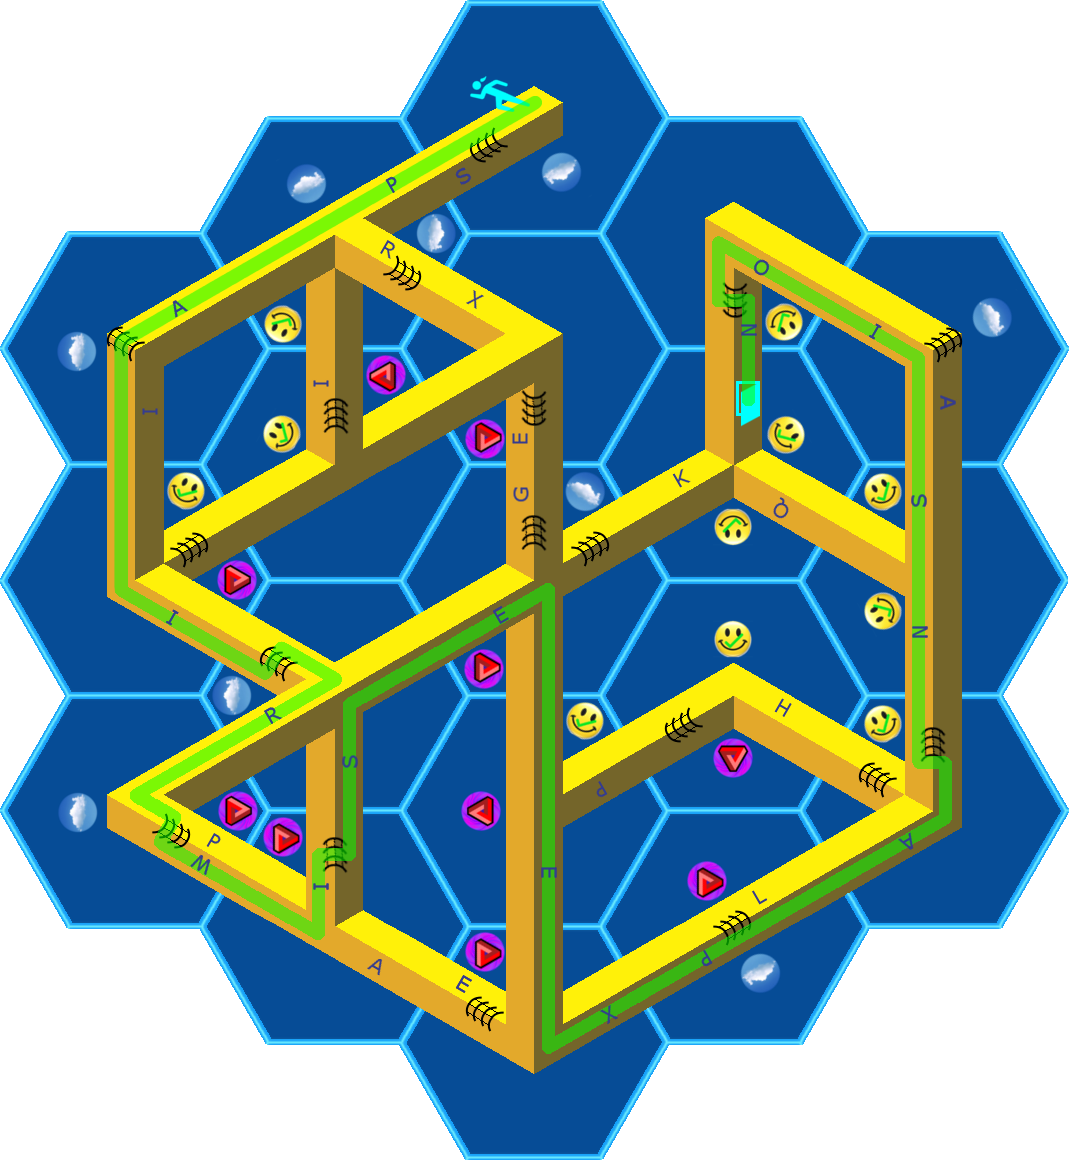
This path crosses some of the letters, tracing out the final answer PAIRWISE EXPANSION.