2.00b Toy Product Design
Let's Play - Toobers!
PCB Assembly 1PCB Overview
Toobers, Assemble!
It's time to begin the process of assembling your Toobers toy into its final housing! Of course, you don't have the housing for your toy just yet, but we can start by taking our prototype toy (the breadboard circuit) and converting it into a more 'finalized' format.
Today's Product
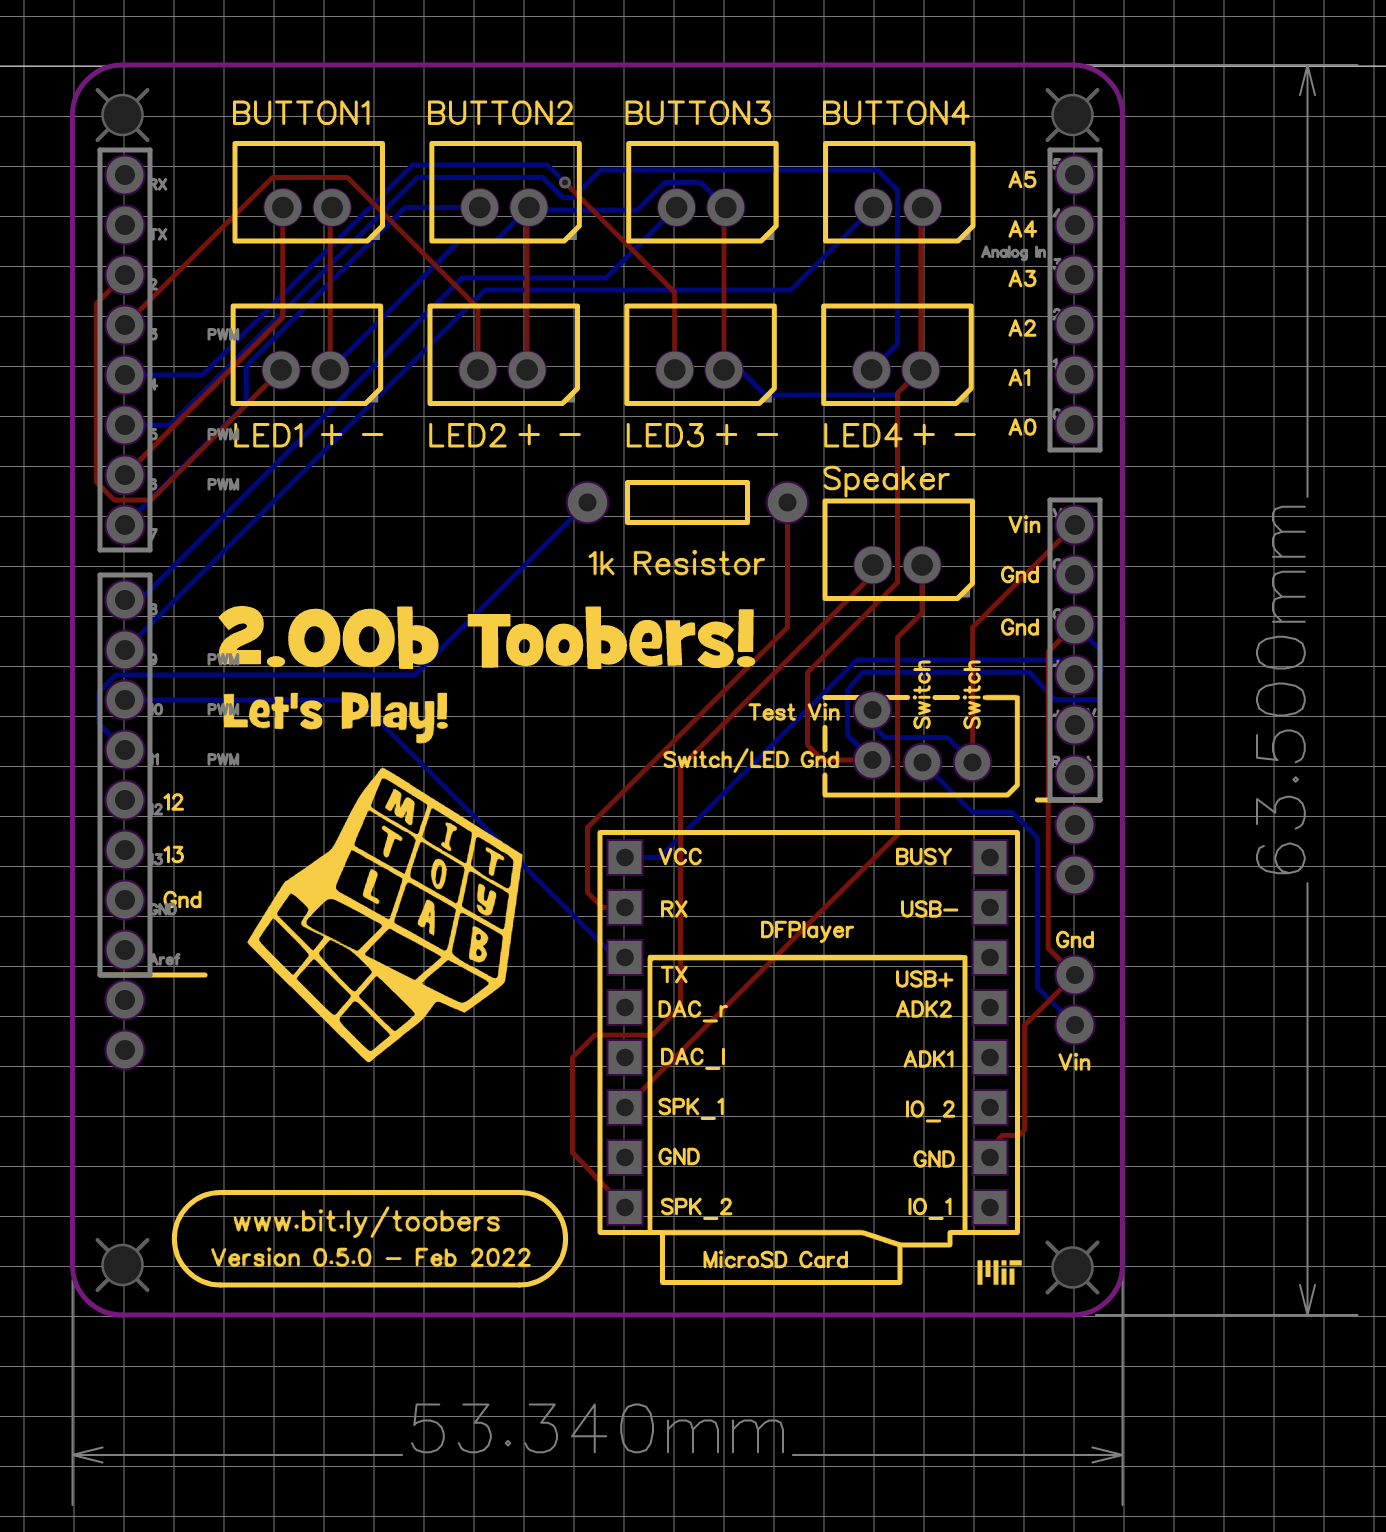
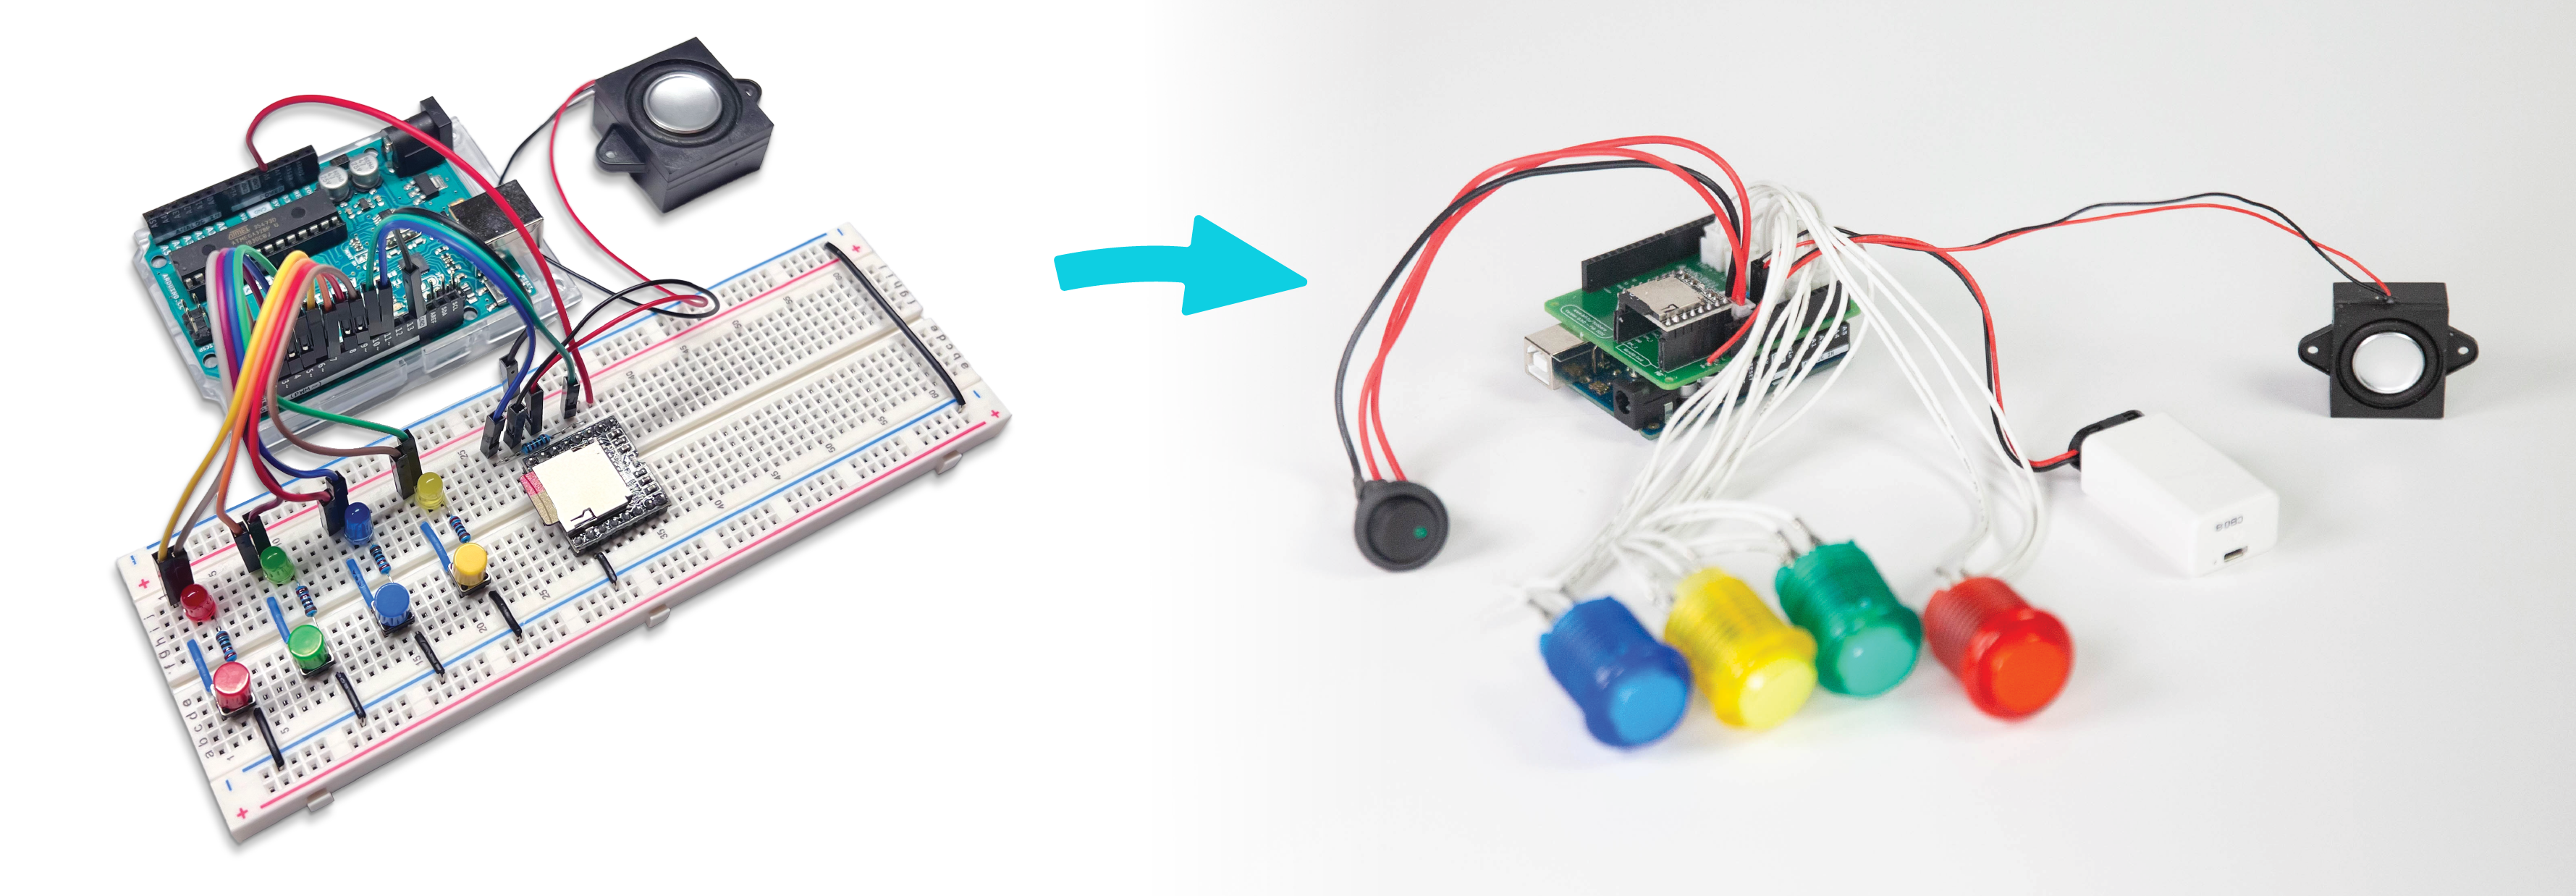
This is what you'll end up with today. This is sometimes known as an Arduino Shield, a printed circuit board (PCB) component that can sit directly ontop of the Arduino. The long leads you see on the PCB go into the Arduino pins, and the board has connectors which allow us to later assemble and connect our components easier. Take a look below at what your end result will be.

Soldering
Soldering is the process of joining different types of metal together by melting a filler material (the solder). Solder is typically made of lead or lead-free alloys (which have low melting-points). We'll discuss the safety of soldering and soldering fumes in a later section.
While soldering and welding both involve melting metal to join two or more work pieces, soldering is different from welding. Unlike welding, soldering does not involve melting the work pieces. In addition to electronics, soldering has applications in plumbing, flashing, metalwork, jewelry, musical instruments, etc.!
Please take a couple of minutes to look at what you have in your new, 'let's keep playing kit' to make sure you have everything as noted in your catalog and that everything makes sense.
The Upgrades!
Before jumping into the hot stuff, let's take a look at what's going to be happening. We'll be condensing the form factor of our current toy into something more manageable. With that, we'll be soldering and permanently attaching parts so that wires and components don't accidentally fall out if the toy is shaken about. And lastly, we'll be making it so our Toobers doesn't use our computer as a power source, by adding a 9v battery (rechargeable!) and a toggle power switch.
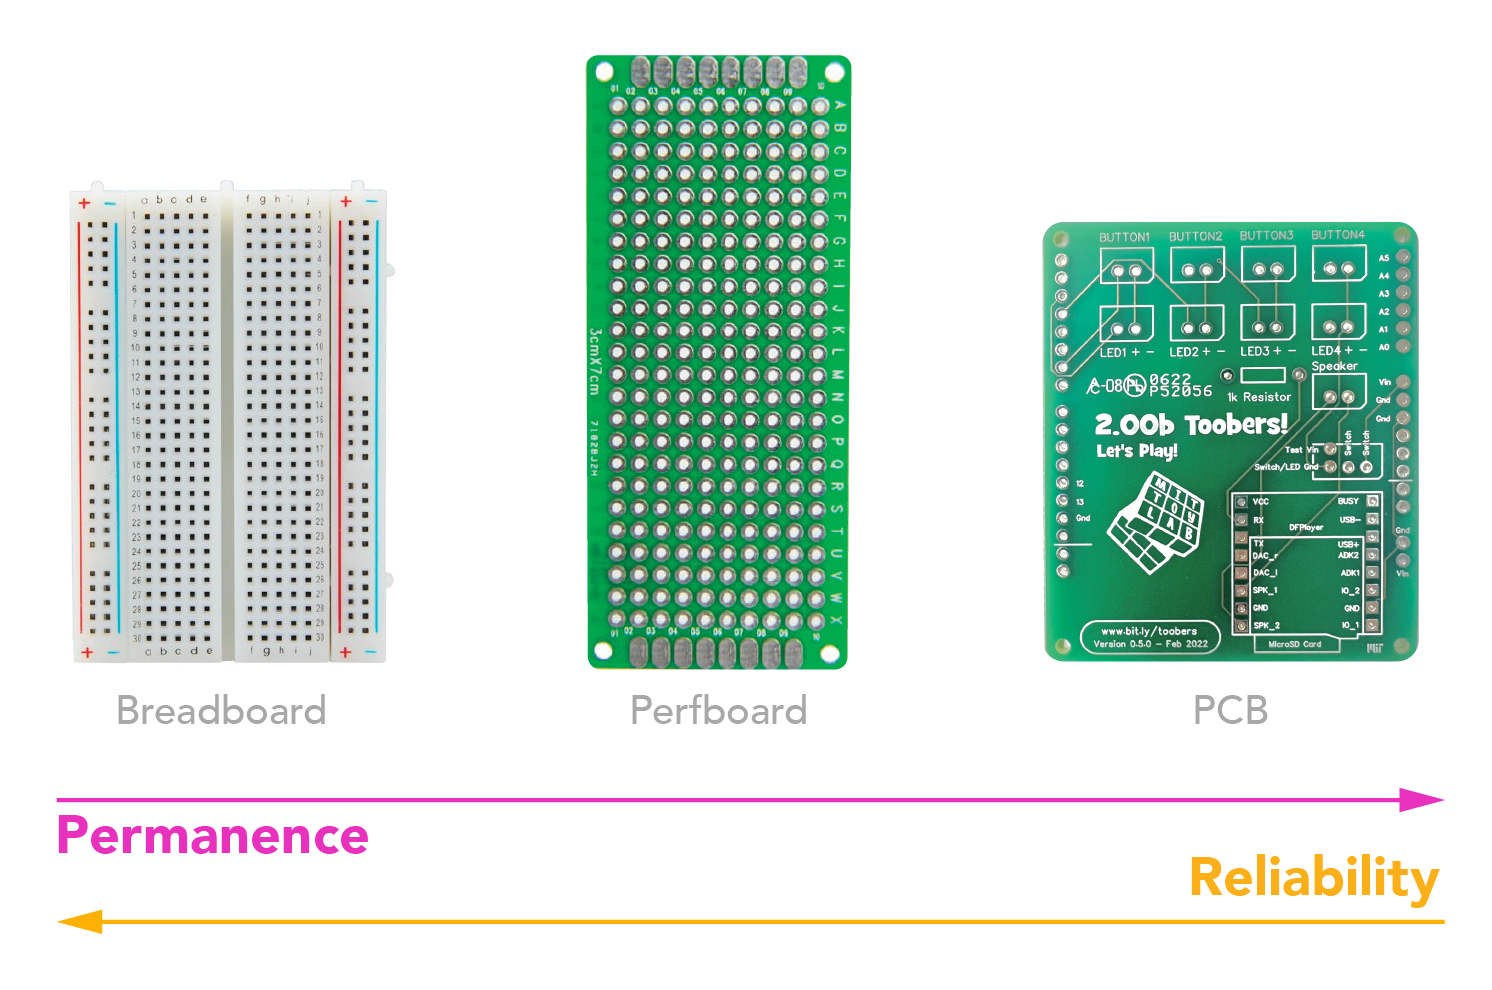
Printed Circuit Board & Perfboards
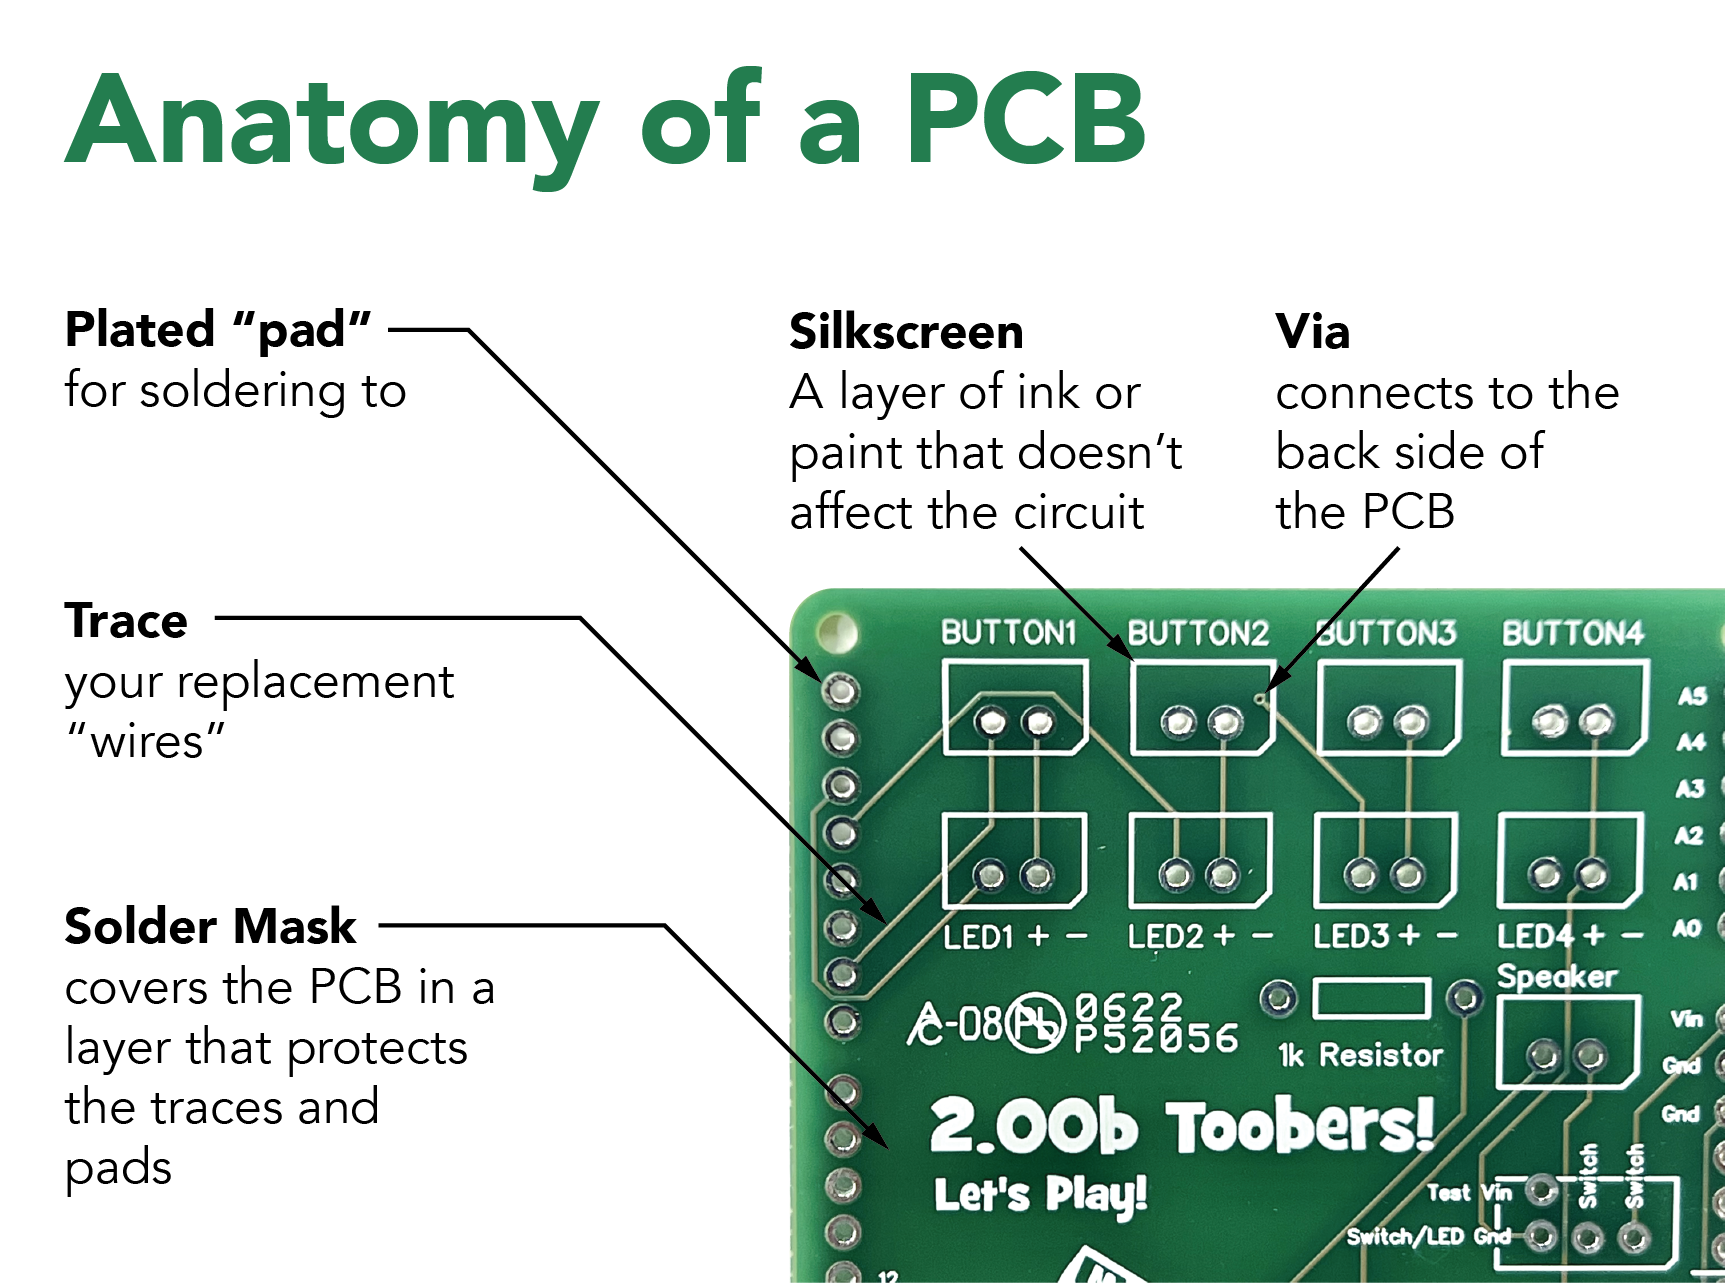
Printed Circuit Boards (or PCBs) are everywhere in our world today. If you're using anything that involves electricity, it's likely that there's a PCB in the device. A PCB forgoes the wires in a breadboard circuit in exchange for traces - the network of conductive paths that make up a printed circuit board and connect the different components. Your components (like resistors, or buttons) are then soldered to this PCB.
While getting a professionally made PCB is relatively cheap and easy nowadays, you may not have a chance to design and make a PCB for this class, as the turnaround & shipping time for a PCB tend to not work very well with the milestones of this class. We also have tools in the PDL that helps with making your PCB, although that can also be time consuming.
So, what do we want to do if we want something more reliable than a breadboarded circuit in our final product? A reasonable solution is a 'perfboard'! A perfboard doesn't have traces, so you'll need to solder your own wires, but it still has the reliability and permanence of a printed circuit board.
Alright, now that we understand that option, back to the PCB. Take a look at the PCB, and take a few seconds to identify all the different components that you'll attach to it. You may notice that we're missing locations for the resistors for the LEDs on the PCBs. That's because the buttons you have are extra special! Each arcade button is actually a button AND a LED with a built-in resistor.
The PCB File
This PCB was made in EasyEDA, a free, online-based PCB design tool. If you're curious, you can download the file here.