


2.00b Toy Product Design
Let's Play - Toobers!
PCB Assembly 3Preparing your Tools & Parts
Charge your 9V Battery
We have these nifty 9V batteries that have a microUSB port to recharge them. These are not alkaline batteries (like most 9V consumer batteries), instead they are lithium ion batteries in a 9V form factor. They hold a significantly more charge, and of course are rechargeable!
Charge the 9V battery in your kit now so you'll be able to use it later once it's time to power up your toy.
Identify your Speaker Connector
Take a look at your speaker! You'll have two different kinds. Please note the kind you have, and the specific connector you'll need later for it.
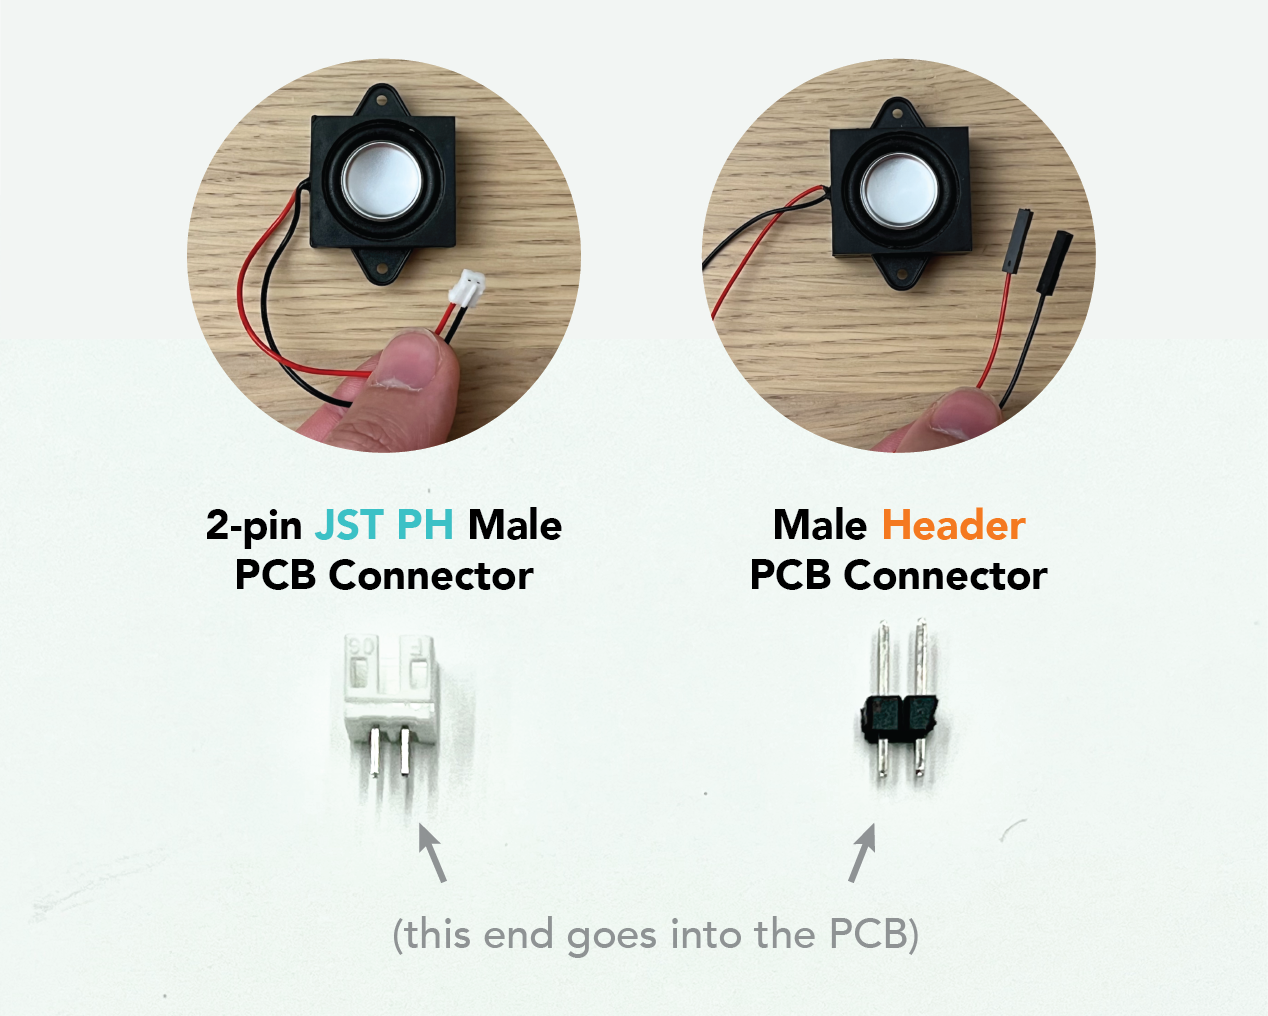
Depending on which speaker connector you have, you'll want to load the appropriate component later. Don't forget this!. If you have the JST PH connector, careful not to confuse it with the JST XH connector (which you have 10 of). The JST PH connector comes in a tiny baggy of separate components.
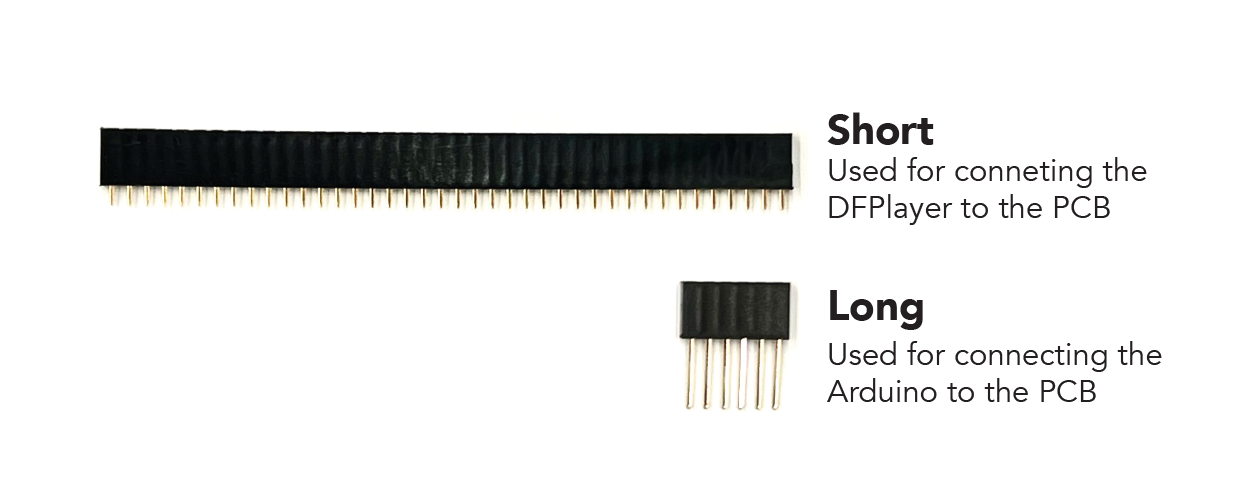
Prepare the SHORT Female Header Pins
These are female header pins. Please note the difference between the LONG and the SHORT ones. Make sure you're cutting the short ones.
Cut the header pins as shown below (make 2 of these). The DFPlayer has 8 pins on each side, so we want to preserve 8 of these pins on the female pin. We need to cut on the 9th pin, because it'll fall out and we'll lose that one.
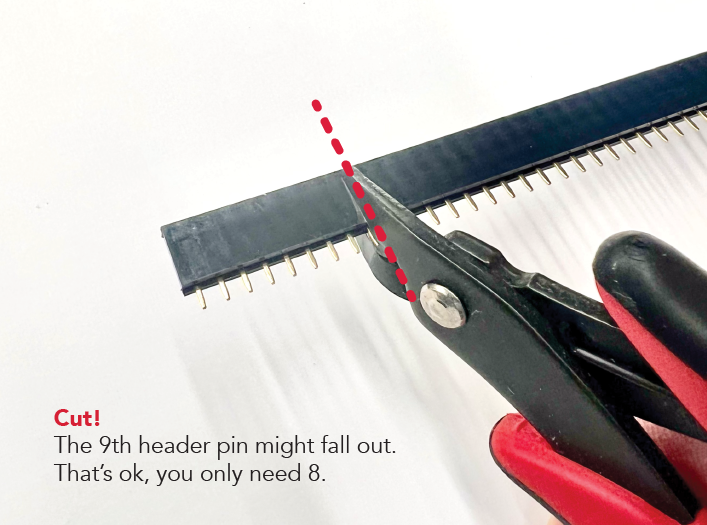
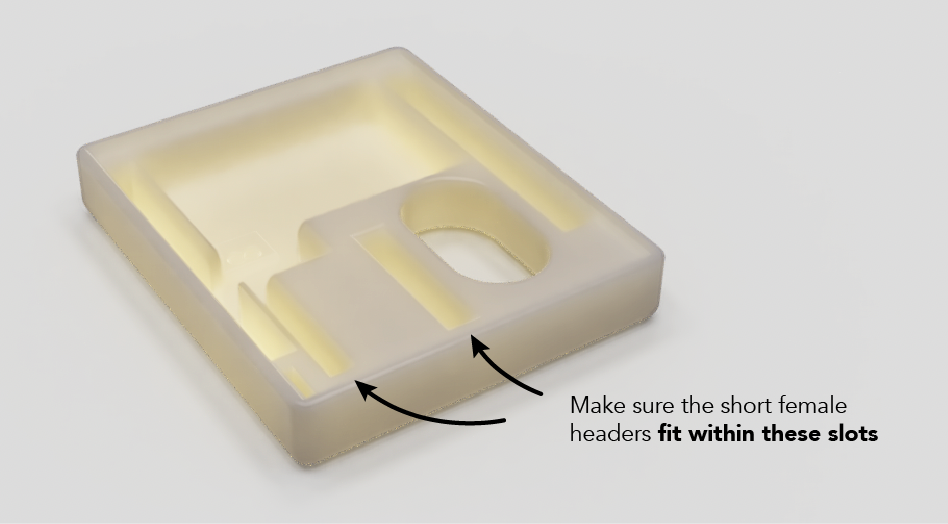
When you're soldering, the female headers will sit into the slots of the jig as shown below. Take a moment to check to make sure the header pins actually fit. If not, you may need to trim off a little more. As you trim, make sure all the pins you need (the 8 pins) stay intact and are not exposed on the side.
Setup your PCB
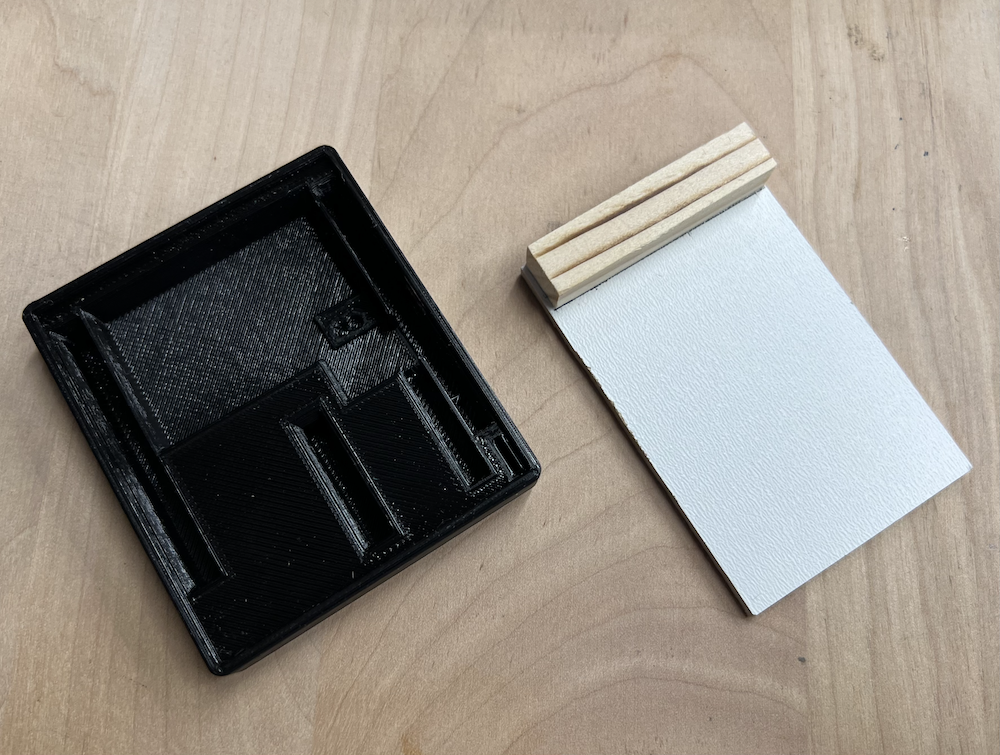
To solder components to this PCB, we've created a simple jig for you to use. It helps us hold the components while we're soldering them to the board. We've 3D printed a jig for you specifically for this project (in the picture on the left), but the wooden one (in the picture on the right) is an example of something quick you could build in a matter of minutes to make your soldering-life easier.
Please do not take these jigs home. We will be reusing these across sections.
Load all of your components onto your PCB!
Collect the parts so they're infront of you, out of their baggies, and within reach. Hold the PCB with one hand, and start placing the components on the PCB.
- 8 x 2-pin JST XH connectors for the buttons
- 1 x 3-pin JST XH connector for the toggle switch
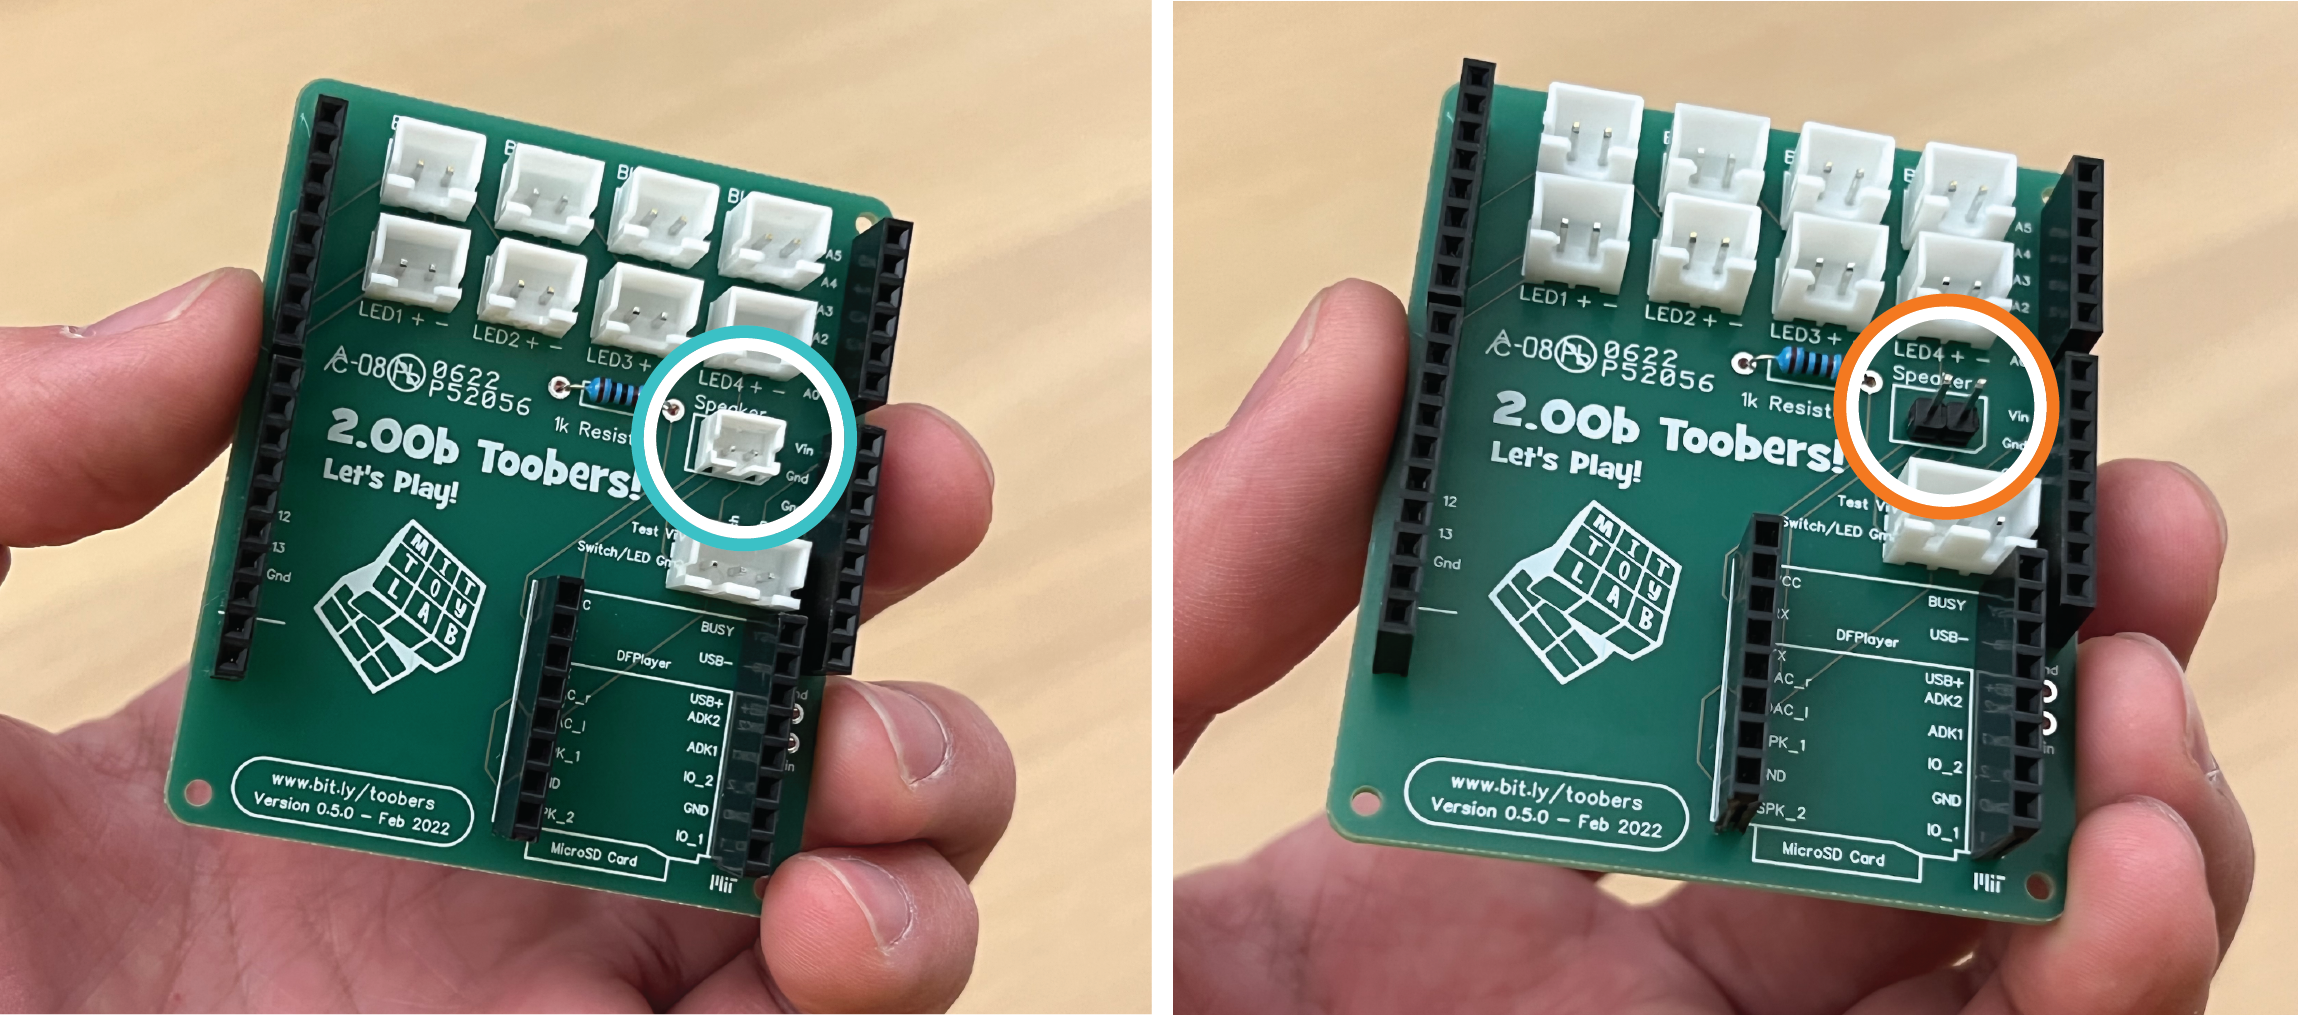
- 1 x speaker connector (as noted above)
- 1 x 1kΩ Resistor
- 2 x SHORT female header pins for the DFPlayers
- 4 x LONG female header pins for attaching to the Arduino
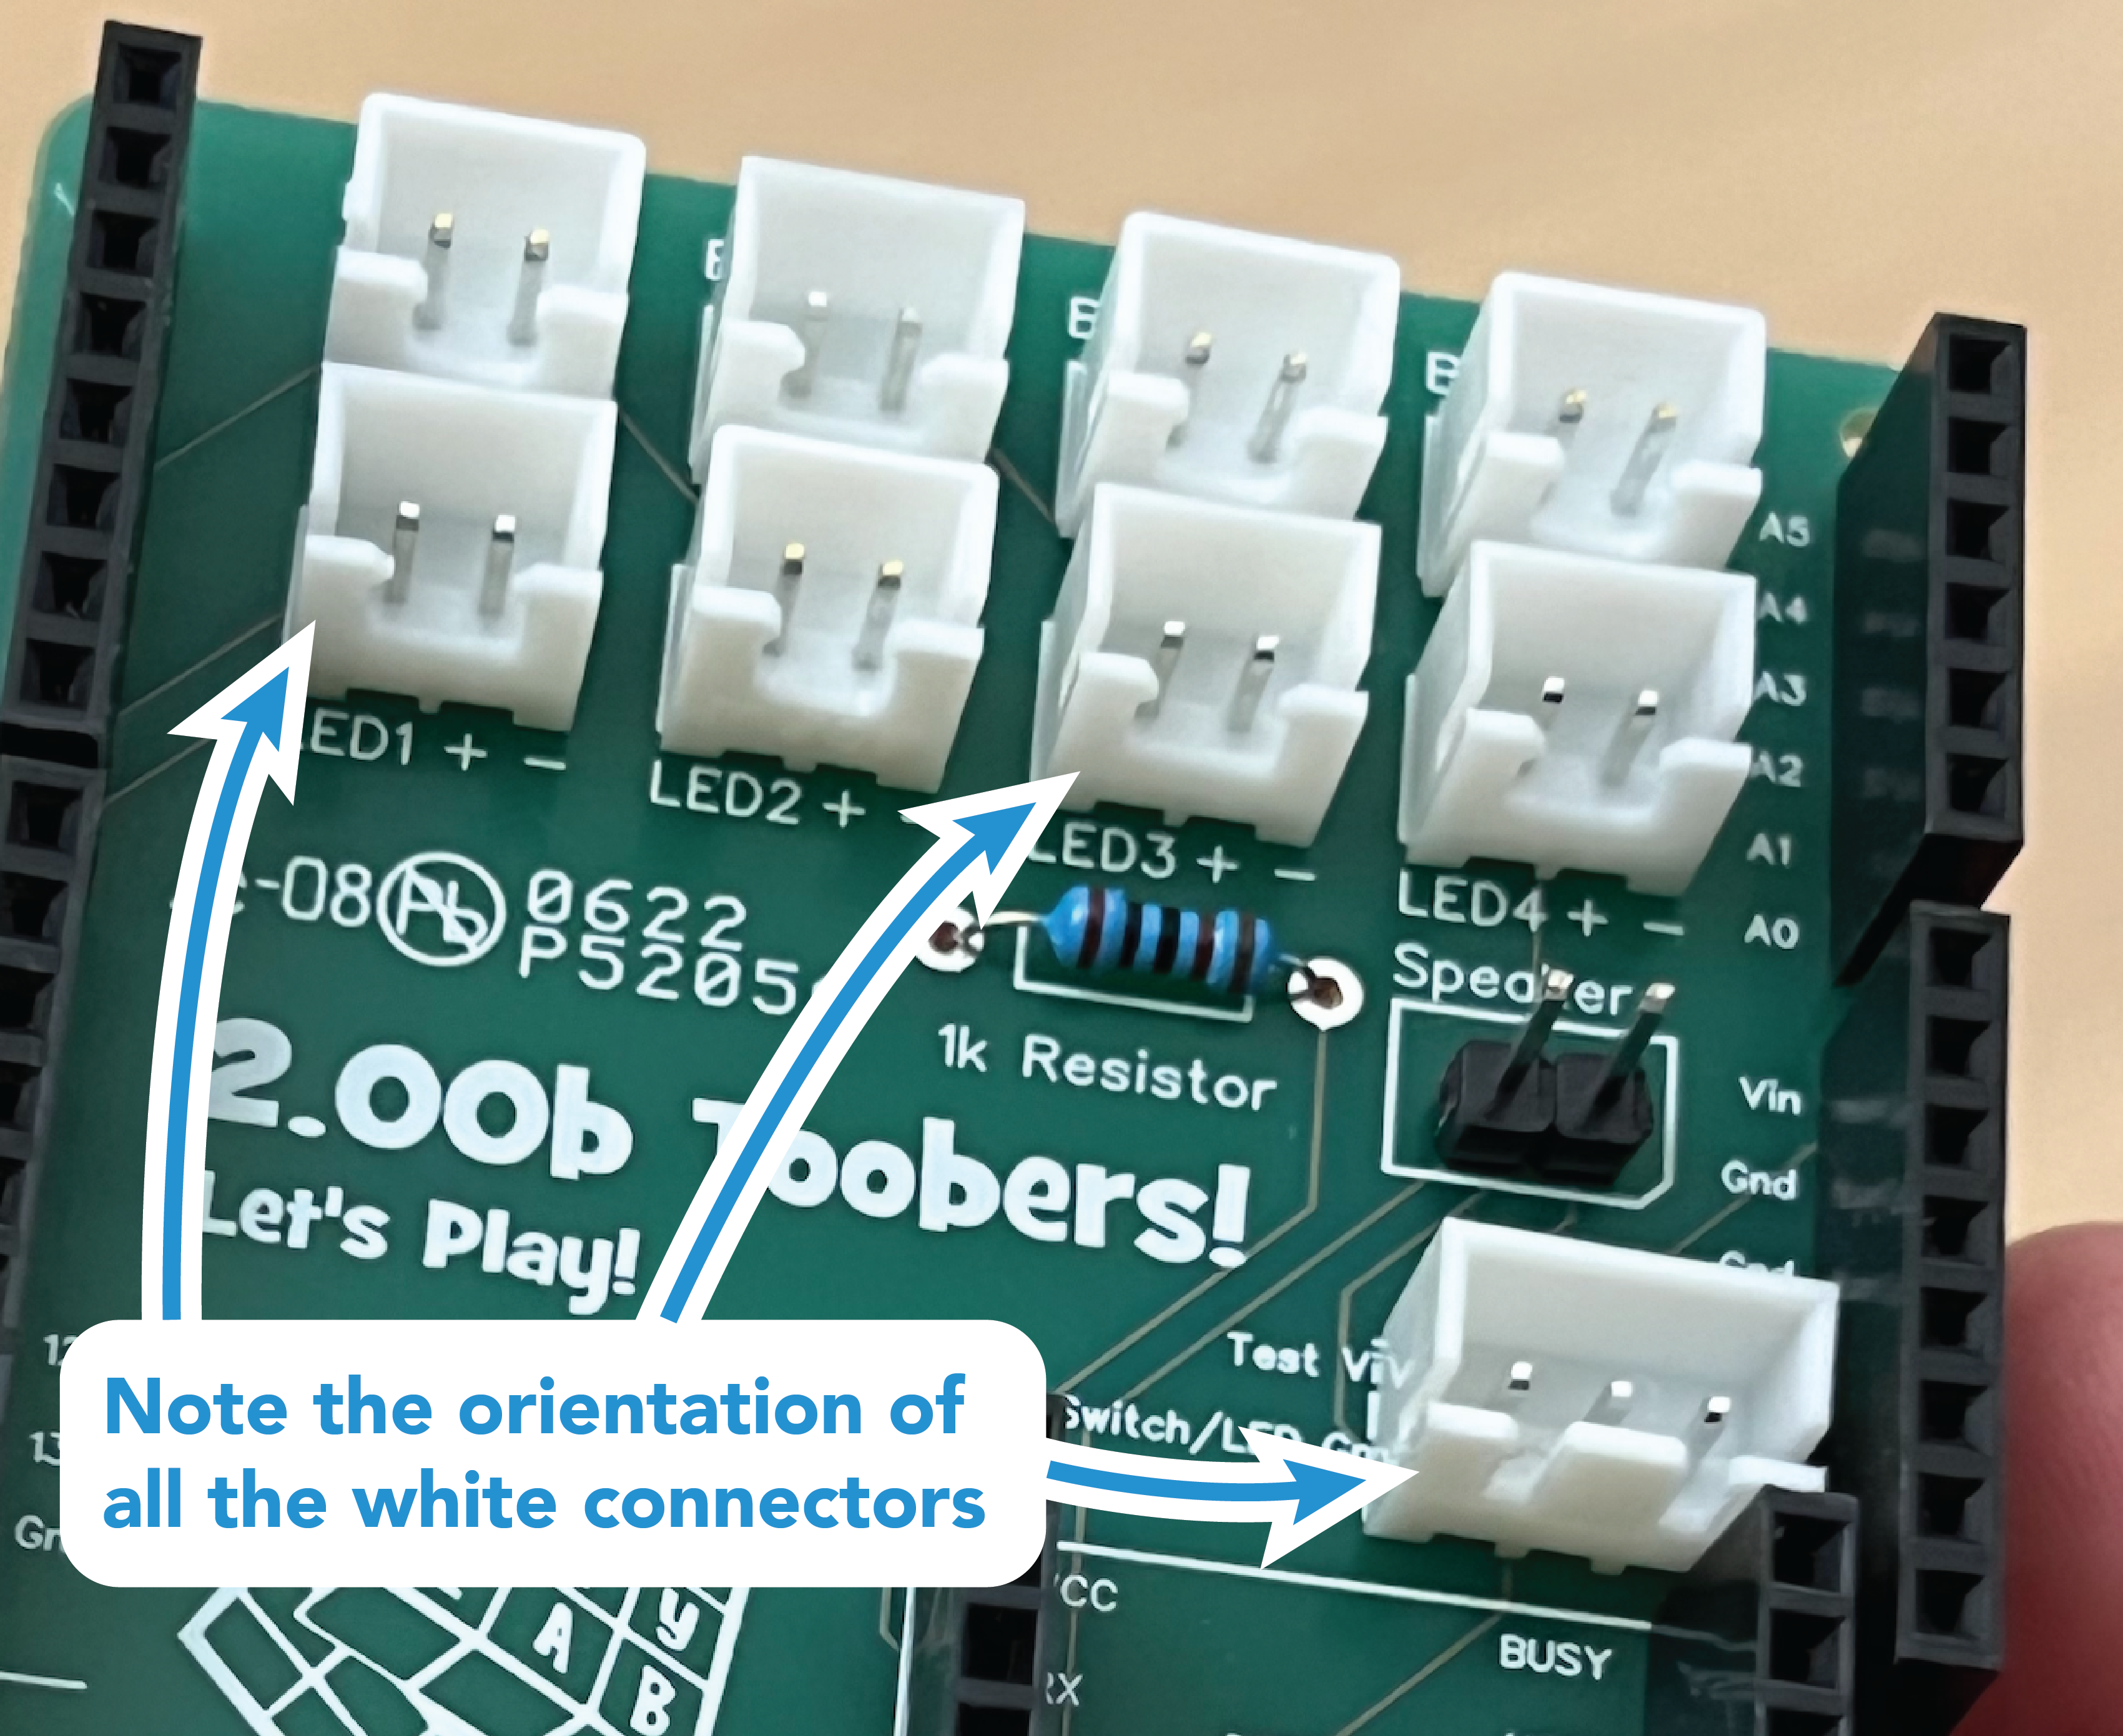
When you're done, it should look like the below (depending on which speaker connector you're using).

Note that your resistor may not be blue in color. Please make sure you pick the 1kΩ resistor.

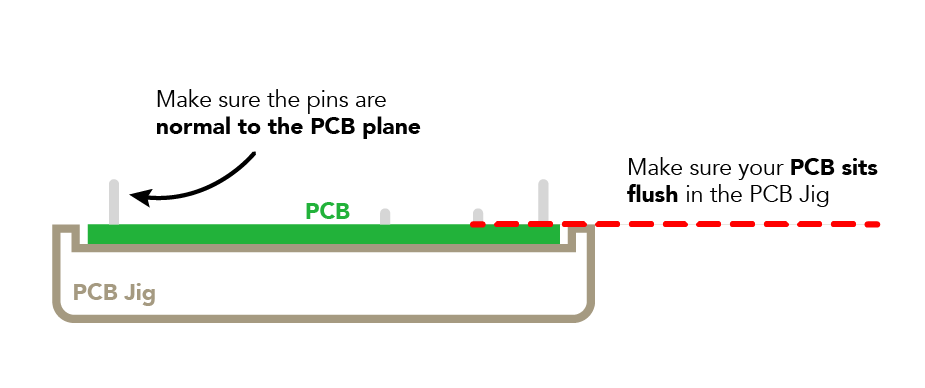
Once you have these all on your PCB, take the soldering jig and place it on it so it captures all your components and the PCB. Once you have that, turn it 180, and it should now see all the contacts exposed and you should be ready to solder!
Once you place the jig on and turned the jig and PCB upside down, you should notice that the pcb sits pretty well with in it. If not, you may need to flip it back and re-adjust some pieces, or check to make sure that the short female header pins are trimmed enough.
Prepare for Soldering
Make sure your table is clear of any unnecessary clutter, and let's get ready to solder!
Turn your soldering iron on. If it has a temperature adjust setting, adjust the temperature of the iron to about 750F (make sure it's in Fahrenheit!)
This should be obvious, but hear me out: the soldering iron is going to be hot 🔥. Not only should you be careful of touching the tip, watch out for accidentally bumping your elbows into someone else's soldering iron (or bumping your soldering iron into someone else!) Ow.
Tinning the Tip
To maintain a good soldering tip, you'll need to clean it periodically. You'll know when it's time to clean your tip when it starts oxidizing, or is no longer as shiny as it once was.
There are two ways to clean the tip. These soldering irons have both of them built into their handy little stand, so it's up to what works for you (or a combination of both).
Wet Sponge
Wet the sponge in the sink. Apply a bit of solder to the tip (if the solder isn't melting, give it a few seconds to heat up.) After a minute or two the iron should be hot enough to steam when touched to the sponge, and you should hear a satisfying sizzling sound. Wipe the tip on the sponge. The goal is to remove old and excess solder from the tip.
Brass Sponge
A brass sponge works much like a regular sponge, except there's no need to worry about the tip becoming cooler as the brass sponge is not wet. Apply a bit of solder to the tip, and then just push your soldering tip up and down into the brass sponge. As with before the goal is to remove old and excess solder from the tip.
Now that your tip is properly tinned, you can start soldering. Periodically while you are working, clean and re-tin the tip. Tinning improves conductivity and makes soldering quicker and easier.