Rocks Cluster Distribution: Users Guide: 
| ||
|---|---|---|
| Prev | Chapter 5. Customizing your Rocks Installation | Next |
The default root partition is 6 GB and the default swap partition is 1 GB. The remainder of the root disk is setup as the partition /state/partition1.
Table 5-1. Compute Node -- Default Root Disk Partition
| Partition Name | Size |
|---|---|
| / | 6 GB |
| swap | 1 GB |
| /state/partition1 | remainder of root disk |
All remaining disk drives will have one partition with the name /state/partition2, /state/partition3, ...
For example, the following table describes the default partitioning for a compute node with 3 SCSI drives.
Table 5-2. A Compute Node with 3 SCSI Drives
| Device Name | Mountpoint | Size |
|---|---|---|
| /dev/sda1 | / | 6 GB |
| /dev/sda2 | swap | 1 GB |
| /dev/sda3 | /state/partition1 | remainder of root disk |
| /dev/sdb1 | /state/partition2 | size of disk |
| /dev/sdc1 | /state/partition3 | size of disk |
 | After the initial installation, all data in the file systems labeled /state/partitionX will be preserved over reinstallations. |
This section describes a simple method in which to change the size of the default root and swap partitions on compute nodes. If more control over the compute partitioning is desired, see the section Customizing Compute Node Disk Partitions.
First, create the file extend-auto-partition.xml.
# cd /home/install/site-profiles/4.1/nodes/ # cp skeleton.xml extend-auto-partition.xml |
Above the <main> section, insert the following two lines:
<var name="Kickstart_PartsizeRoot" val="10000"/> <var name="Kickstart_PartsizeSwap" val="2000"/> |
This will increase the root partition from the default 6 GB to 10 GB and it will increase the swap partition from the default 1 GB to 2 GB.
Then apply this configuration to the distribution by executing:
# cd /home/install # rocks-dist dist |
To reformat compute node compute-0-0 to your specification above, you'll need to first remove the partition info for compute-0-0 from the database:
# rocks-partition --list --delete --nodename compute-0-0 |
Then you'll need to remove the file .rocks-release from the first partition of each disk on the compute node. Here's an example script:
for i in `df | awk '{print $6}'`
do
	if [ -f $i/.rocks-release ]
	then
		rm -f $i/.rocks-release
	fi
done |
Save the above script as /home/install/sbin/nukeit.sh and then execute:
# ssh compute-0-0 'sh /home/install/sbin/nukeit.sh' |
Then, reinstall the node:
# ssh compute-0-0 '/boot/kickstart/cluster-kickstart' |
Create a new XML configuration file that will replace the current auto-partition.xml configuration file:
# cd /home/install/site-profiles/4.1/nodes/ # cp skeleton.xml replace-auto-partition.xml |
Inside replace-auto-partition.xml, add the following section:
<main> <part> / --size 8000 --ondisk hda </part> <part> swap --size 1000 --ondisk hda </part> <part> /mydata --size 1 --grow --ondisk hda </part> </main> |
This will set up an 8 GB root partition, a 1 GB swap partition, and the remainder of the drive will be set up as /mydata. Additional drives on your compute nodes can be setup in a similar manner by changing the --ondisk parameter.
In the above example (aside from the <part> and </part> tags), the remaining syntax follows directly from Red Hat's kickstart. For more information on the part keyword, see Red Hat Enterprise Linux 4: System Administration Guide
 | User-specified partition mountpoint names (e.g., /mydata) cannot be longer than 15 characters. |
If you would like to use software RAID on your compute nodes, inside replace-auto-partition.xml add section that looks like:
<main> <part> / --size 8000 --ondisk hda </part> <part> swap --size 1000 --ondisk hda </part> <part> raid.00 --size=10000 --ondisk hda </part> <part> raid.01 --size=10000 --ondisk hdb </part> <raid> /mydata --level=1 --device=md0 raid.00 raid.01 </raid> </main> |
If the user-specified partitioning scheme is not currently configured on an installing compute node, then all the partitions on the compute node will be removed and the user-specified partitioning scheme will be forced onto the node.
If the user-specified partitioning scheme is currently configured on an installing compute node, then all the partitions on the node will remain intact and only the root partition will be reformatted.
| If you change the partitioning scheme, all partitions will be removed and reformatted. |
Then apply this configuration to the distribution by executing:
# cd /home/install # rocks-dist dist |
To reformat compute node compute-0-0 to your specification above, you'll need to first remove the partition info for compute-0-0 from the database:
# rocks-partition --list --delete --nodename compute-0-0 |
Then you'll need to remove the file .rocks-release from the first partition of each disk on the compute node. Here's an example script:
for i in `df | awk '{print $6}'`
do
	if [ -f $i/.rocks-release ]
	then
		rm -f $i/.rocks-release
	fi
done |
Save the above script as /home/install/sbin/nukeit.sh and then execute:
# ssh compute-0-0 'sh /home/install/sbin/nukeit.sh' |
Then, reinstall the node:
# ssh compute-0-0 '/boot/kickstart/cluster-kickstart' |
This procedure describes how to force a compute node back to the default Rocks partitioning scheme regardless of the current state of the disk drive on the compute node. See Default Partitioning for a description of the Rocks compute node default partitioning scheme.
Create a new XML configuration file that will replace the current auto-partition.xml configuration file:
# cd /home/install/site-profiles/4.1/nodes/ # cp skeleton.xml replace-auto-partition.xml |
Inside replace-auto-partition.xml, add the following section:
<main> <part> force-default </part> </main> |
Then apply this configuration to the distribution by executing:
# cd /home/install # rocks-dist dist |
To reformat compute node compute-0-0 to your specification above, you'll need to first remove the partition info for compute-0-0 from the database:
# rocks-partition --list --delete --nodename compute-0-0 |
Then you'll need to remove the file .rocks-release from the first partition of each disk on the compute node. Here's an example script:
for i in `df | awk '{print $6}'`
do
	if [ -f $i/.rocks-release ]
	then
		rm -f $i/.rocks-release
	fi
done |
Save the above script as /home/install/sbin/nukeit.sh and then execute:
# ssh compute-0-0 'sh /home/install/sbin/nukeit.sh' |
Then, reinstall the node:
# ssh compute-0-0 '/boot/kickstart/cluster-kickstart' |
After you have returned all the compute nodes to the default partitioning scheme, then you'll want to remove replace-auto-partition.xml in order to allow Rocks to preserve all non-root partition data.
# rm /home/install/site-profiles/4.1/nodes/replace-auto-partition.xml |
Then apply this update to the distribution by executing:
# cd /home/install # rocks-dist dist |
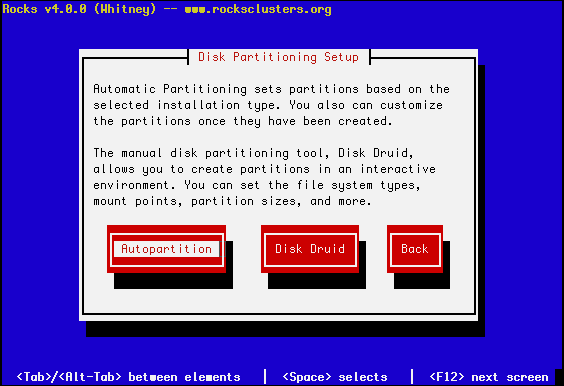
This procedure describes how to force a compute node to always display the manual partitioning screen during install. This is useful when you want full and explicit control over a node's partitioning.
Create a new XML configuration file that will replace the current auto-partition.xml configuration file:
# cd /home/install/site-profiles/4.1/nodes/ # cp skeleton.xml replace-auto-partition.xml |
Inside replace-auto-partition.xml, add the following section:
<main> <part> manual </part> </main> |
Then apply this configuration to the distribution by executing:
# cd /home/install # rocks-dist dist |
The next time you install a compute node, you will see the screen:
To interact with the above screen, from the frontend execute the command:
# ssh compute-0-0 -p 2200 |
Then, to manually partition the node, select Disk Druid.