Shingling Robot
Overview
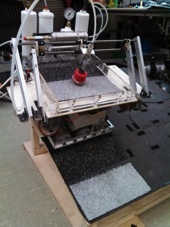
- The robot was designed to place shingles on a mock roof for CMU's Mechatronics class.
- During the class competition, the robot was placed in a corner and then had to autonomously navigate and put down all of the shingles.
- The robot was limited to a size of 2' x 3' x 2' and needed to place 7 to 14 shingles in less than 3.5 minutes.
- Additionally self imposed constraints were added by the team including having on board power and the ability to shingle the entire roof (rather than just the required lower half).
Forming Concepts & Brainstorming
- After the challege was presented, the team worked out different concepts and strategies.
- Should the robot:
- Deposit the shingles under the robot or pick and place them with pneumatics or grippers?
- Just be a long arm or a drivetrain? What kind of drivetrain?
- How many shingles should the robot place at a time? How can the robot store all of the shingles?
- In selecting our strategy, we strongly considered how the robot would work on a real rooftop.
Strategy & Overall Concept
- We decided on a robot that would be able to shingle the entire mock roof and would resemble a robot that could be placed on standard house rooftop.
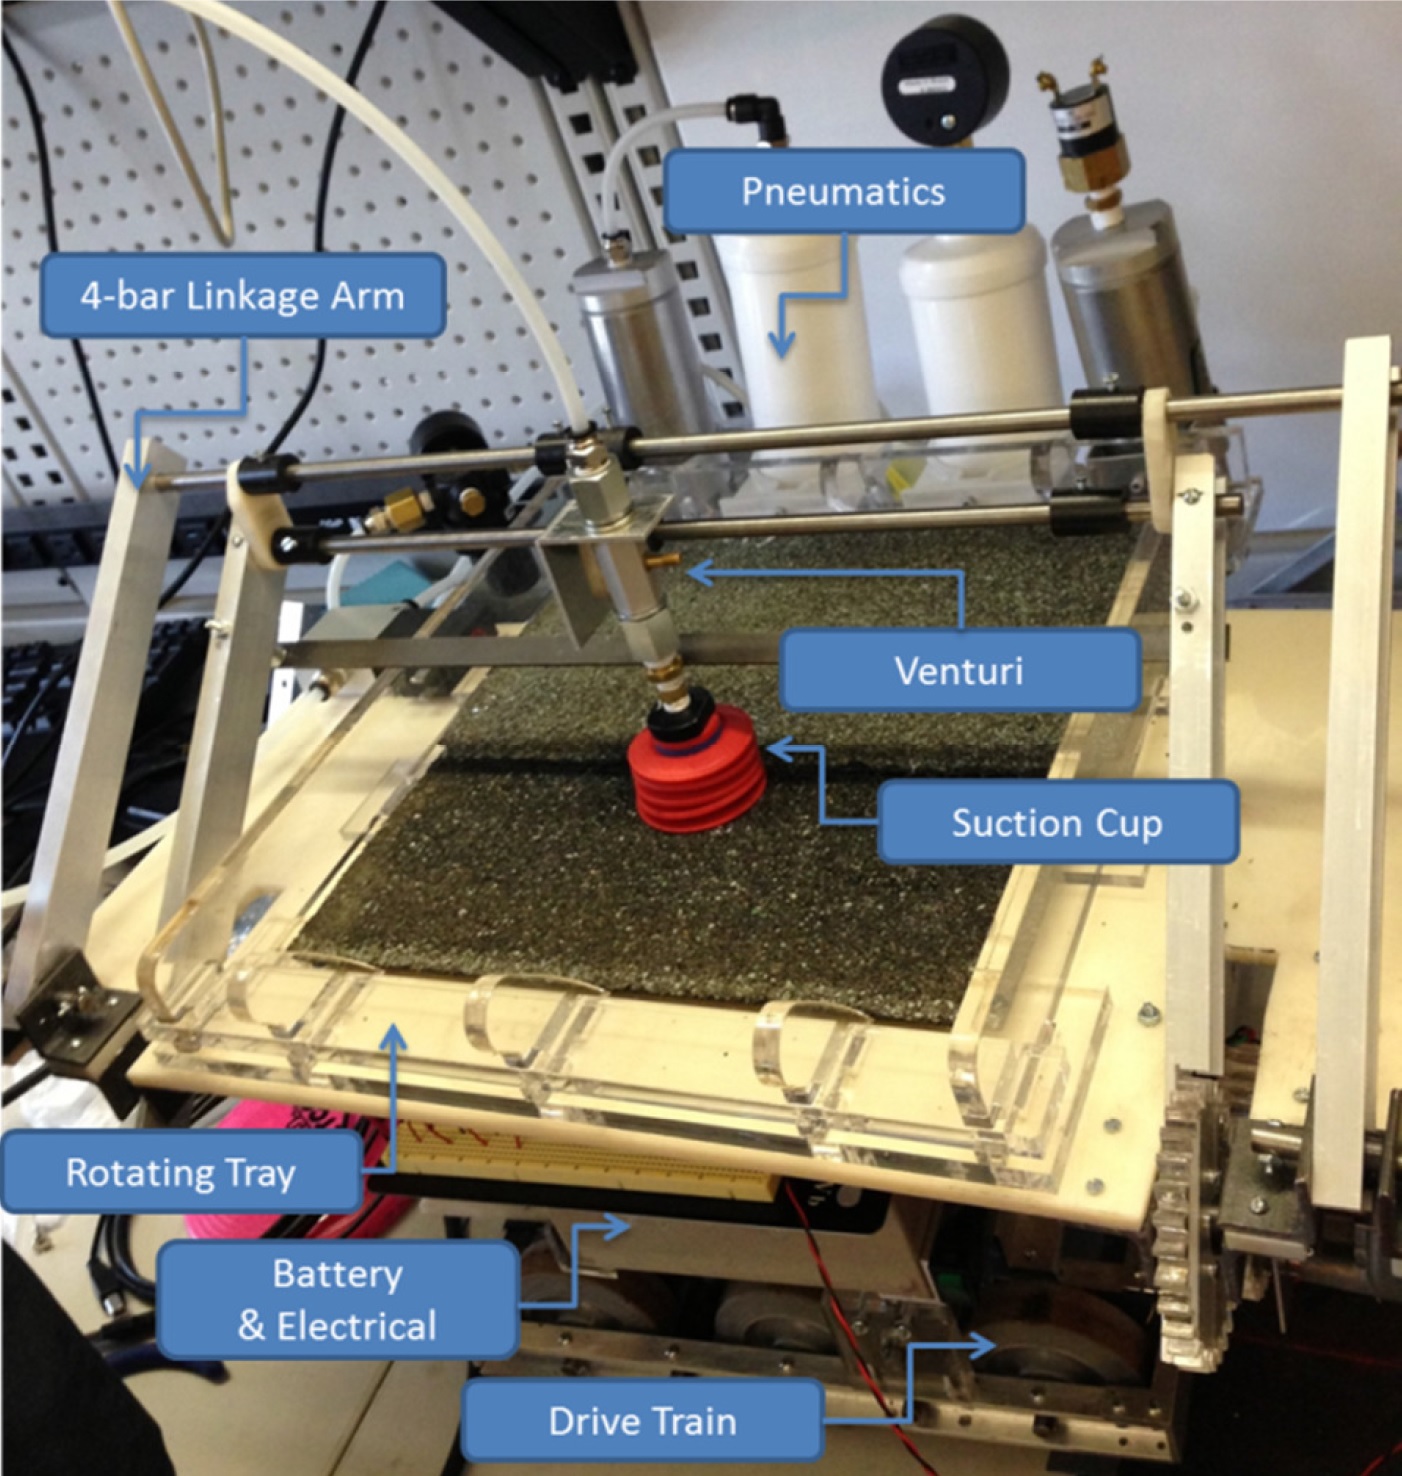
- Arm: four bar linkage to pck and place the shingles.
- Drivetrain: 6 wheel drive for good grip and maneuverability.
- Power: Onboard batteries for electrical components. Onboard compressor for pneumatics.
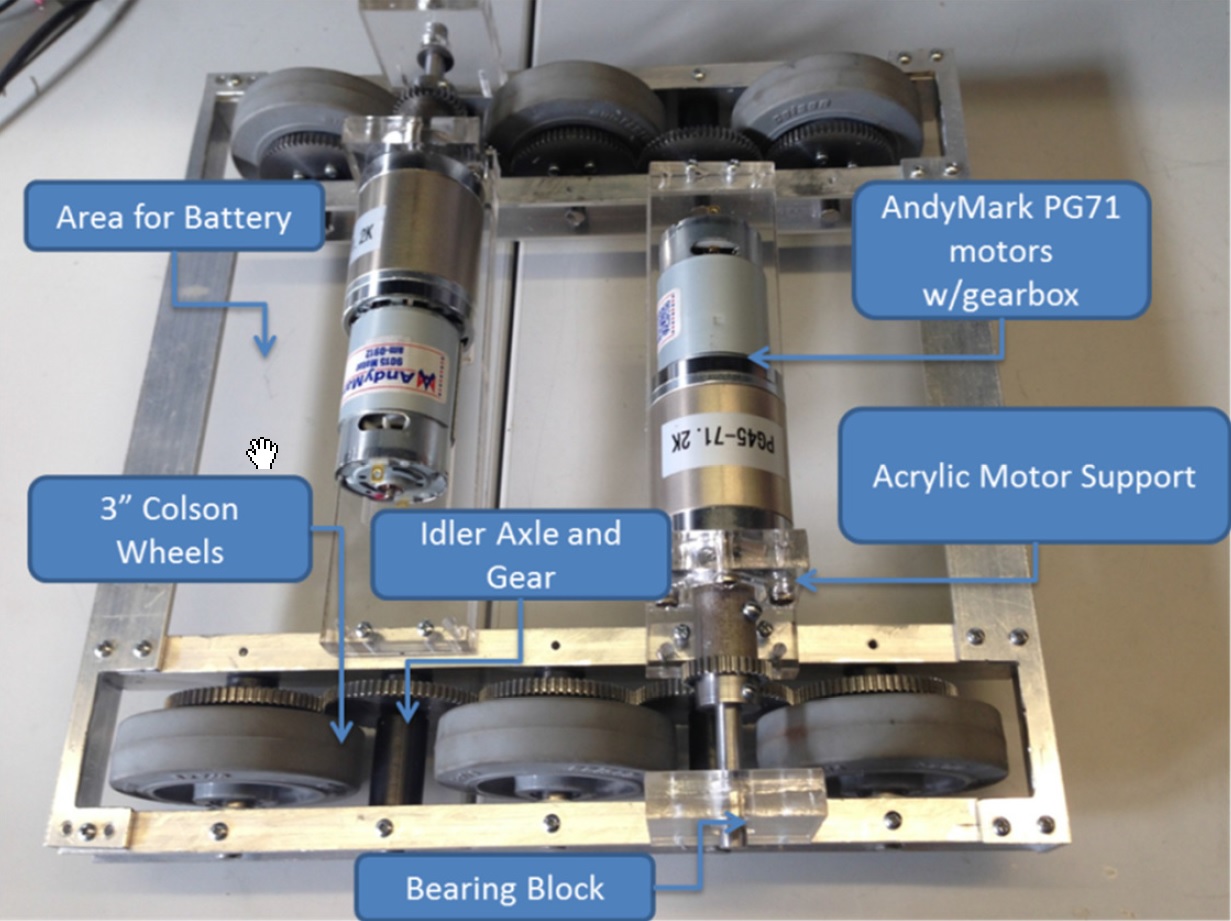
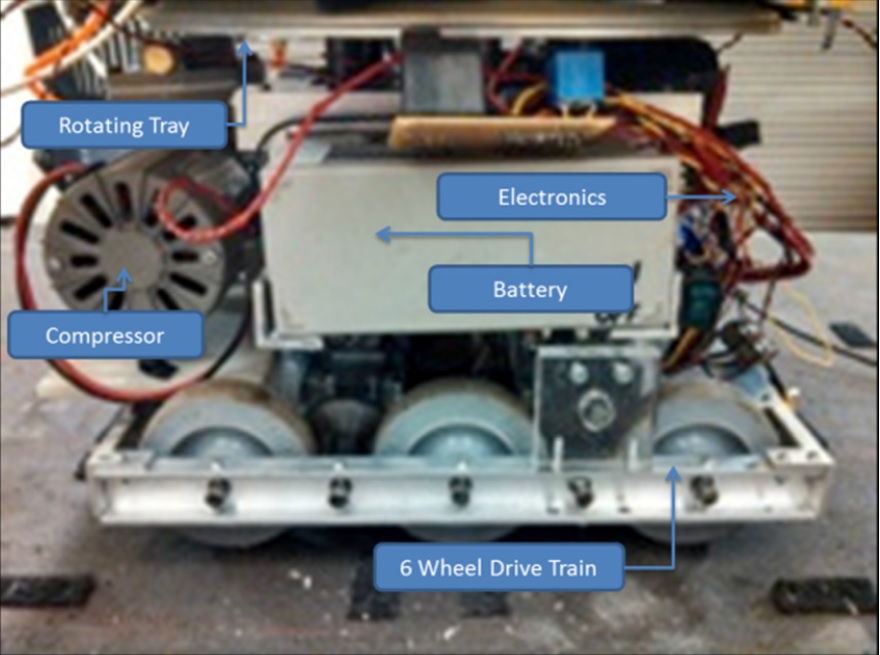
Drivetrain
- The drivetrain consisted of six small diameter colson rubber wheels with an AndyMark motor controlling each set of three wheels.
- A series of gears on each side connected the wheels together to allow for skid-steer control.
- Additionally, the middle wheel was slightly lowered to allow for better turning.
- Wheel encoders were attached to each motor shaft to allow for estimated location and position control.
- Edge detection sensors were mounted on the front and back of the robot so that it can sense the edges of the rooftop.
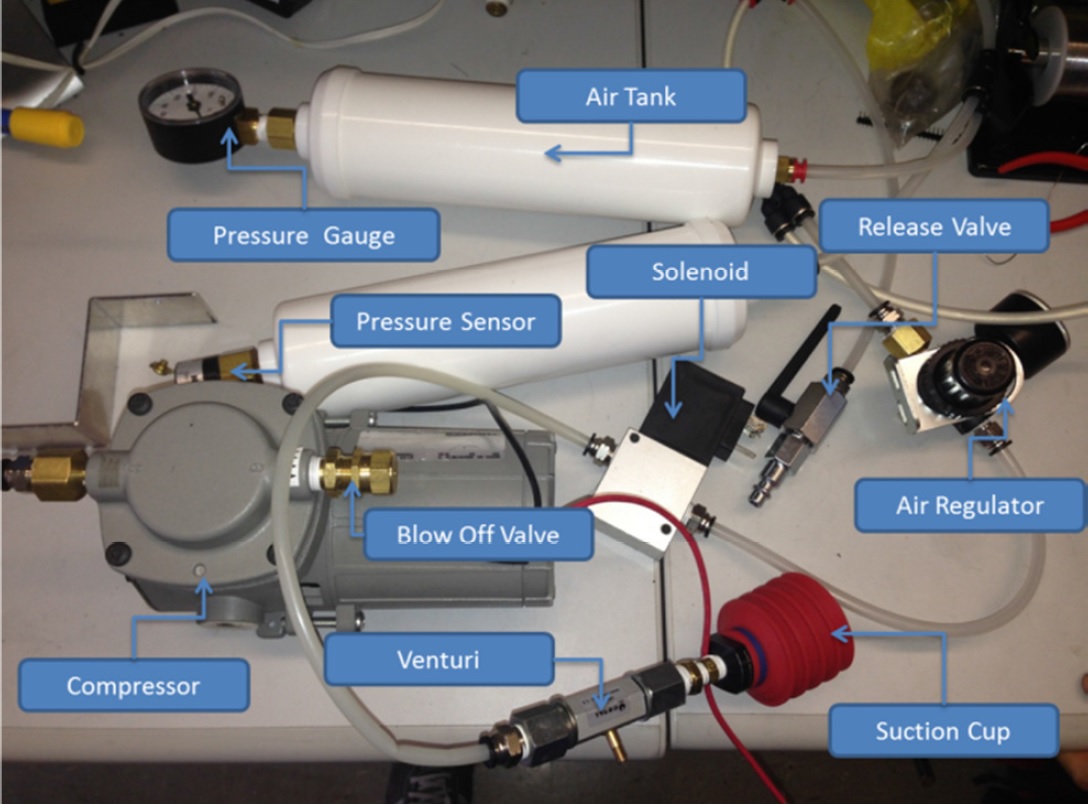
Pneumatics and Suction
- A suction cup with an attached venturi was used to pick up the shingles. This allowed the robot to easily lift, control, and release the shingles from above.
- The air for the venturi was stored in five lightweight air tanks and replenished via an on-board compressor that activated when a pressure sensor indicated that pressure was close to the limit for securely lifting a shingle.
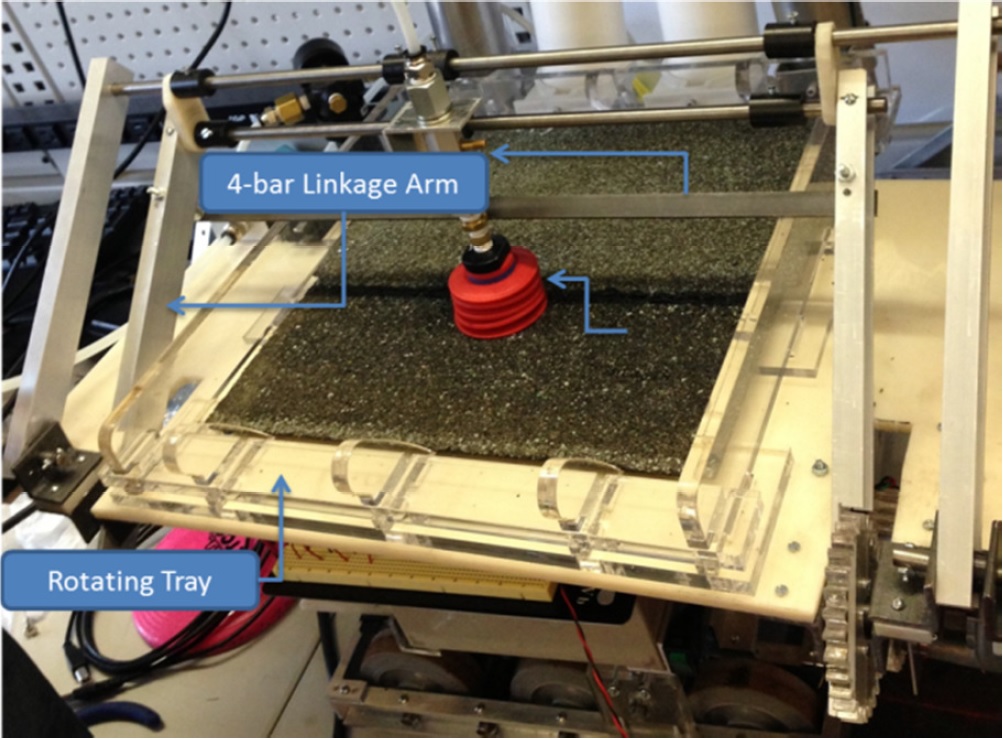
Shingle Moving
- A four bar linkage system was used to move the shingles. This allowed the face of the suction cup to come down parallel to the face fo the shingle and also place it flat on roof.
- The four bar was connected to a series of gears attached to a motor that was used to move the four bar linkage backwards.
- The design overcame the issue of a singularity in the four bar by creating resistance in the outside link while simultaneously driving the inside link.
- The entire system rested on a lazy susan that was controlled via a window motor. This allowed the robot to place more efficiently, be less dependent on the drivetrain for positioning, and could be particularly useful in a real world environment.
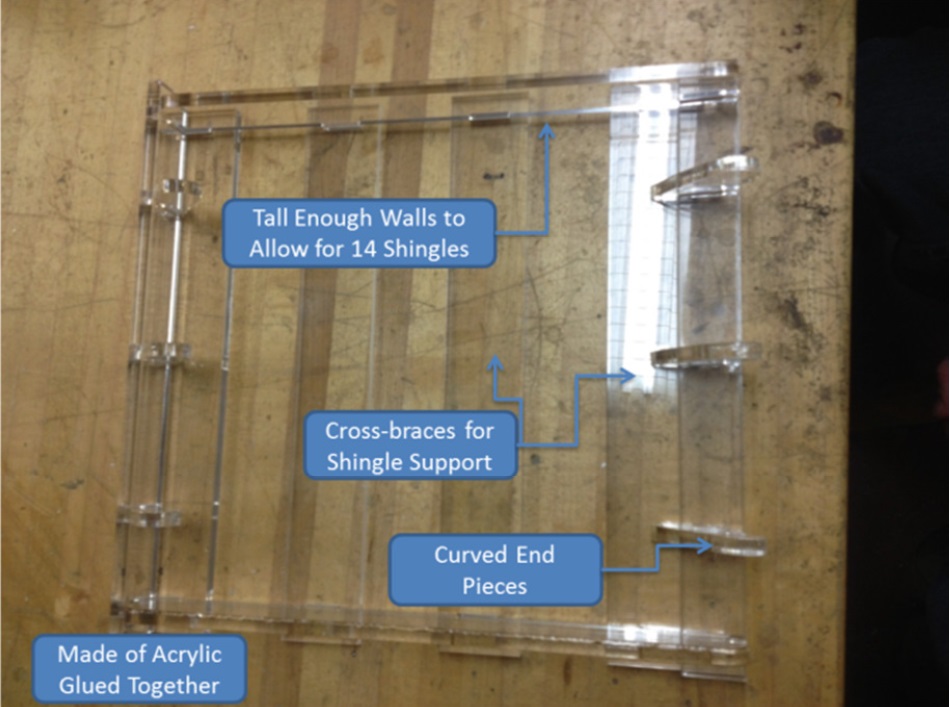
Tray and Shingle Holder Rotation System
- A tray, with curves matching the path of the arm, was created to hold the shingles so that the arm would pick up the shingles at the same point everytime.
- A disk with tabs was attached to the bottom to allow for a break sensor to measure the rotation via the lazy susan.
Electrical
- The electrical system was powered via two 12V 9Ah batteries that were mounted on either side fo the robot.
- The 18Ah of power allowed for long periods of testing in between recharging cycles and would allow the robot to place many shingles on an actual roof.
- The motors were controlled via an H-bridge while the compressor and solenoid for the the pneumatics were controlled using relays.
- An Arduino microcontroller was use to control everything onboard.
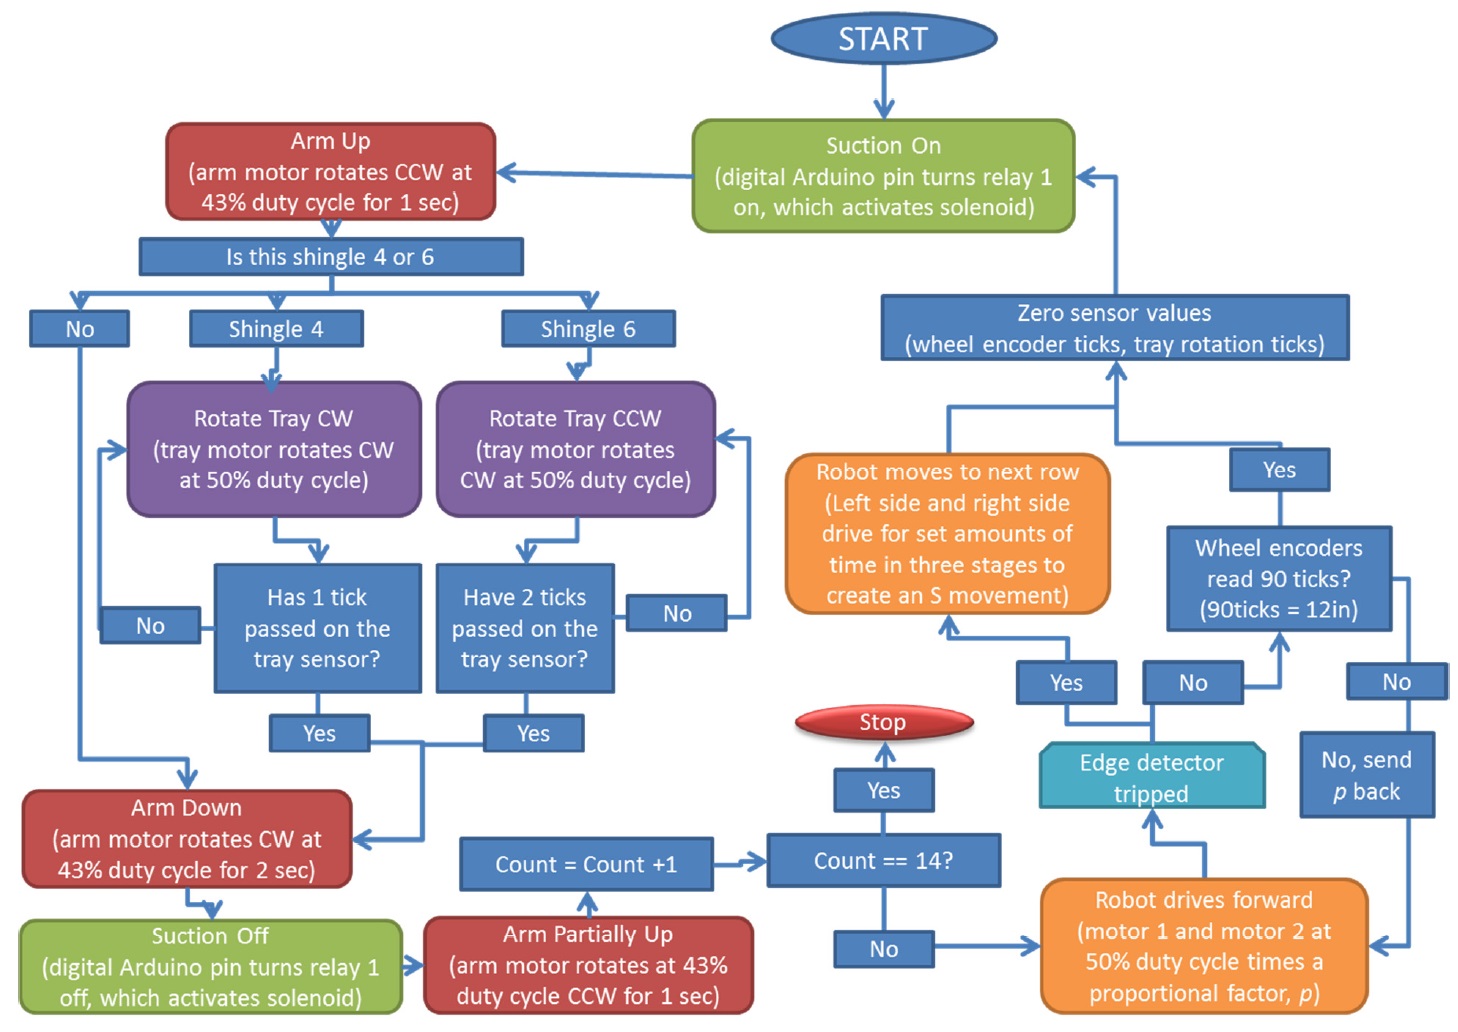
Programming
- The robot was designed to function autonomously once it was placed on the rooftop.
- The robot was controlled via Arduino and followed a predetermined set of motions.
- Sensors were used to ensure the robot was driving in the correct paths, that the arm and rotating tray were moving to the proper points, and that the pneumatic pressure was at the right level.
- Additionally, sensors were used to detect the edge of the rooftop in order to know when to move to the next row and restarted the shingling process.
Performance/Conclusion
- The robot was able to successfully place shingles along the roof and placed second in the class competition.
- The arm was very fast and efficient at placing shingles, but was slightly less precise than some others.
- The drivetrain was very powerful and smoothly drove over the shingles and positioned the robot effectively.
- In the future, it would be beneficial to add more precise end effecter control to the robot for small adjustments in shingle position
and develop a holder that can store more shingles.