Building a Calibrated Daylighting Model
Background Material: DH-II chapters 10 and 12 (upcoming) | MIT lecture: Daylight Simulations, Light and Matter
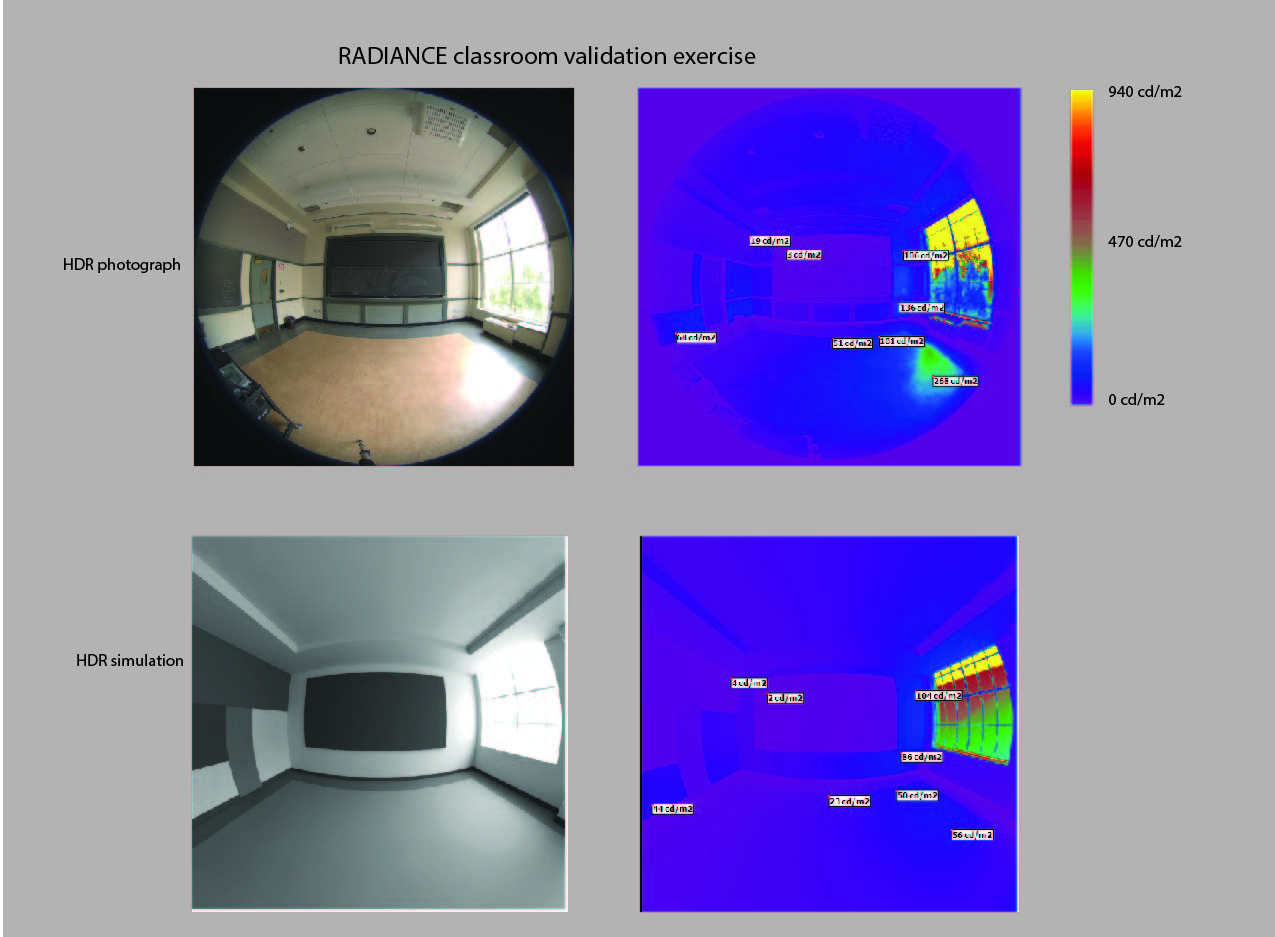
The goal of this assignment is to build a “calibrated” daylighting model of an existing daylit, space such as your study space from the Daylit Area Study, and to match your daylight simulations against HDR photographs of that space. The figure below shows a successful calibration exercise by Manos Saratsis and Irmal Turan of a classroom at MIT. To get such close correspondence between measurement and simulation, several steps are required.
1. Build a scene model To get started you need to building a true geometric CAD model of your test space following the Simulation checklist from the DH-II chapter 10.
2. Run Daylight Simulation If you are planning to use DIVA/Radiance for the daylight simulations, you need to import your CAD model from step 1 into a Rhinoceros file and run a daylight simulation of your scene following the DIVA Tutorial 01 - Visualizations tutorial.
3. Model Calibration The visualization from step 2 and your HDR image of the scene may initially be considerably different. As a first calibration step, you need to adjust the view point in the simulation to match that from which the HDR image was taken. The next step is to match the date, time and sky condition from the simulation to when the photograph was taken. Finally, you may need to adjust the settings of your scene materials to the ones of the actual space as described in the DH-II chapter 12 as well as in the MIT Light and Matter lecture notes.