|
|
home | project | blog | media |
|
week | 1-2 | 3-4 | 5-6 | 7-8 | 9-10 | 11 | week threeMonday 6/8 - Thursday 6/11: debugging paper flowers I messed around with the input resistor and it turns out the original value was way too high. I also added an extra resistor to prevent the battery from running too much current. I've gotten the flower to open and close using battery power when the input is set low. Using the original mechanism, the flower is normally open and moves only about a centimeter at most. One reason is that the petals are made of cardstock which may simply be too stiff. I improved my second (white) flower using pages from my notebook. I also changed the mechanism so that it is normally closed and only opens up when current runs through the memory wire. This time the flower clearly opens and closes! 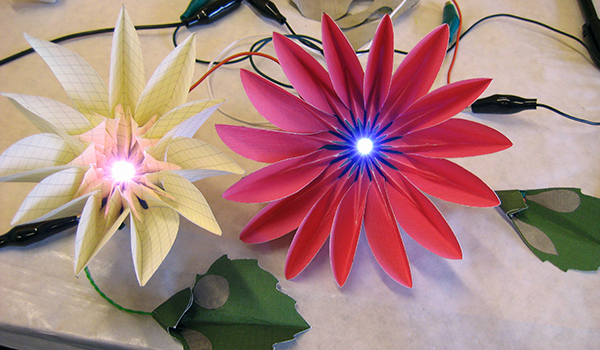 The leaf connected to each flower actually hides a power switch which both connects the battery to the transistor and turns on the LED in the center of the flower. The little metal patches on the leaves are actually pads for charging the Li battery inside the base. I connected the flowers to an arduino and sent the low inputs simultaneously so that they alternate opening and closing. The motion is pretty slow and vaguely sinusoidal so the flowers actually appear to be breathing. :) Friday, 6/12: pop-up brainstorms Now that the paper flower is somewhat done (some current limiting issues remain), I've moved on to the pop-up book project. I spent today experimenting with different mechanisms and seeing what's already out there. There have been a series of extremely impressive pop-up books by Robert Sabuda. I also ordered a few books on paper engineering techniques. Hopefully those will arrive early next week! For the electronics portion of the project, Dr. Buechley suggested having a place on each page for a magnetic arduino. She also hoped that the pages would be kinetic, using removable motors and memory wire. I'm also considering putting the arduino on the cover, and connecting it to the individual pages via the spine. I'm still brainstorming as to the substance of the circuits. week fourMonday 6/15 - Wednesday 6/17: paper switches and sensors Coming up with an entire book turned out to be too much to simply tackle. There's the structure of the book, mechanics of the pop-ups, circuit components, wiring of the circuitry, and finally programming of the board! So instead, I'm starting with switches. I made several types of flat switches using paper, conductive fabric, conductive paint and resistive paint. I made a simple tact switch by connected one conductive fabric patch to ground and a separate patch to the input. When you touch both patches, the input goes low. I also made several potentiometers and a capacitive touch sensor (which was a bit more code-intensive than the other switches). It was interesting playing with the paints! The conductive paint is a water-based paint with copper powder. When the paint dries, the copper pretty much makes a solid connection (though there is a tiny bit of resistance per surface area). Once drawback with this paint is that it oxidizes, leaving a non-conductive green film where the paint is exposed to air. I left some soldering flux on the paint over night and by the next morning that patch had turned green. What is more interesting is the resistive paint. It's basically graphite powder in some sort of dark plastic substrate. When the paint is applied, it looks like regular black ink. However, once it dries, it actually becomes layered. The graphite seems to sink down to the paper and the substrate forms a black covering goes over the graphite. When you scratch the line, the black covering comes off leaving what looks like a really dark pencil mark beneath. Dr. Buechley has used the resistive paint to make custom resistors. The longer and thinner the line, the higher the resistance. Basically, you can paint a squiggly line and depending on the length, it will give a fairly consistent resistance. It's really nice since the paint allows you to make custom resistors. The trick is to wait for the paint to dry completely, or the resistor will smear (which happened, a lot)! 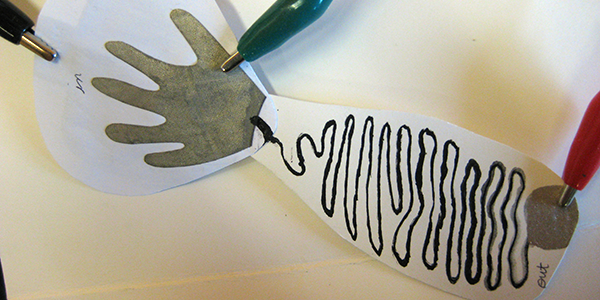 Thursday 6/18 - Friday 6/19: pop-up I started the first page of the pop-up book. Each spread of the book has its own color (in addition to silver of the conductive paint, black of the resistive paint, gray of the conductive fabric and the white background). I originally wanted to follow a theme or story, like Alice in Wonderland, but that turned out too complicated! The first page is going to be pink with several sorts of flowers. So far, I've made a flower lamp where when the user pulls a tab down, a petal flaps up, the leaves drop, and three LEDs in the flower light up. 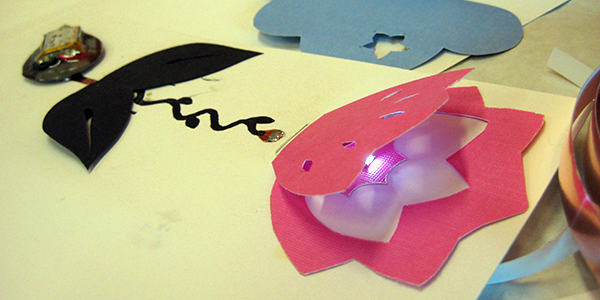 I've also started taking a silkscreen class given by the Student Art Association. One of the restrictions as a visiting student is that you're not allowed to enroll in classes, but apparently these art courses don't count! I highly recommend taking advantage of these classes if you're in the area. Anyway, Dr. Buechley was particularly interested in my taking the course, as it's another method of laying down circuits. |