


2.00b Toy Product Design
Let's Play - Toobers!
Final Assembly 1Background Information
Your Freshly Printed Toobers!
Hello! Exciting! You've hopefully received your freshly printed Toobers printed on the Stratysys 55 Prime. This is the last part to the Toobers project. By the end of this lab, make sure that you get a photo of your Toobers with Danny, the course photographer. After that, you're free to take your Toobers home!
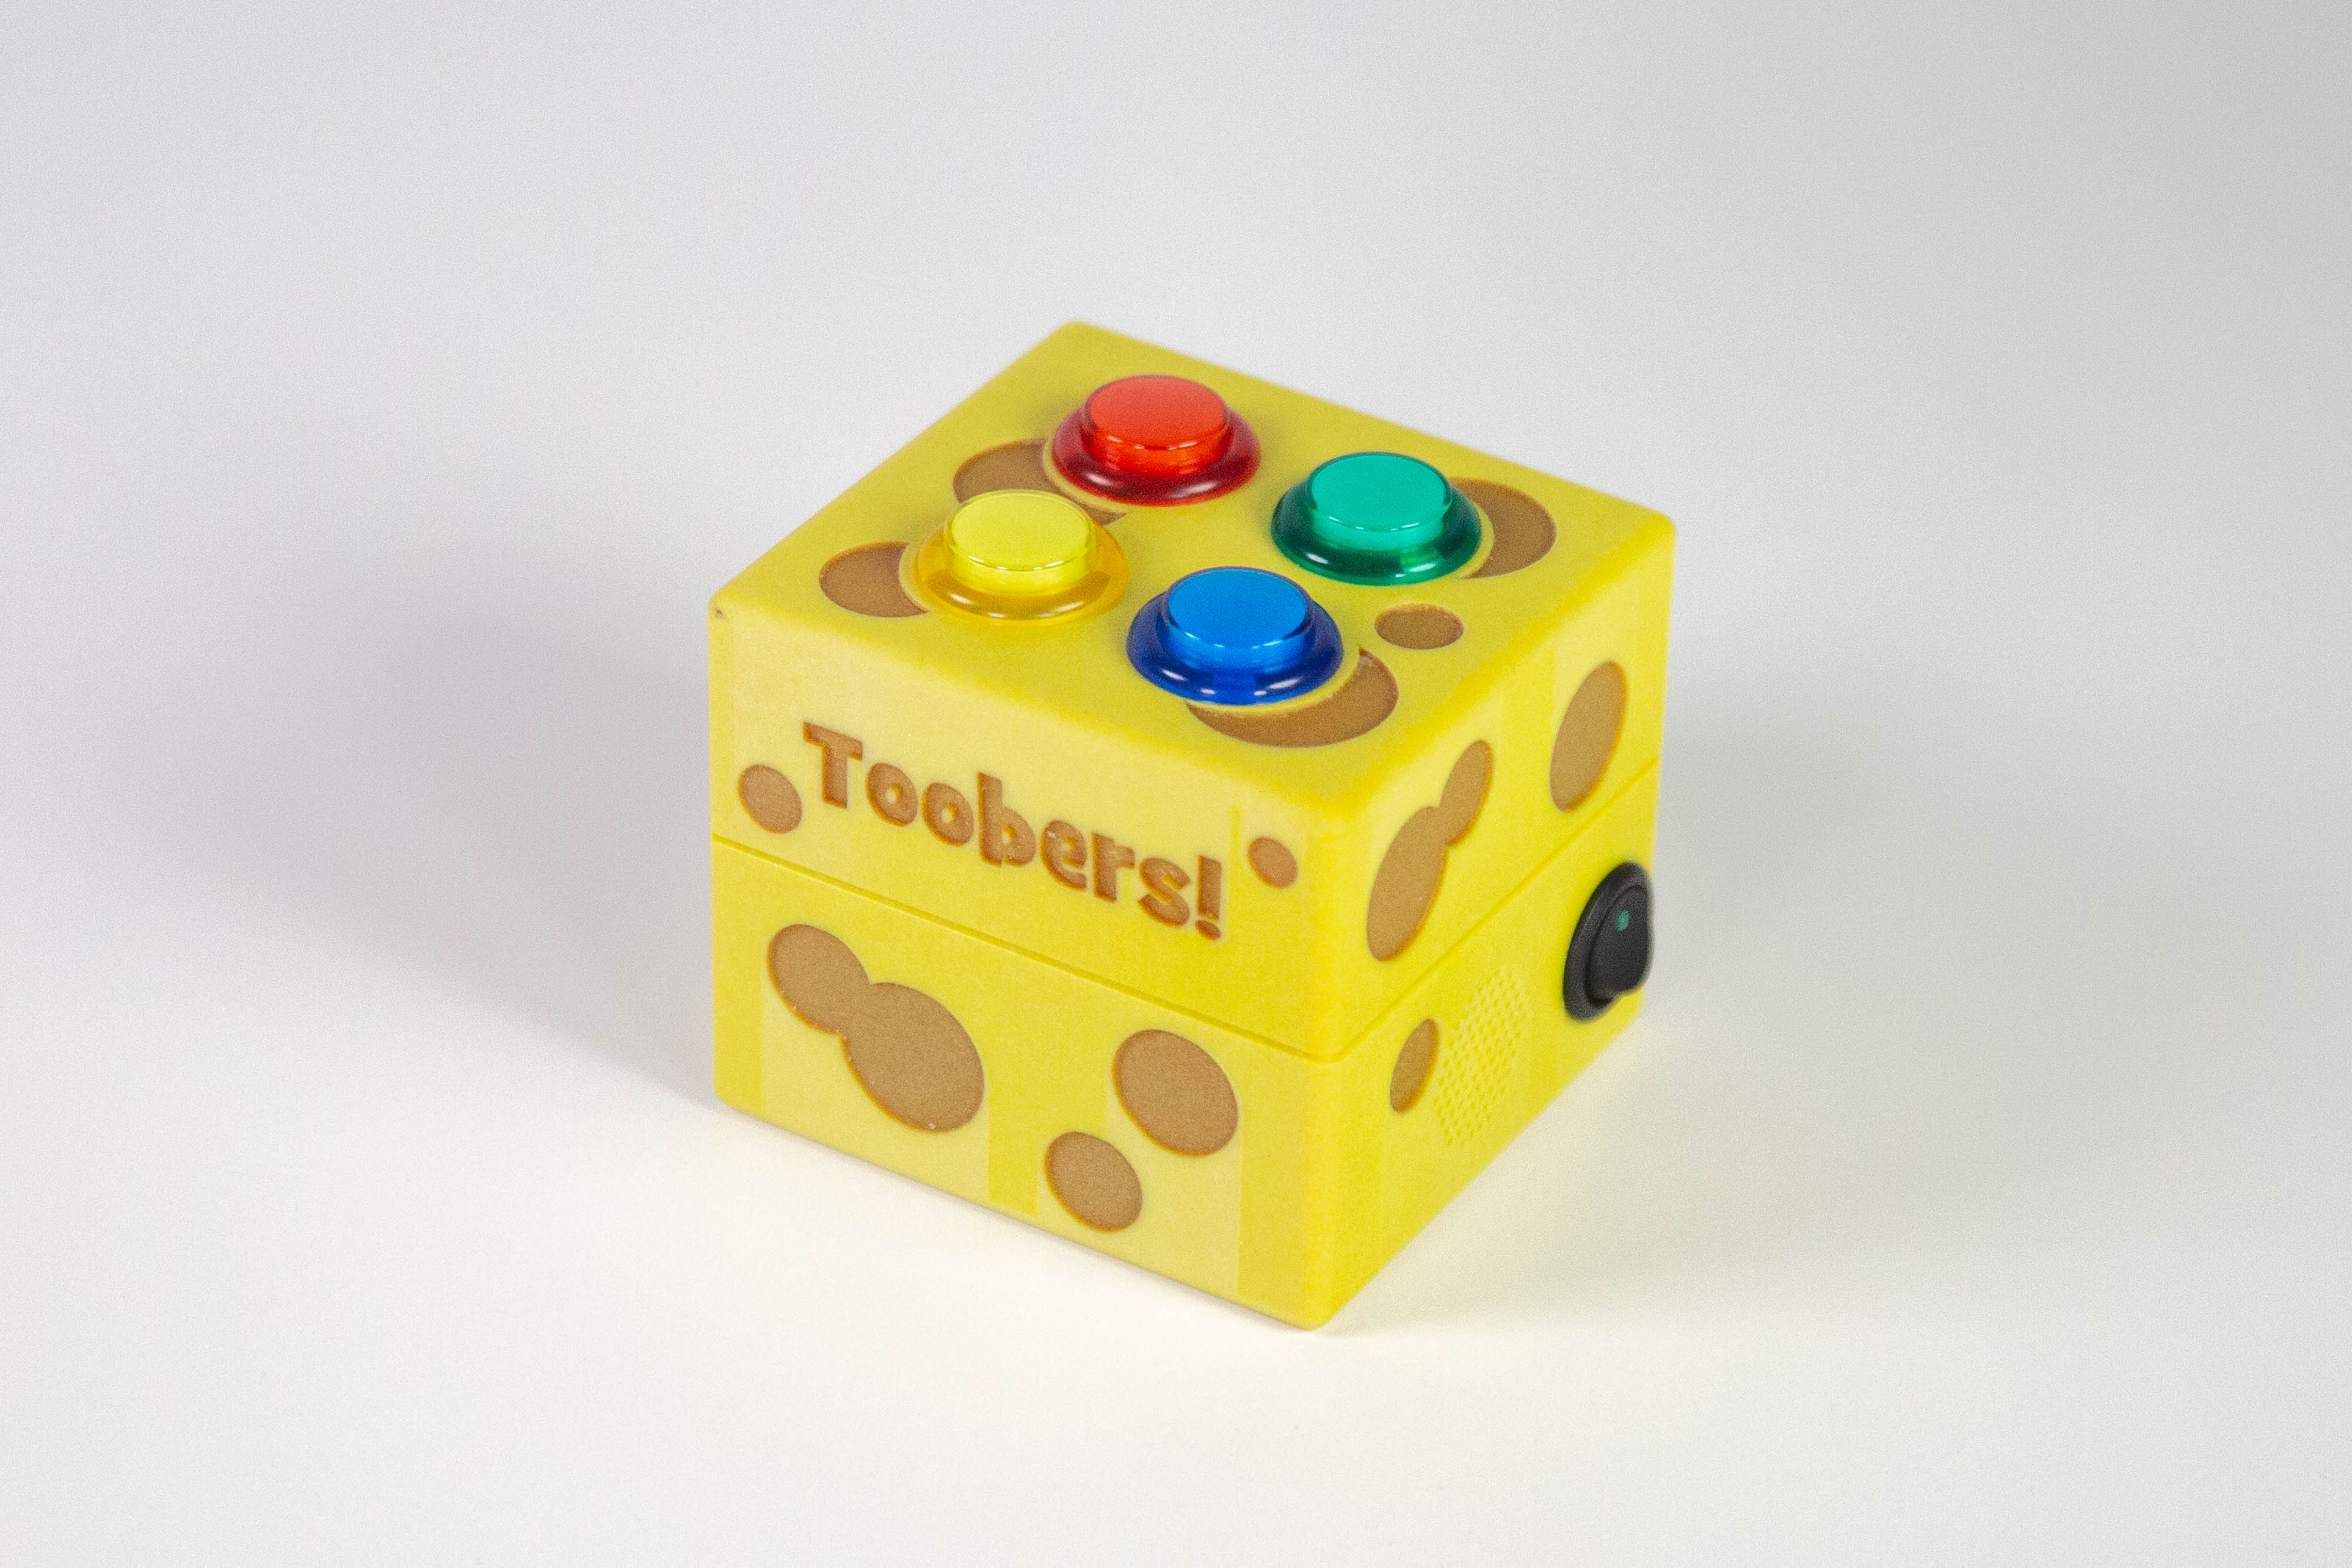
Try fitting the two halves of your Toobers together!
Between you submitting your CAD file and the printing of your Toobers, a few things happened. If you'd like to learn a little about some of the behind-the-scenes, feel free to continue reading. It'll give you some background on what 3D printing entails, and may help you as you think about 3D printing for your toy prototypes (or just generally in the future!) Otherwise, feel free to skip to chapter 2.
Going from Physical to Digital
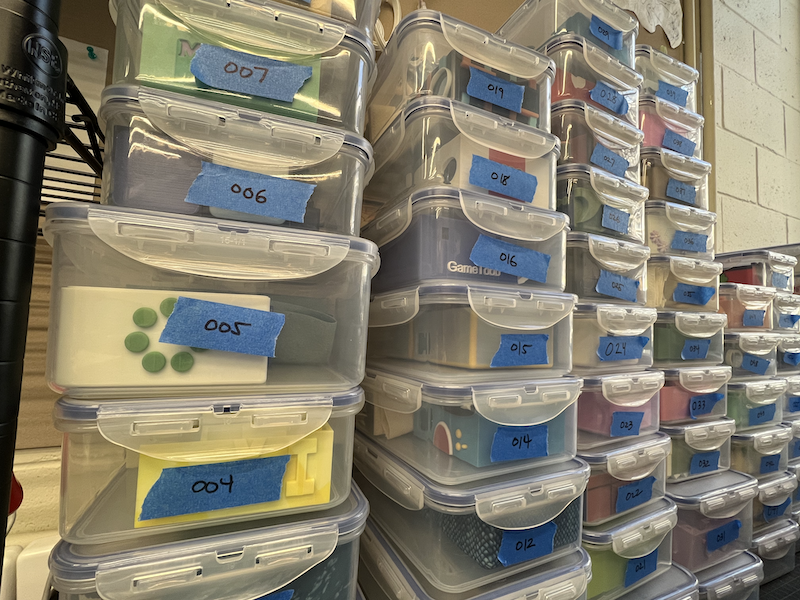
Your file was first reviewed by a team of TAs, past TAs and 3D Printing experts (thanks, Jordan, Antonio, Caleb, Sam, and James!) In addition to the checking that the file was valid, no walls were too thin/too thick, and the size is reasonable to print, your file was also checked to make sure that nothing edited modified the hardpoints. This meant that button clearances, on/off toggle switch, battery, arduino, PCB, wires, etc. all fit as they did before. There's a lot to keep track of! (see our internal tracking sheet below)
We also checked that bodies which were intended to be printed together were correctly in contact with each other. Even a gap as small as 0.001inch meant that two parts may be printed separately. On the flip side, we made sure that the two halves of the Toobers were still two separate halves that could assemble together via the slotting and locking mechanism (and then secured by the single screw in the corner).
If there were appendages on your Toobers, we chopped it up for you and added alignment and orientation pins. Modifying your appendages in this way often saves tens of hours worth of printing time, and tens (maybe even hundreds) of dollars in terms of 3D printing costs!
Once the appropriate modifications have been made, the file is then imported into other software (in this case Solidworks) which can better export and generate the colors for the 3D printers. 3D printing software will normally accept a .STL file (which you can export from Fusion), but for full-color 3D printing files, this can be a little more complicated.
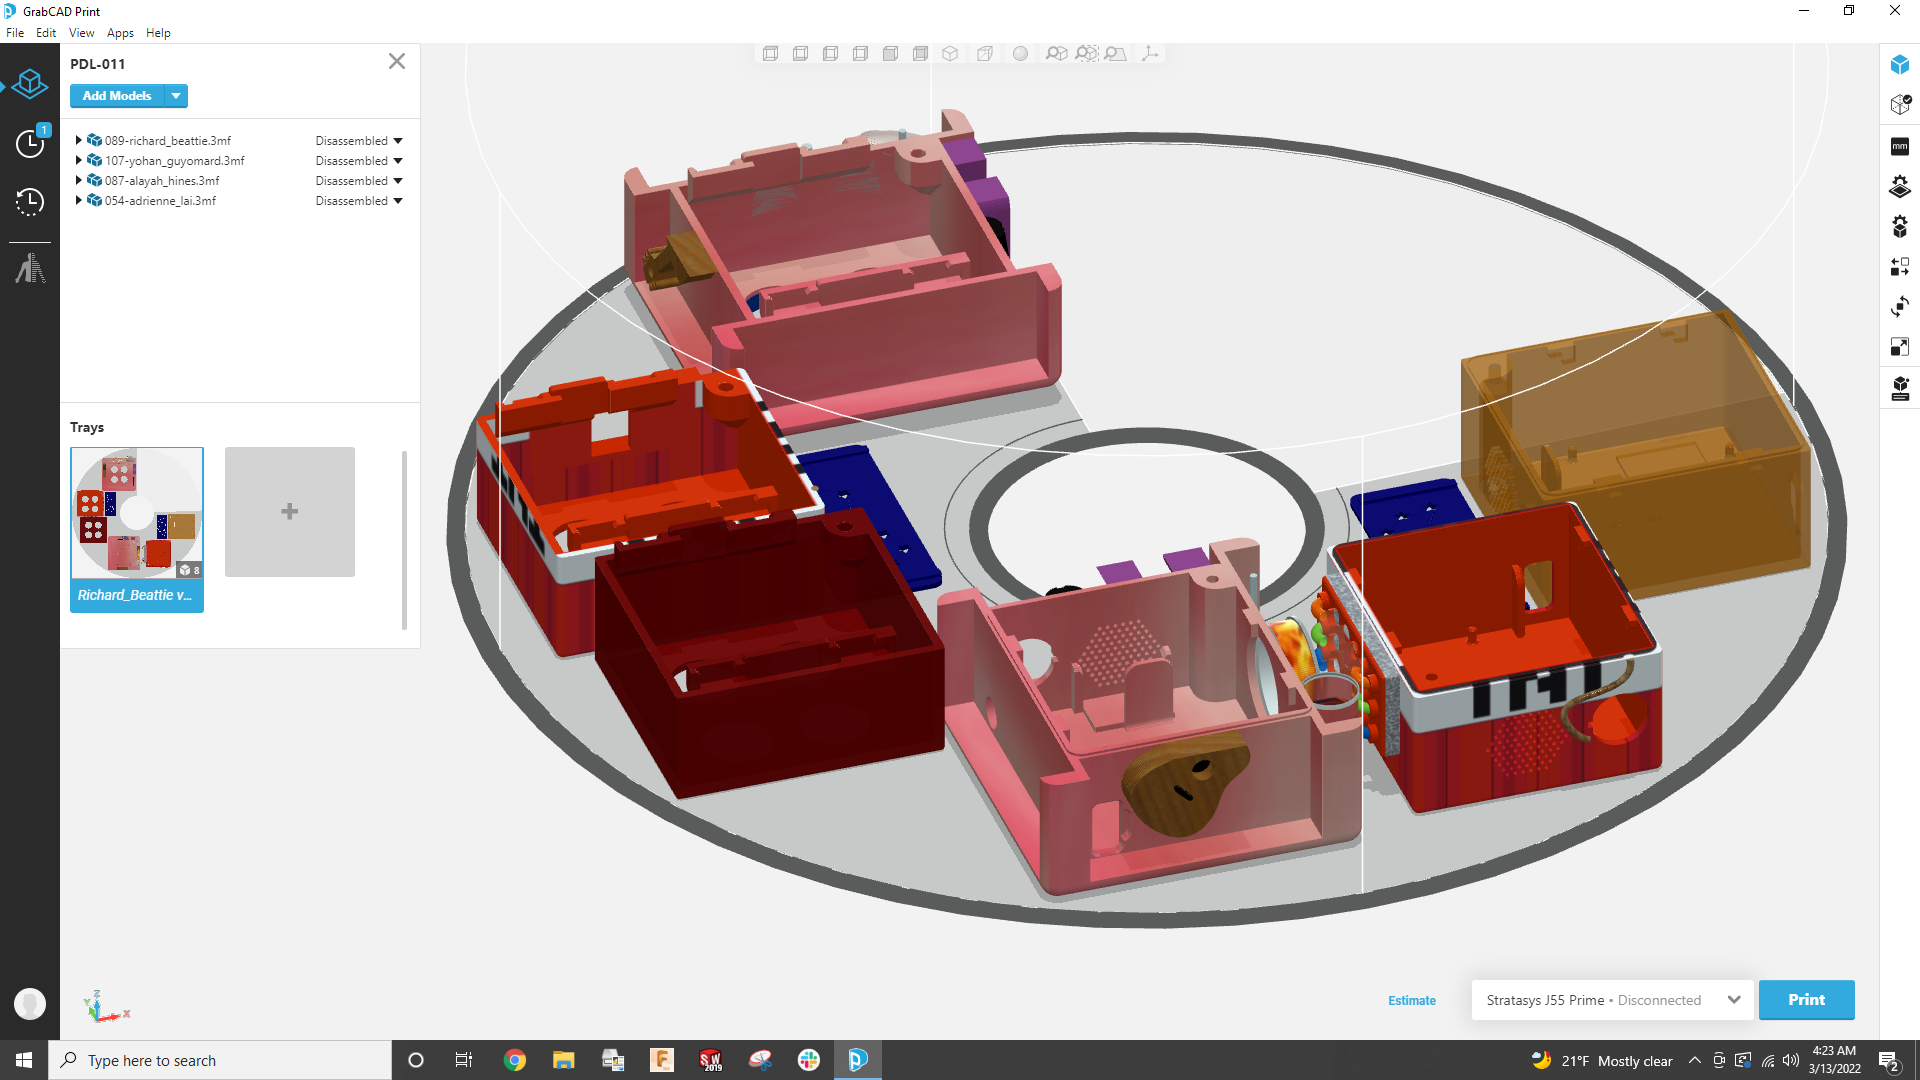
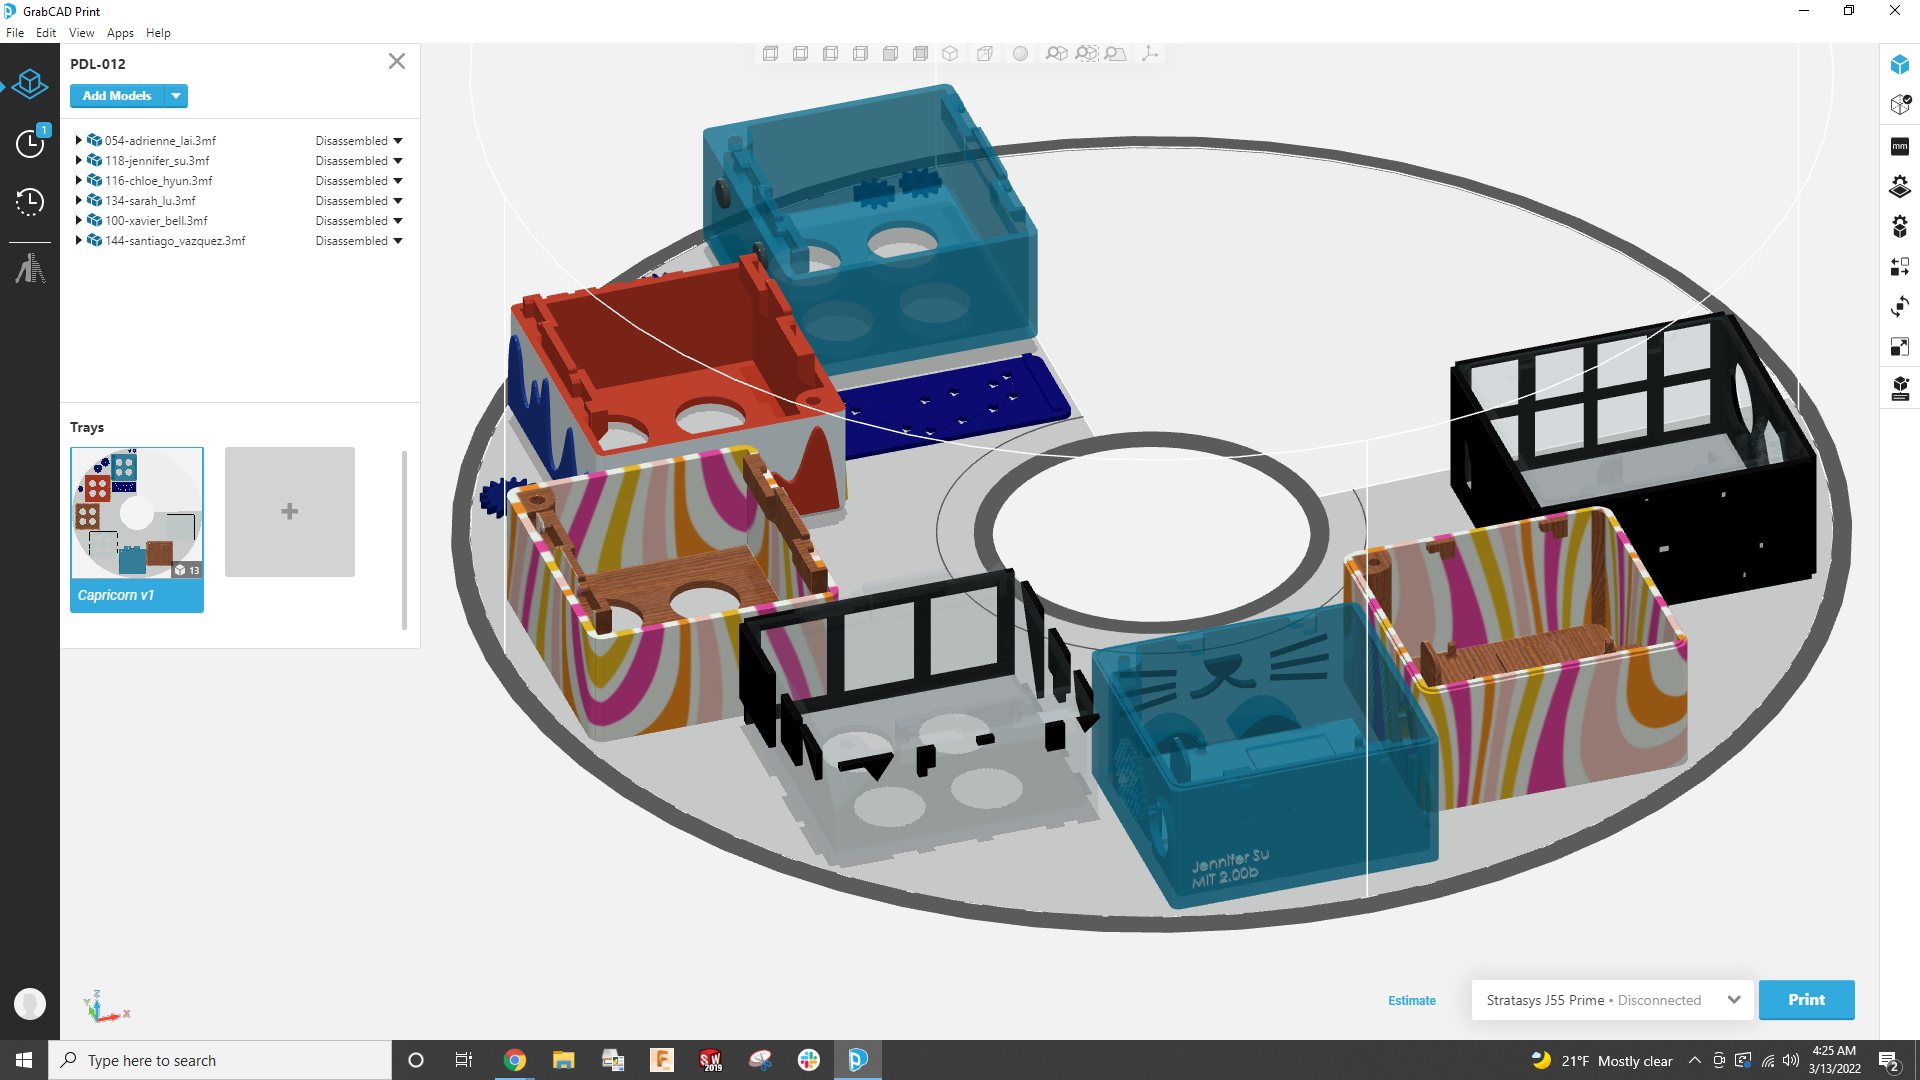
One Tray to Go, Please!
Most 3D prints this time around are actually much smaller than the print bed, meaning we can print multiple toobers at once. We try our best to cram as many parts in there at once for efficiency (like a fun game of tetris). Below shows an example tray of parts we would be printing. This tray took around 23 hours to print. The print time (for this printer) is mostly determined by the height.
The Crazy Printing Machine
And this is what the machine looks like when it's printing. Look at it go!

The Aftermath
The J55 prime is what the industry calls a 'polyjet' printer. A polyjet printer is like a 2D inkjet printer, but instead of jetting drops of ink, the printer jets drops of photopolymer that solidify when exposed to UV light. These layers accumulate on the build tray.
For parts where there are overhangs, the 3D printer jets a removable gel-like support material. Once the part is completed, this support material is removed before being given to you. To remove the support material, you can remove the big chunks by hand.
Quick Bath
For the more detailed parts, you can use the waterjet in the PDL. We've gone ahead and done all of this for you since there's only one of these waterjets in the PDL.
