2.00b Toy Product Design
Let's Play - Toobers!
CAD 3Exploring the Fusion 360 Interface
Look around you!
Now that you have the base model imported into your folder, let's take a moment to look around.
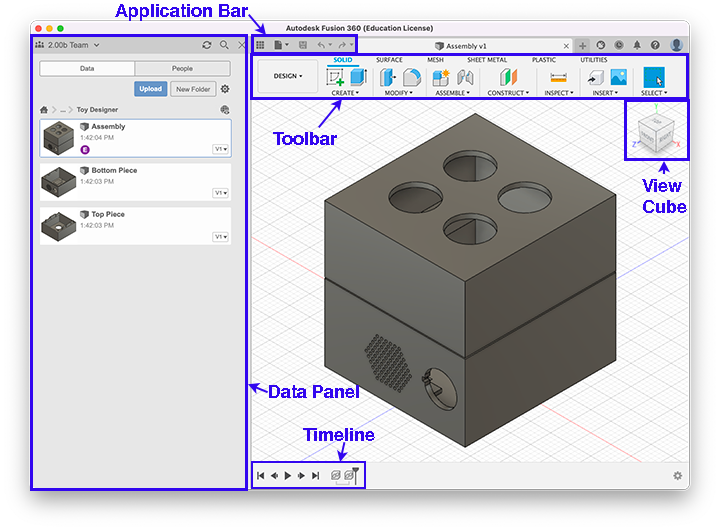
Double-click on the assembly model and it will show up in the right side. The main parts of the application window are labelled below.
-
The Application Bar is home to a handful of important buttons,
namely save, undo and redo, the file menu, and the Data Panel
toggle (
 ).
Pressing the toggle will hide or show the data panel, which is
useful because it can free up some valuable screen real estate.
- The Toolbar is where a lot of the functionality of Fusion 360 lives! Like a tool chest, the toolbar contains different instruments for cutting into, molding, or deforming your models. It also changes depending on which mode you are in.
- The ViewCube lets you move around your model in 3D.
- The Data Panel lets you see the projects you have access to.
- The Timeline (a.k.a. Design History) shows a graphic for each action you've taken. Be aware that not every action begets an icon in the timeline! Things like adding color/material to a part won't be represented. The timeline is useful because it lets you roll back and fast forward through the steps you've taken during the CADing process by dragging the little vertical line around.
TIP: If you've used other CAD programs before, you may be used to different hotkey arrangements, and can modify Fusion's settings to accommodate what you're most comfortable with. More details here.
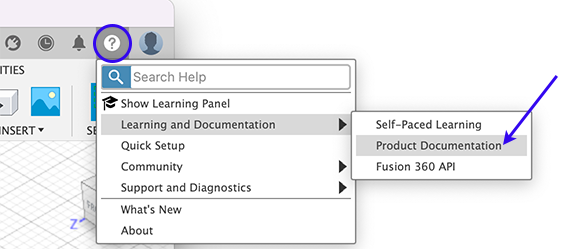
The Product Documentation has a lot more details about all aspects of Fusion 360 and is a handy reference. It can also be accessed from the question mark in the Application Bar.
Moving around
Hide the data panel by clicking on the Data Panel toggle (![]() ). Then click on the View Cube and move it around to see the
assembly from different angles. Click on faces in the View Cube to
see orthogonal views. You can show/hide elements by clicking on the
visibility toggle by each element. To put the model back in it's
initial view, click on the home view icon. Go ahead, try it out!
). Then click on the View Cube and move it around to see the
assembly from different angles. Click on faces in the View Cube to
see orthogonal views. You can show/hide elements by clicking on the
visibility toggle by each element. To put the model back in it's
initial view, click on the home view icon. Go ahead, try it out!
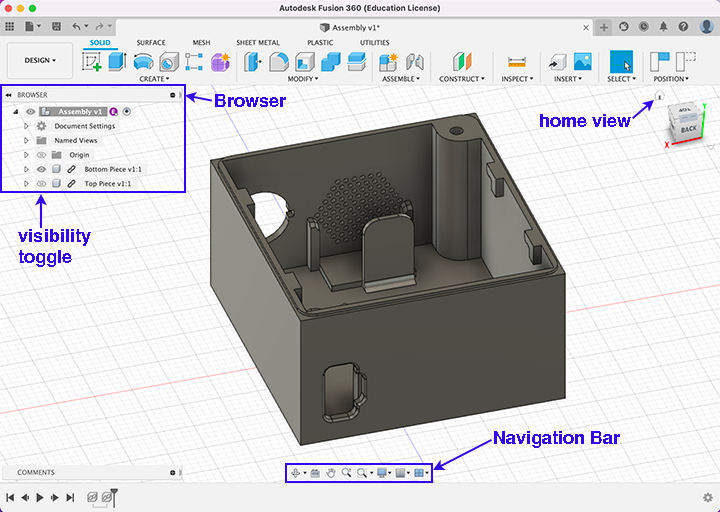
Additional elements shown in this screenshot are:
- The Browser, which lists the objects in your assembly and lets you control visibility of the objects, and
- the Navigation Bar, which contains commands to zoom, pan, and orbit your design.
Setting Units
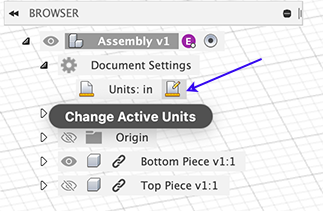
Expand the Document Settings in the Browser to see the current Units. To change the units (default is mm initially), hover the mouse over the Units element until the Change Active Units icon appears, and then click on it.
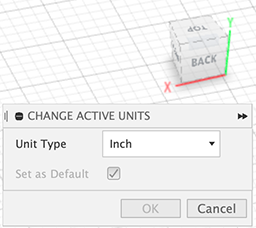
A dialog will appear on the right, and you can select the unit you want to work in.
General Fusion 360 Workflow
Before we start, it's helpful to understand the general Fusion 360 workflow. We will be using solid modeling techniques, so be sure that SOLID is selected in the toolbar as shown below:

To create new features, one usually proceeds as follows (try to find the elements mentioned below in your Fusion 360 client):
- Activate the body you want to work on by clicking on it. The activated icon (
 ) indicates which part of the model is the active part. Fusion 360 actions are applied to the currently activated part/body. For assemblies that include multiple bodies, it's important to always check that the correct body is activated!

- Create a 2D profile of a shape we want to base our 3D body on. To do this, we create a sketch. To enter Fusion 360's Sketch mode, click on Create Sketch (
 ). Then you select a plane to sketch on. Once the plane is selected, the Sketch toolbar appears.

Use the tools in the Sketch toolbar to sketch the 2D profile on the selected plane. Click on Finish Sketch ( ) to exit Sketch mode.
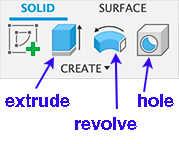
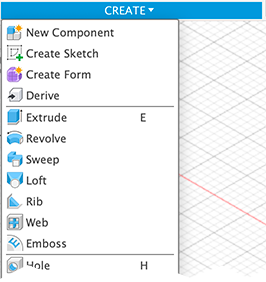
- Create a 3D solid body from the 2D profile using the tools in the CREATE panel. The most commonly used tools used are in the toolbar and additional tools are accessed through the CREATE dropdown panel.
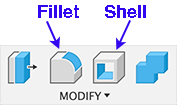
- Once you have a basic 3D shape, you can customize it further using the modification tools available in the MODIFY panel. The most commonly used tools are in the toolbar and more tools are in the dropdown.
