Wall Module: Fabrication
For the purposes of our concept implementation, we explored in further detail the design and integration of the main interactive element in the Virus Attack storyboard: the walls. The walls in the gameplay integrates two main components: the RGB pushbuttons and the RGB light strips. During the gameplay, the light strips will act as a means to communicate to the player the approaching virus into the core of the room. In the other hand, the push button will also light up in the same fashion as the light strip. Additionally, the pushbutton has the additional purpose halting the progression of the virus if the player presses the button just before it passes through it. Simple and fun!
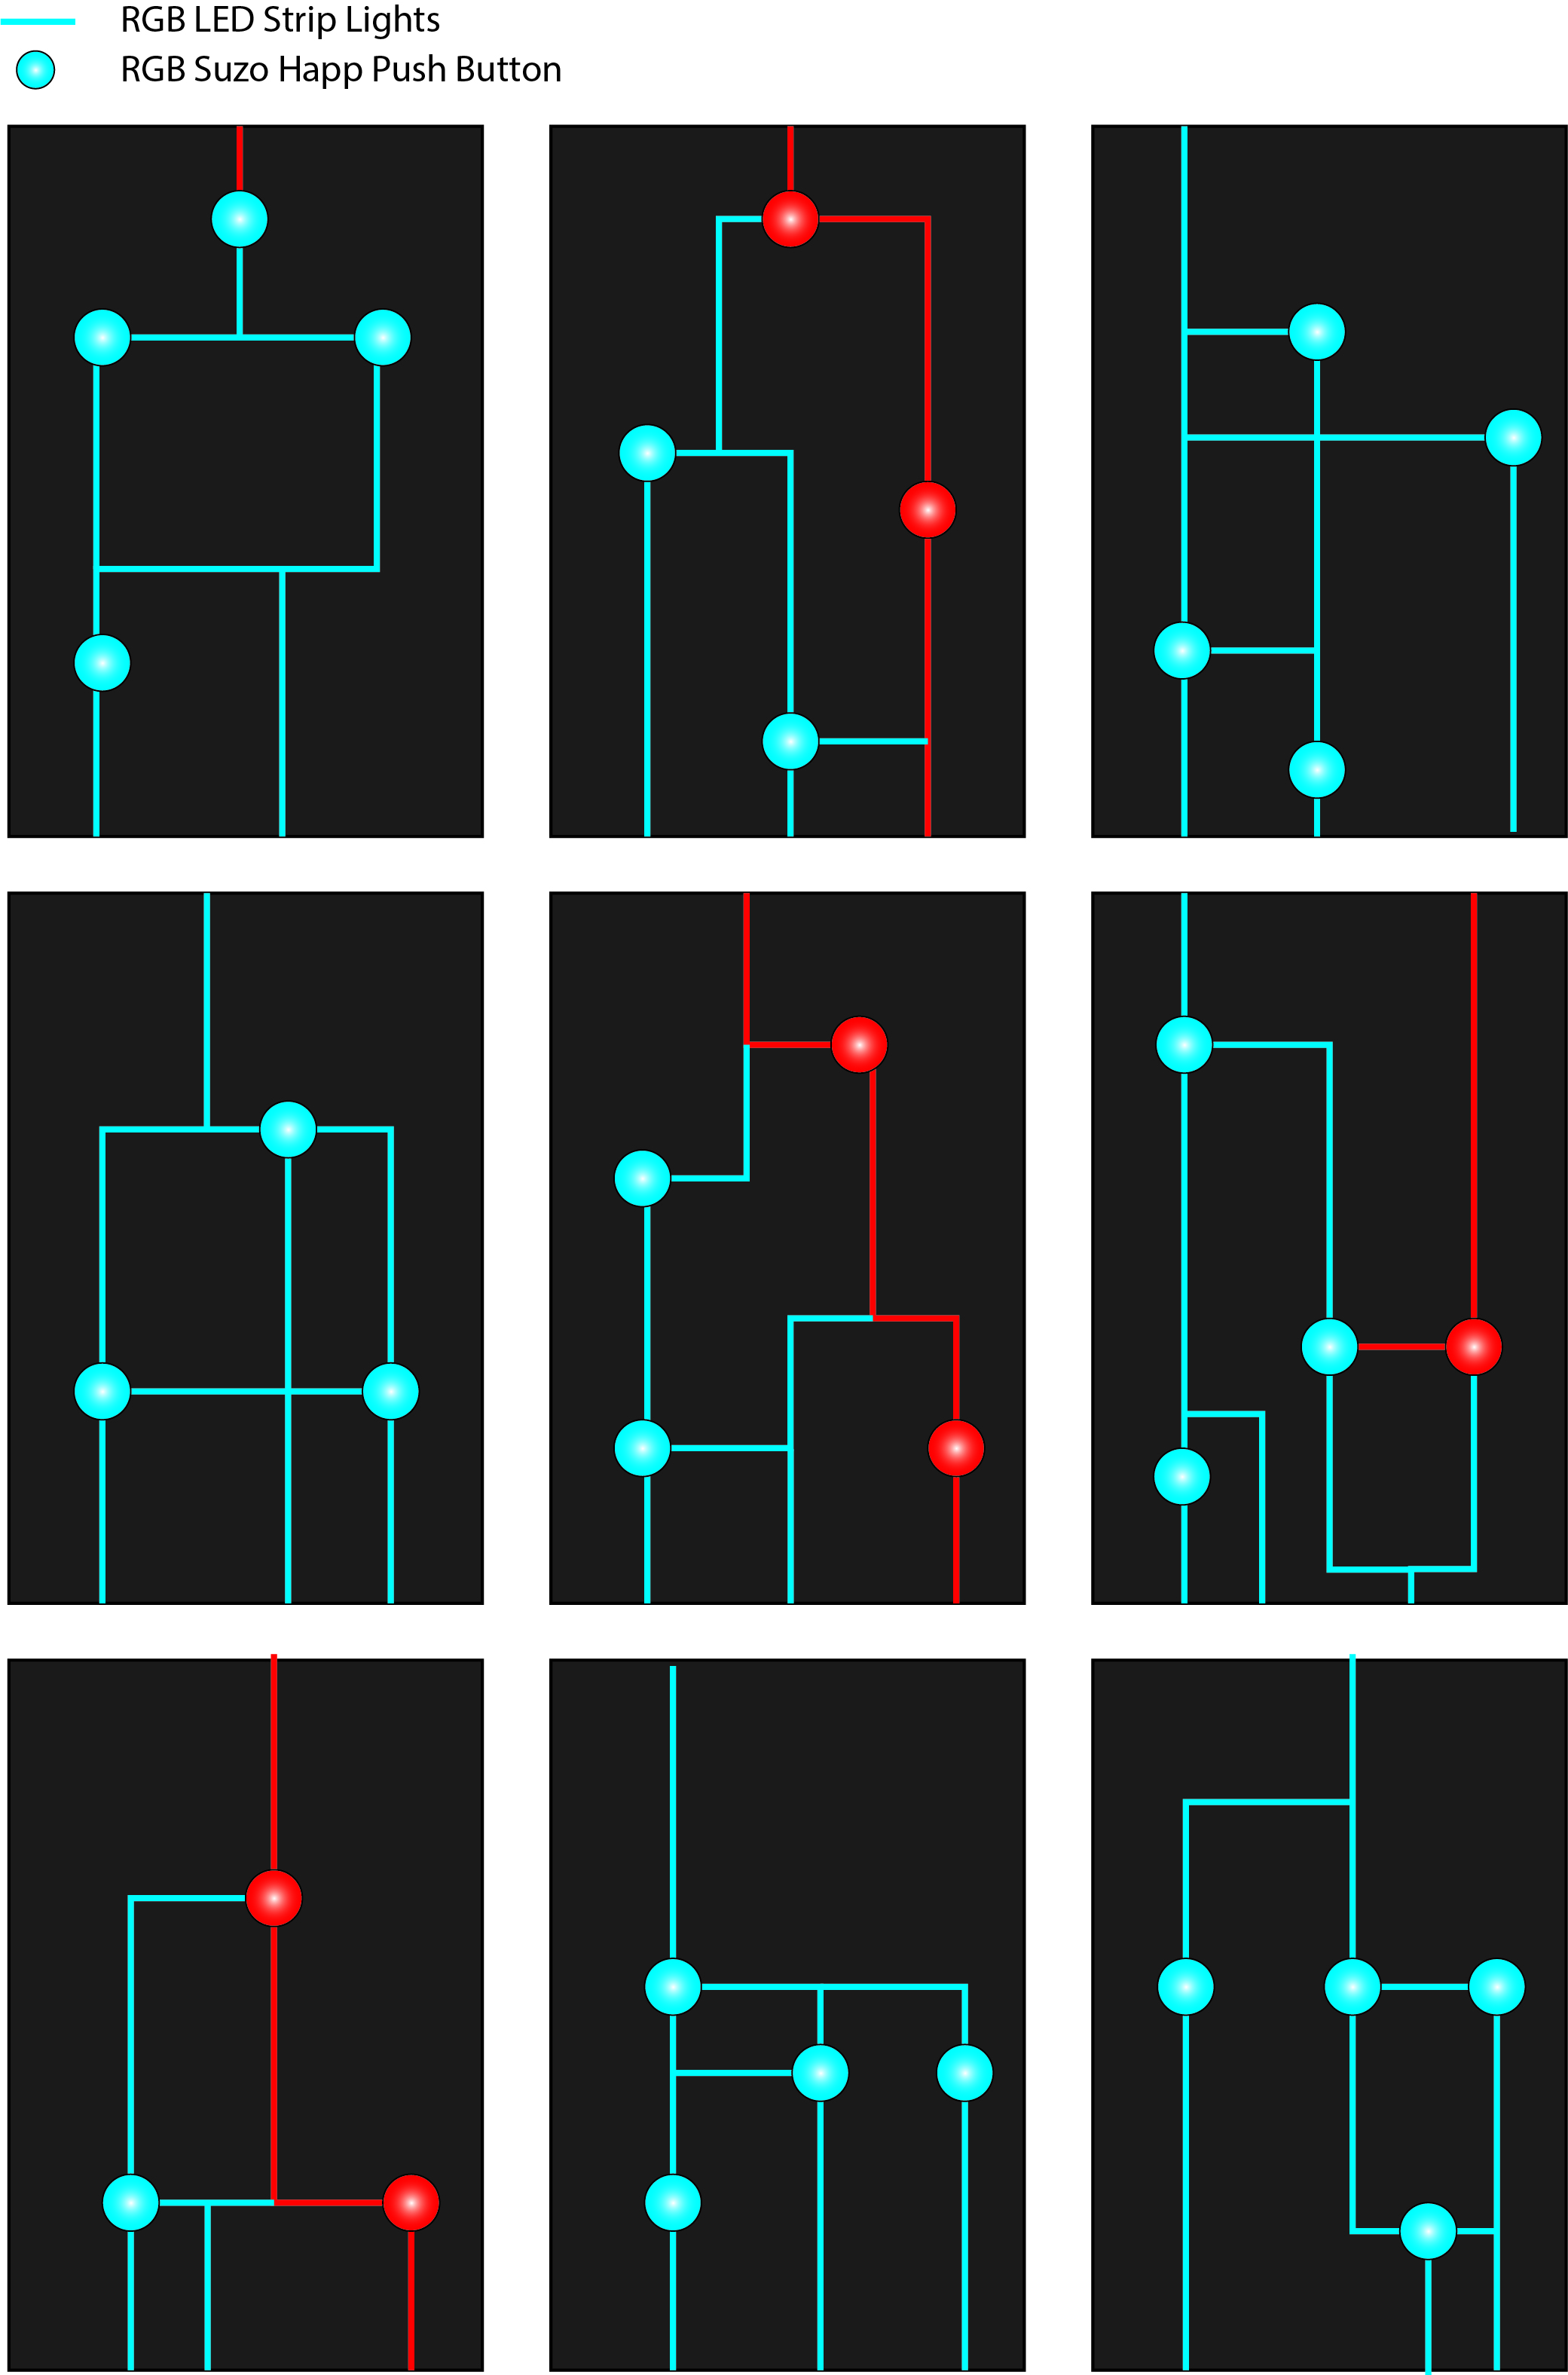
These mockups are examples of individual panels. The design constraints for these modules are the number of addressable buttons and led strips that can be input to one Arduino: 4 buttons and 8 strips can be controlled within each module. Given these contraints, however, there is a wide variety of arrangemetns that can create for engaging gameplay and endless variation to re-set the room by changing the paths.
The panels are roughly 1m by 1.5m and can be easily scaled to better fit in a given game room.
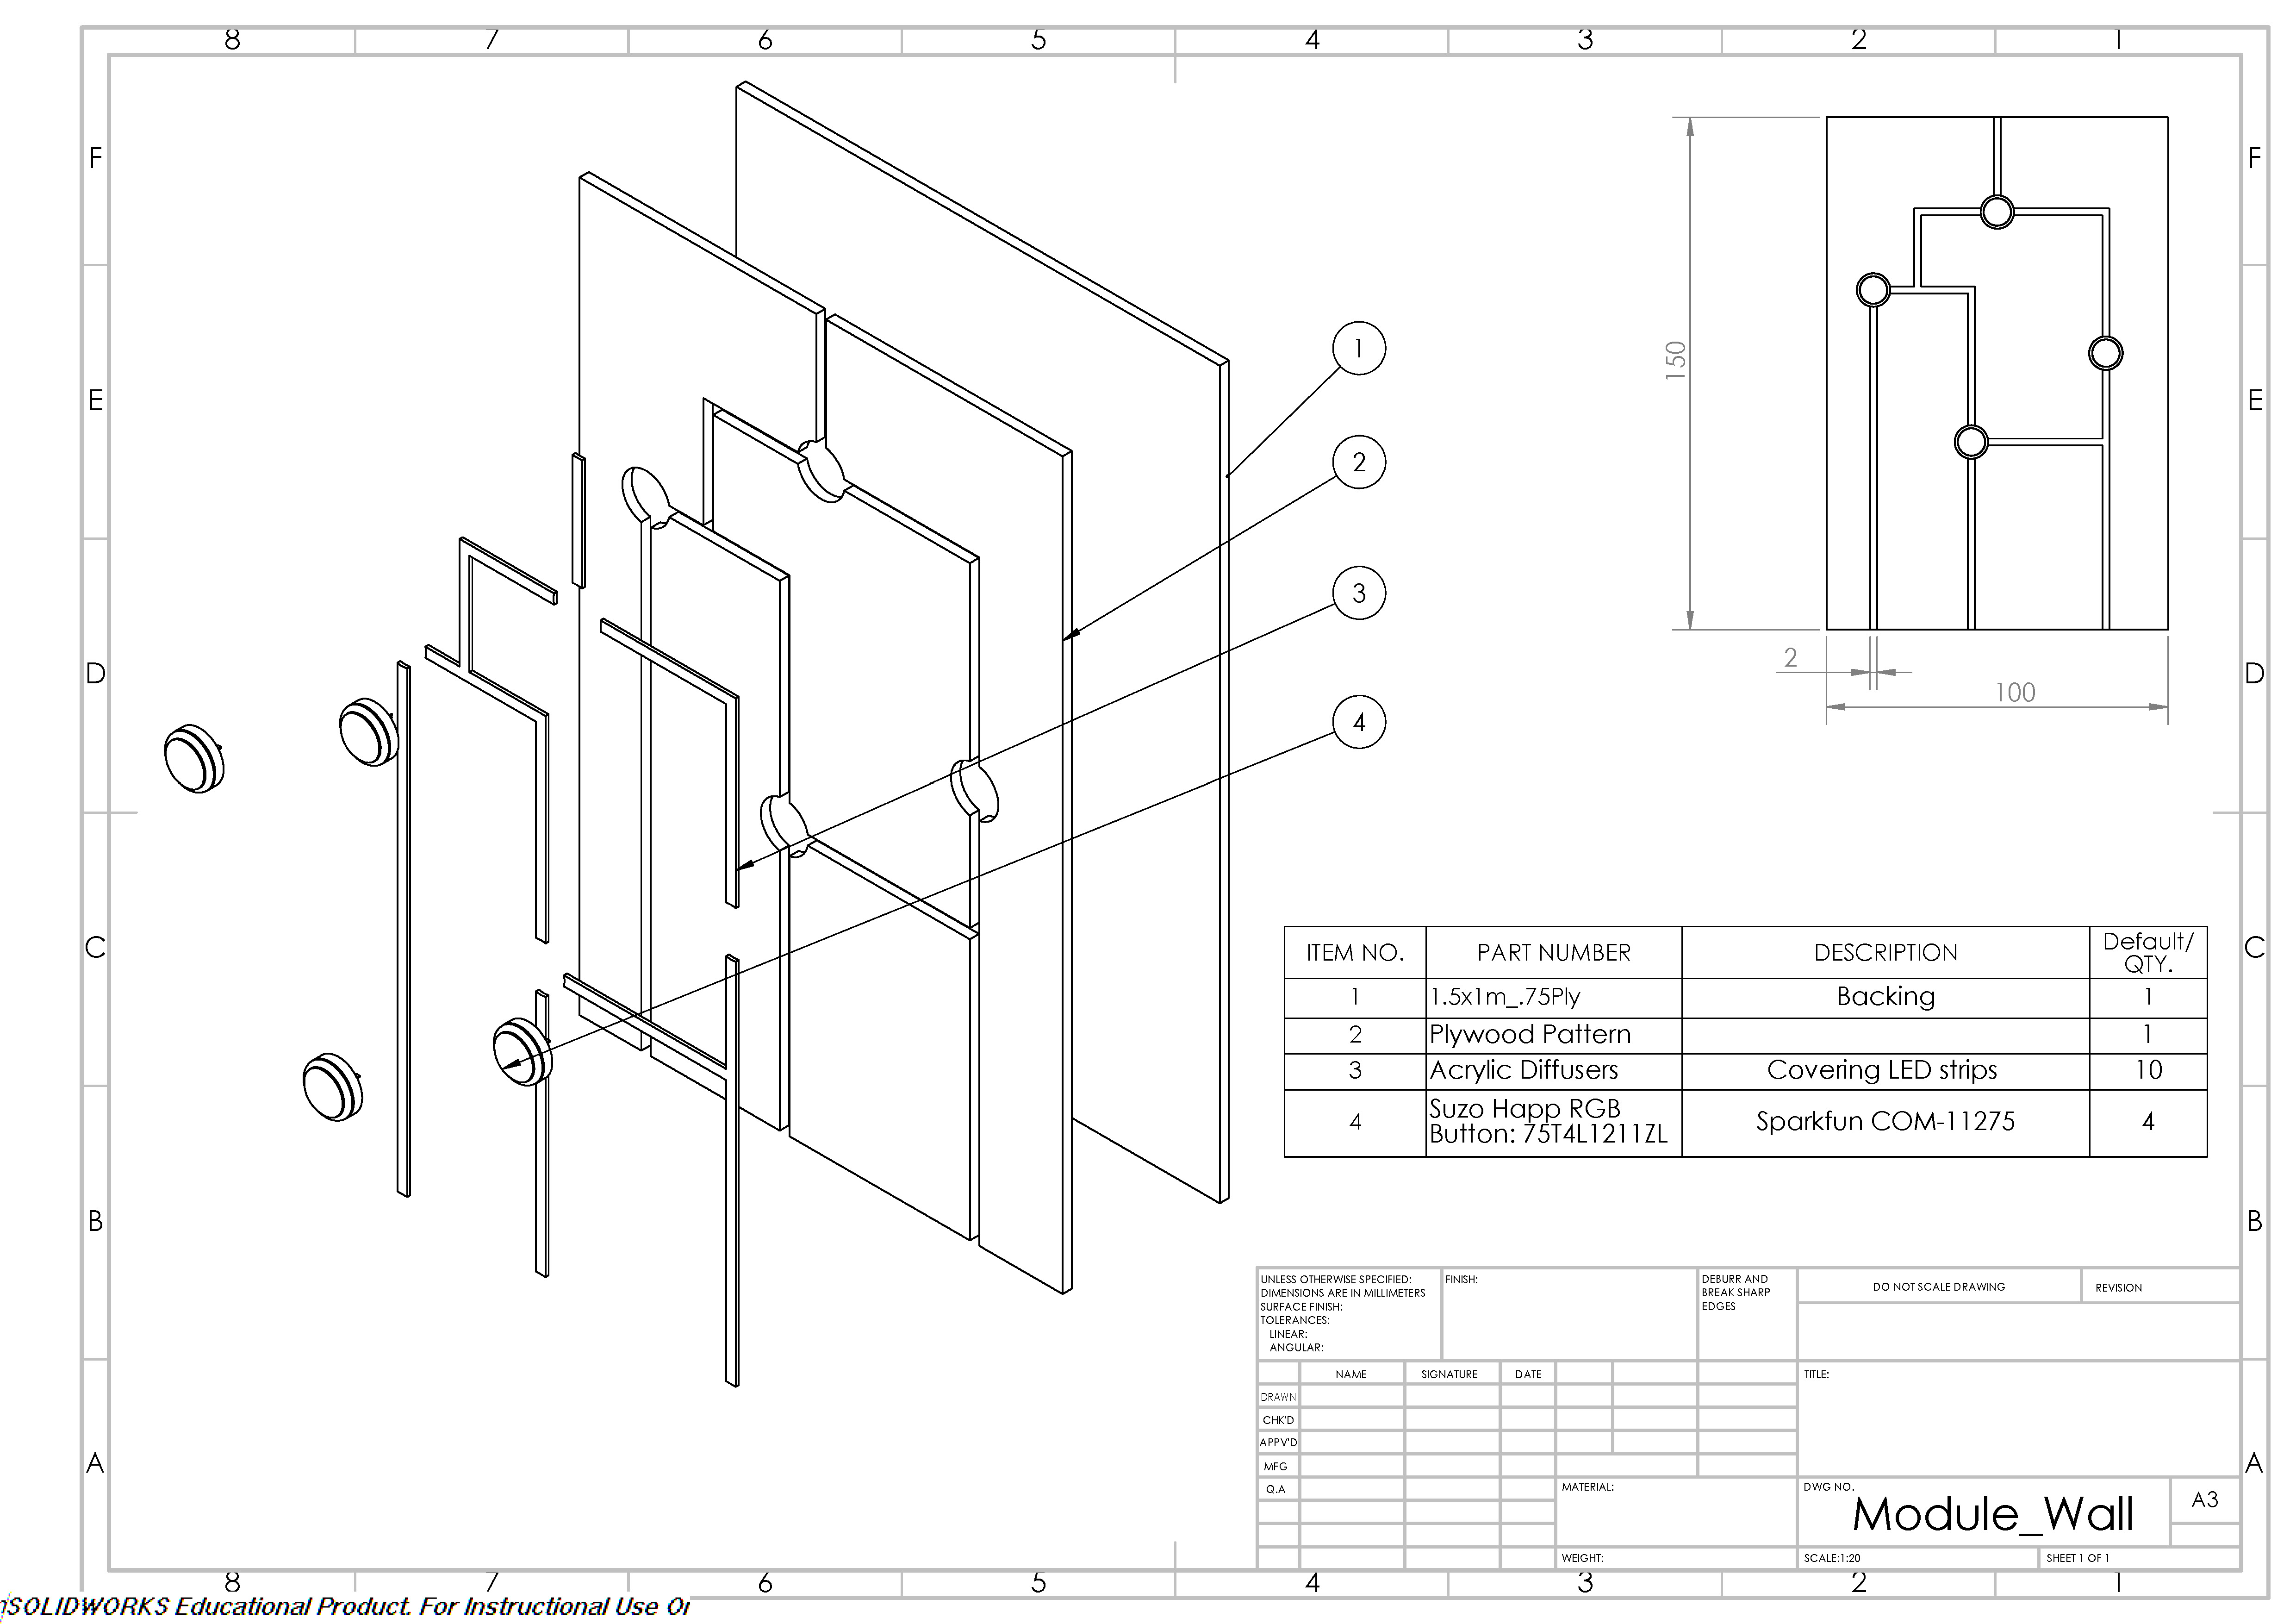
Using one of the above paths as a model, we created CAD to clarify exactly how a panel would be assembled. The materials are simple: a sheet of 3/4" plywood can be CNC milled to cut any drawn path and the buttons and electronics are simply dropped into the channels. Sandblasted acrylic inserts cover the LED strips to diffuse light.
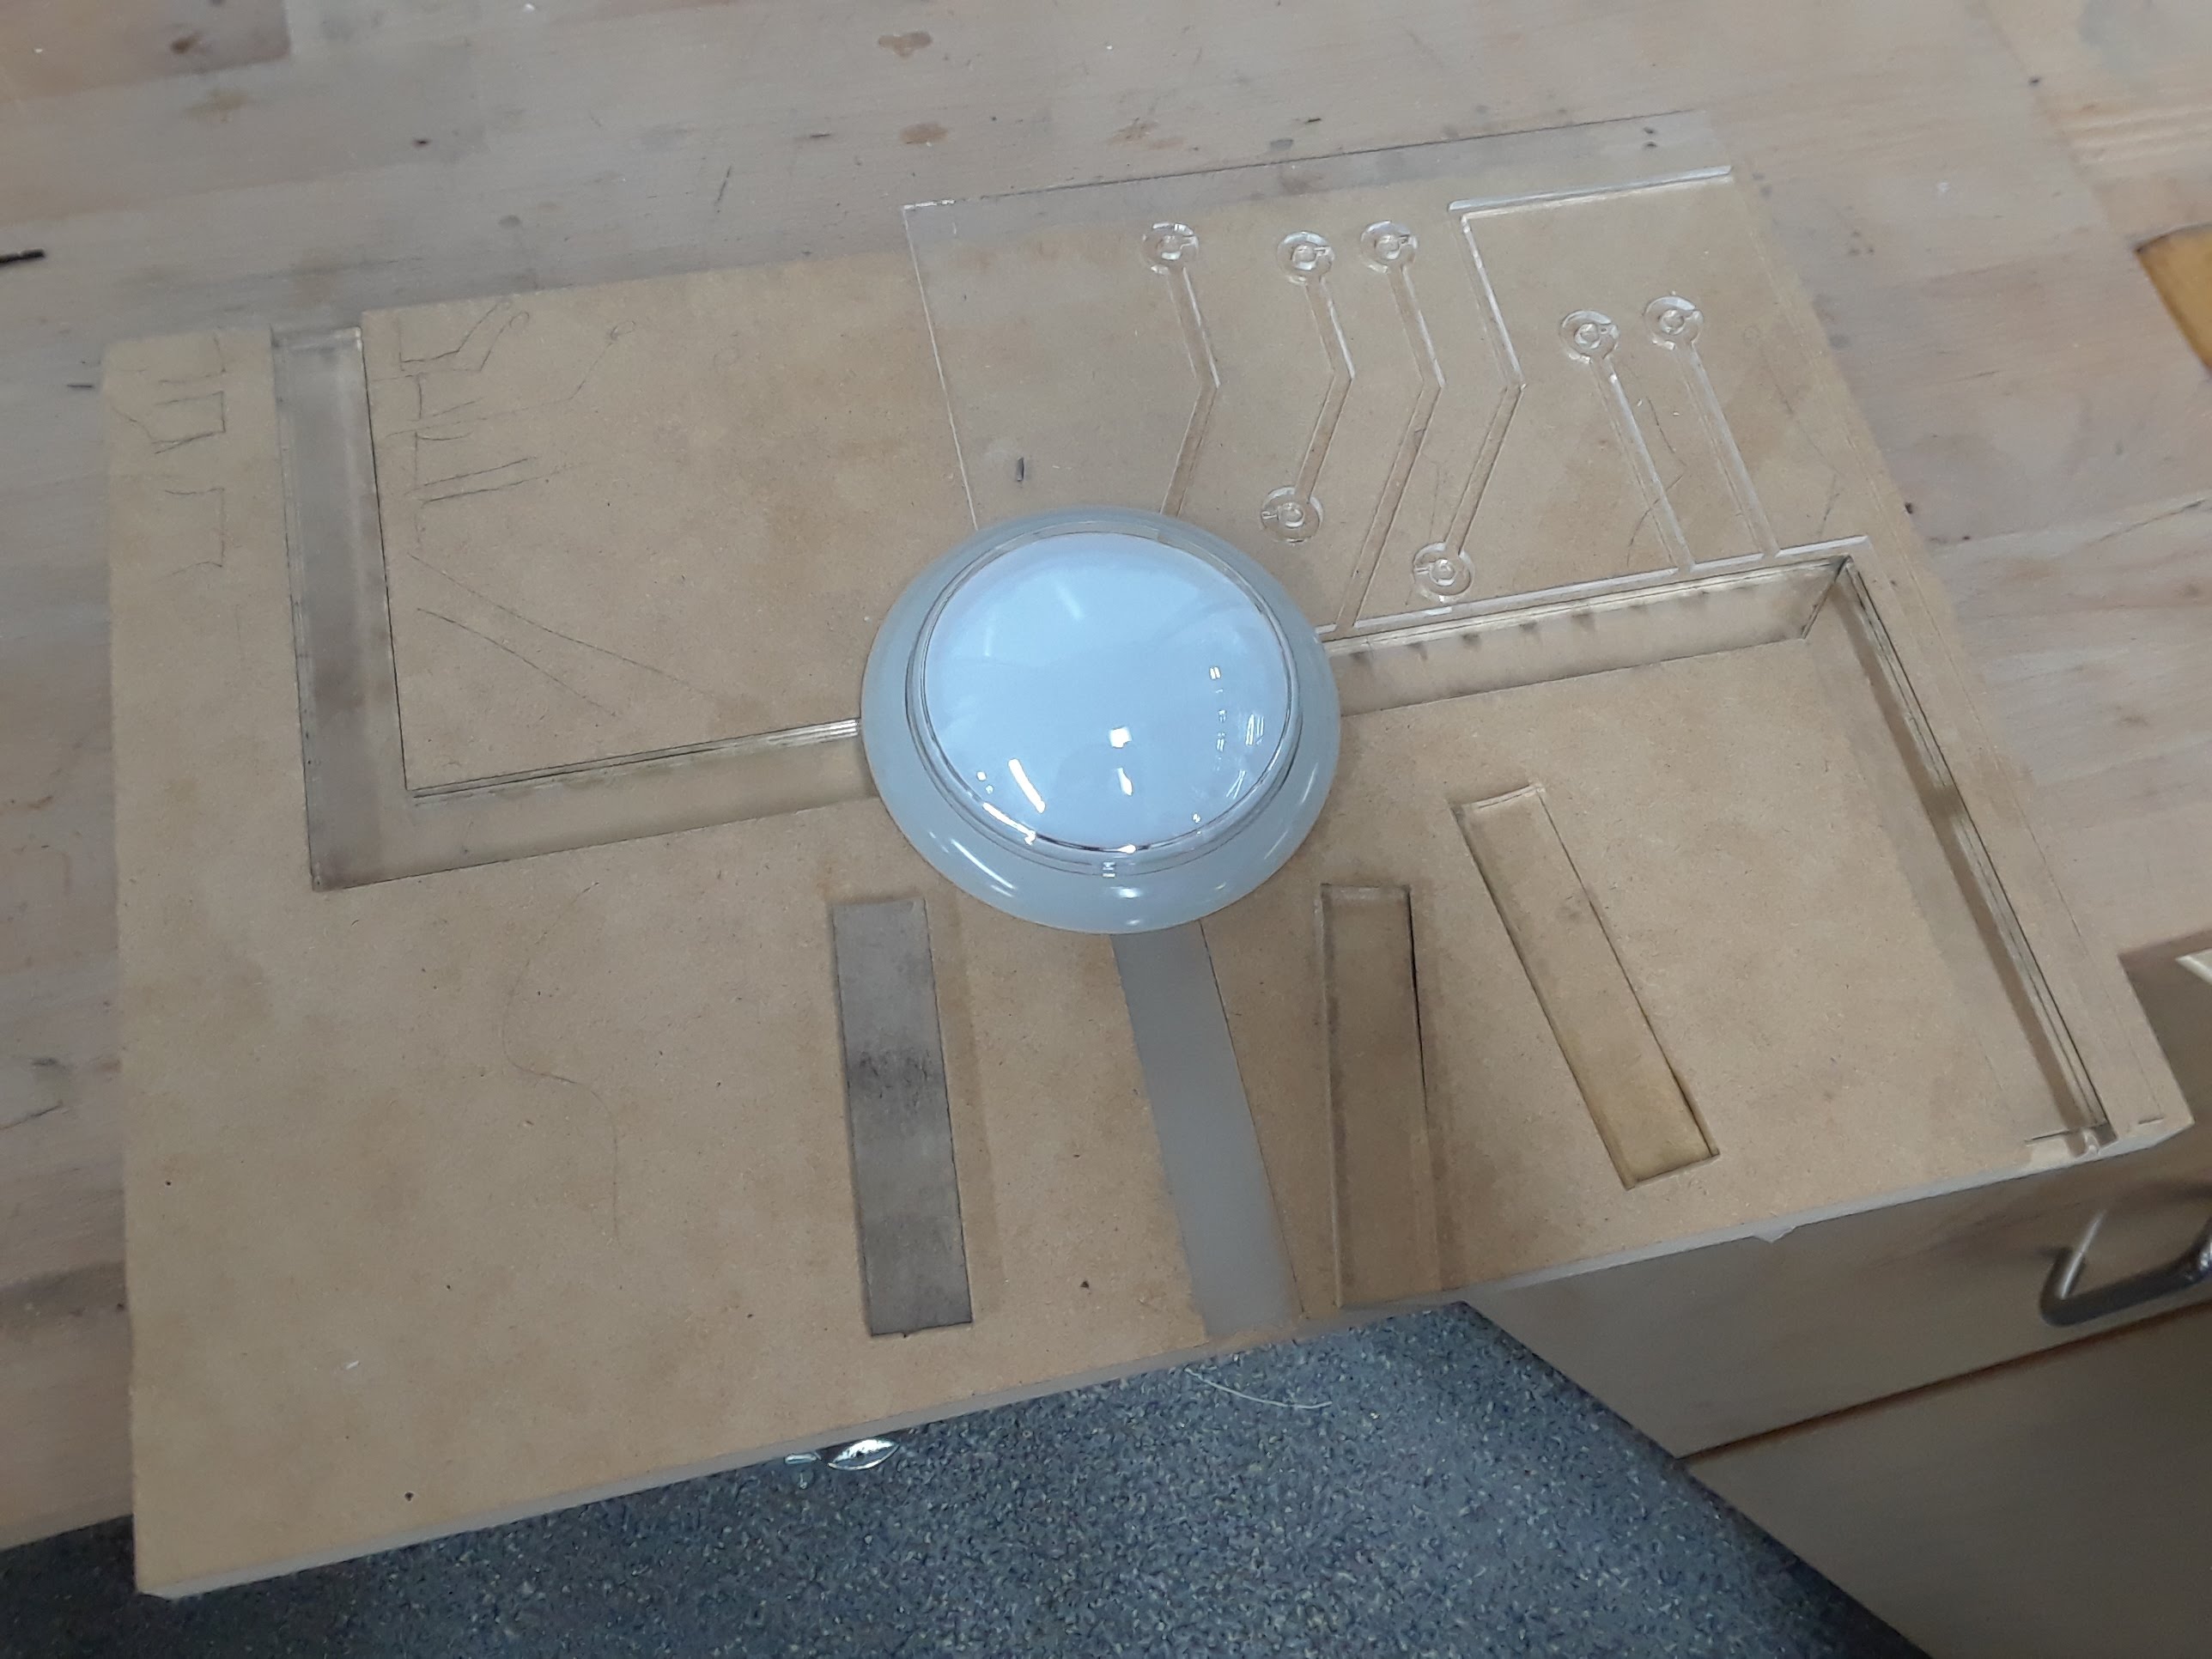
Before cutting the final large panel, we made some tests with a piece of MDF and a variety of acrylic treatments and designs. We settled on sandblasting both sides of the acrylic inserts as well as etching the acrylic overlay design in order to achieve maximum diffusivity. Our LEDS were bright enough to glow well through all these layers.
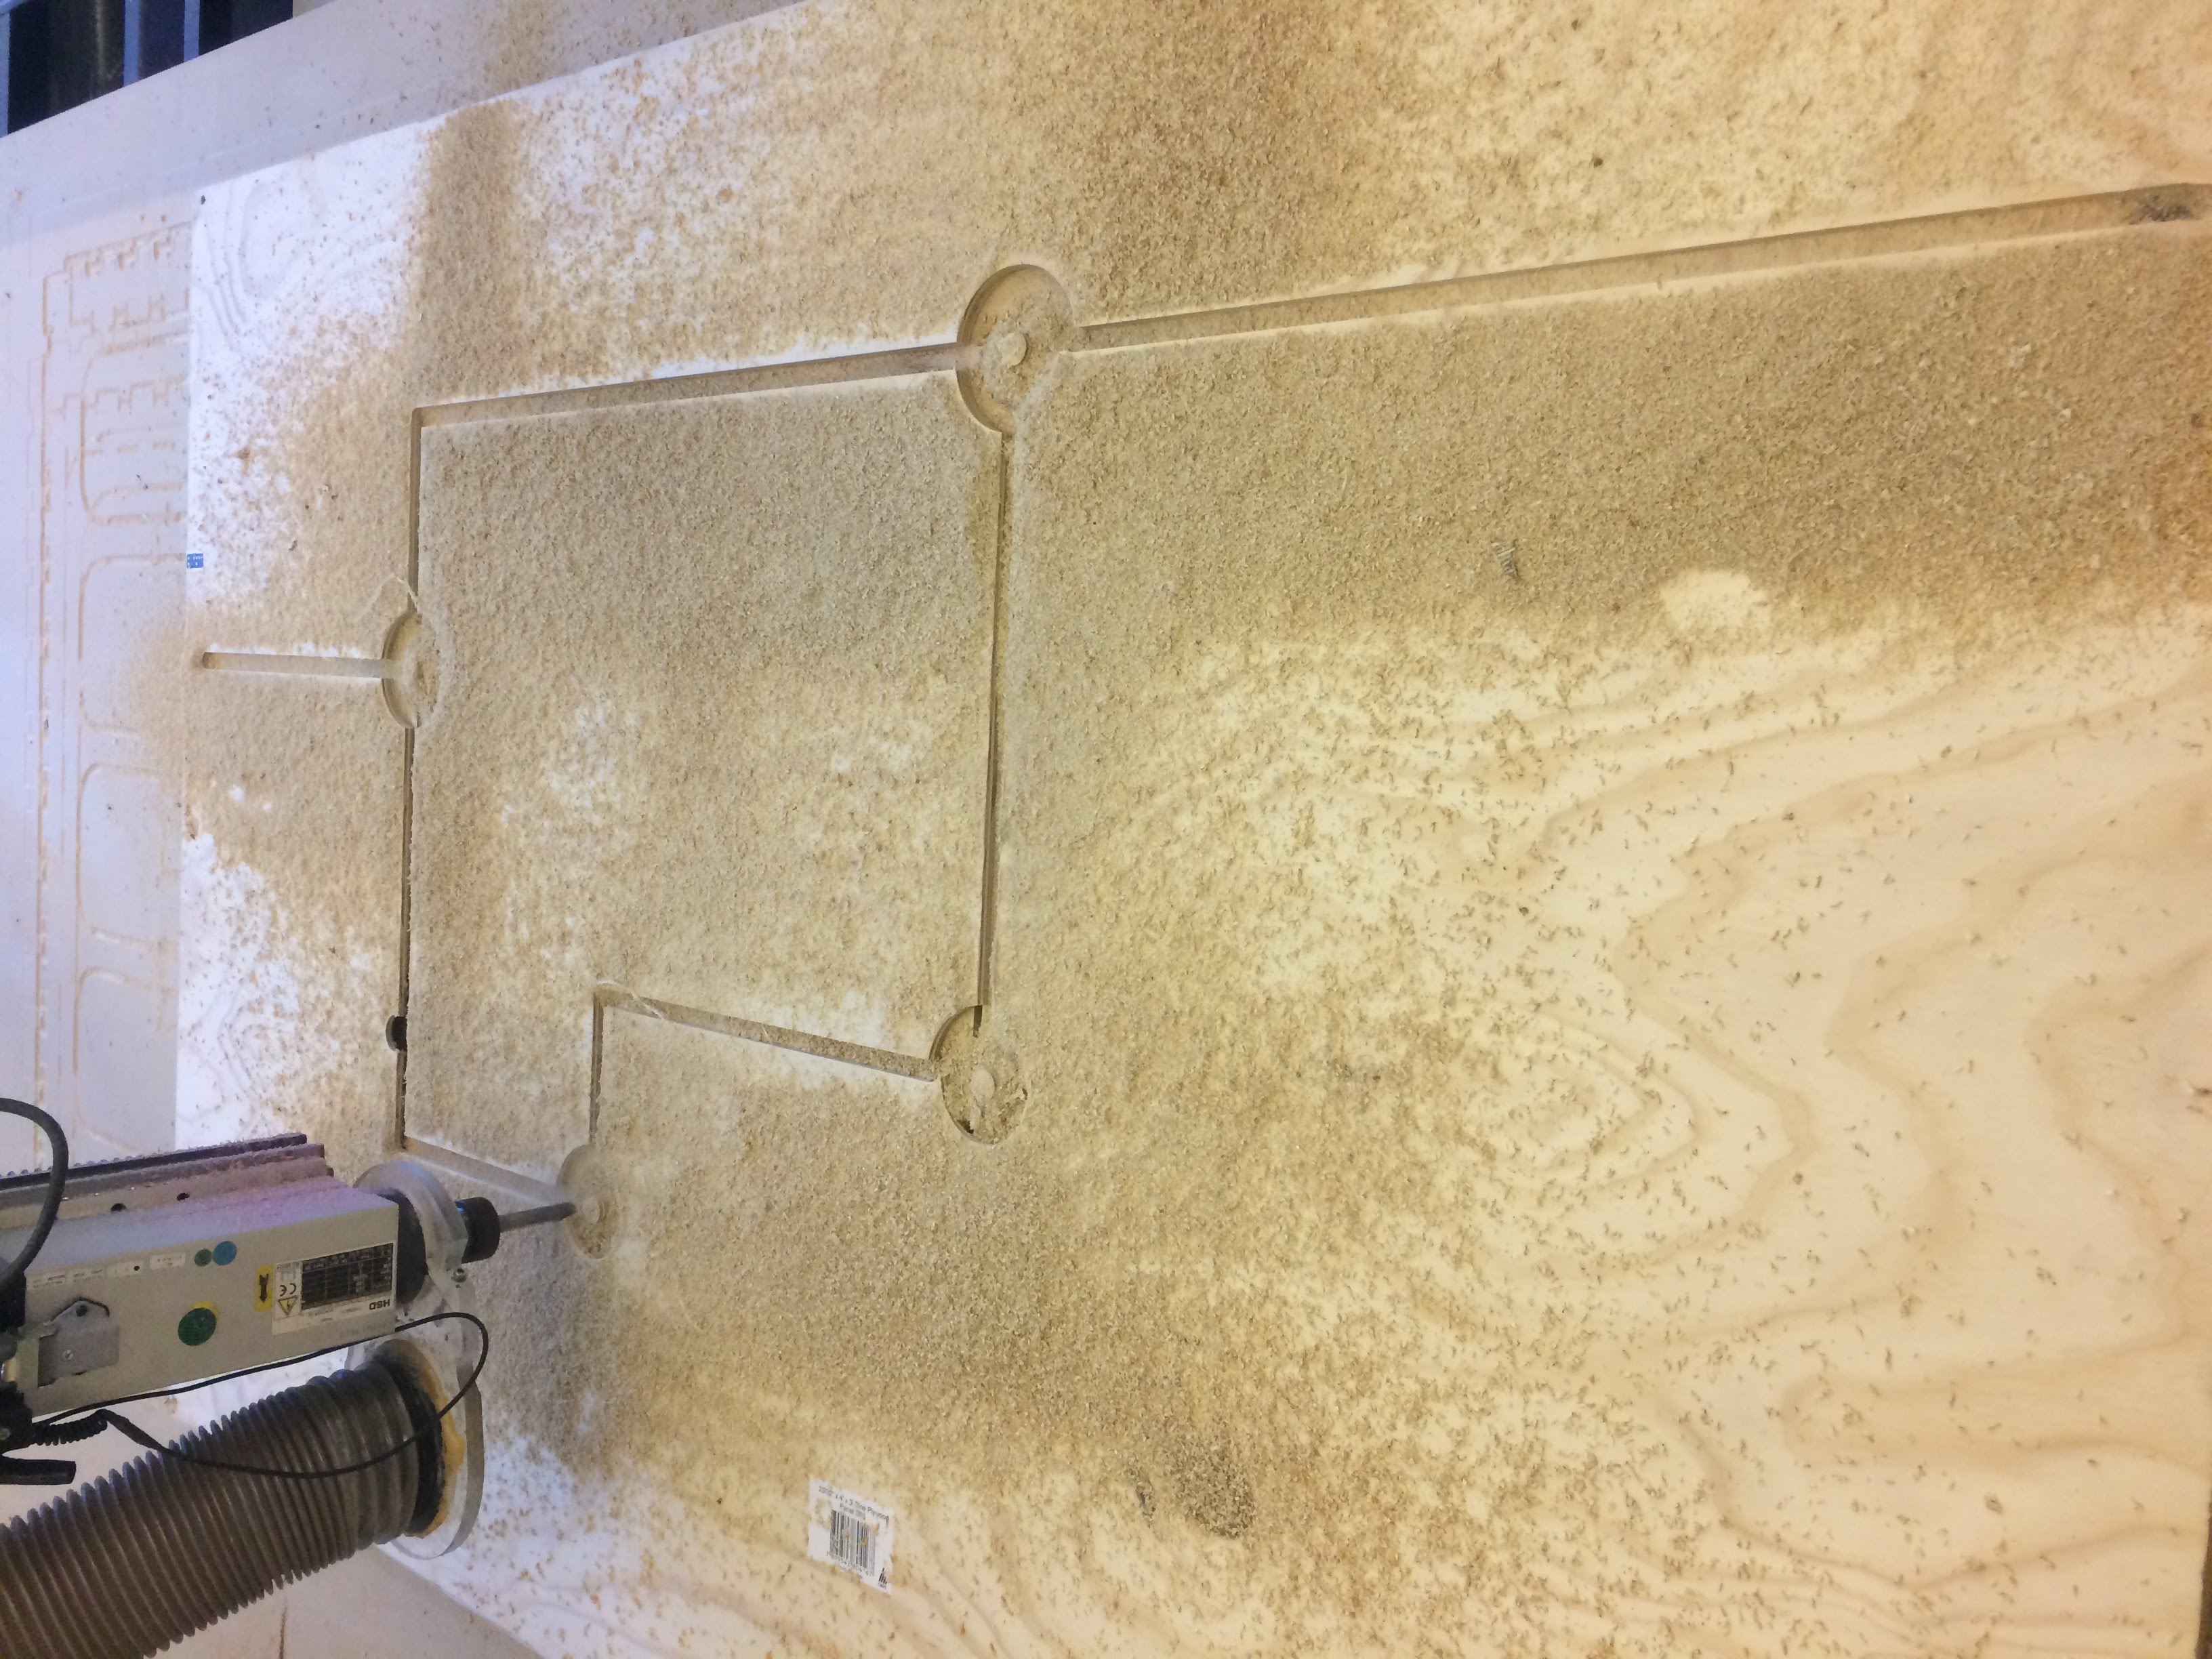
With the final designs completed, we put our plywood on the CNC router table and cut our channels and slots. The work was quick as the 1/2" end mill could blast through the material without a need for fine finishing passes. Since all of the cuts are hidden behind acrylic, there's no need to waste time on making it look good. This would make fabrication of a full room very time-efficient.