Composing New Email Messages
You can start writing a new email message by selecting File->New-> Mail Message, or by pressing the Compose button in the Inbox toolbar. When you do so, the New Message window will open, as shown in Figure 3-2.
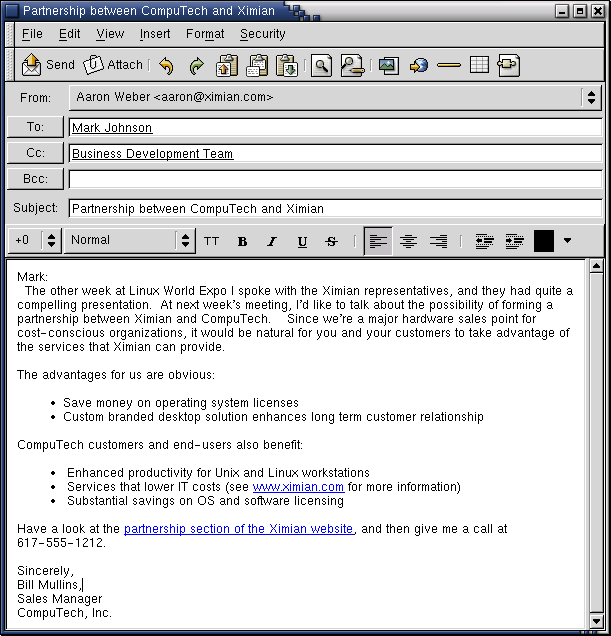
Enter an address in the To: field. If you wish, enter a subject in the Subject:, and a message in the box at the bottom of the window. Once you have written your message, press Send.
Sending Composed Messages Later
Evolution will send mail immediately unless you tell it to do otherwise by selecting File->Send Later. This will add your messages to the Outbox queue. The "Send Later" feature is particularly useful if you use a modem to connect to the Internet and pay per-minute charges: you can remain offline until you need to send mail, then connect and send all your mail at once. Mail in the outbox is sent when you click Send/Recieve in the main window.
To learn more about how you can specify message queue and filter behavior, see the section called Mail Settings in Chapter 9.
Working Offline: Select File->Work Offline to have Ximian Evolution disconnect from the Internet while you work. When you want to reconnect, choose File->Work Online. Alternativly, you can click the connection button at the bottom left side of the window.
You can also choose to save messages as drafts or as text files. Your options are:
Choose File->Save Draft to store your messages in the drafts folder for later revision.
If you'd like to have the message sent later, you can choose Send Later. That way, the message will be added to the queue, and you can send a batch of messages all at once.
If you prefer to save your message as a text file, choose Save As and then choose a file name.
More About Mail Composition
In the next few sections, you'll see how Evolution handles advanced email features, including large recipient lists, attachments, and forwarding.
Attachments
To attach a file to your email:
Push the attach button in the composer toolbar
Select the file you want to attach
Press OK
You can drag a file from your desktop into the composer window to attach it as well.
To hide the display of files you've attached to the message, select View->Hide Attachments; to show them again, choose Show Attachments.
When you send the message, a copy of the attached file will go with it. Be aware that big attachments can take a long time to download.
Specifying Recipients for Email
Evolution, like most email programs, recognizes three types of addressee: primary recipients, secondary recipients, and hidden ("blind") recipients.
The simplest way to direct a message is to put the email address or addresses in the To: field, which denotes primary recipients. To send mail to more than one or two people, you can use the Cc: field.
Hearkening back to the dark ages when people used typewriters and there were no copy machines, "Cc" stands for "Carbon Copy." Use it whenever you want to share a message you've written to someone else.
Bcc: is a little more complex. You use it like Cc:, but people on the Bcc: list are hidden from the other recipients of the message. Use it to send mail to large groups of people, especially if they don't know each other or if privacy is a concern. If your Bcc: field is absent, click View->Bcc Field.
If you frequently write email to the same groups of people, you can create address lists in the Contact Manager, and then send them mail as though they had a single address. To learn how to do that, read the section called Creating a List of Contacts in Chapter 5.
Choosing Recipients Quickly
If you have created address cards in the contact manager, you can also enter nicknames or other portions of address data, and Evolution will offer a drop down list of possible address completions from your address book. If you enter a name or nickname that can go with more than one card, Evolution will open a dialog box to ask you which person you meant.
Alternately, you can click on the To:, Cc:, or Bcc: buttons to get a list — potentially a very long one — of the email addresses in your contact manager. Select addresses and click on the arrows to move them into the appropriate address columns.
For more information about using email together with the contact manager and the calendar, see the section called Send me a Card: Adding New Cards Quickly in Chapter 5 and the section called Scheduling With the Evolution Calendar in Chapter 6.
Replying to Email Messages
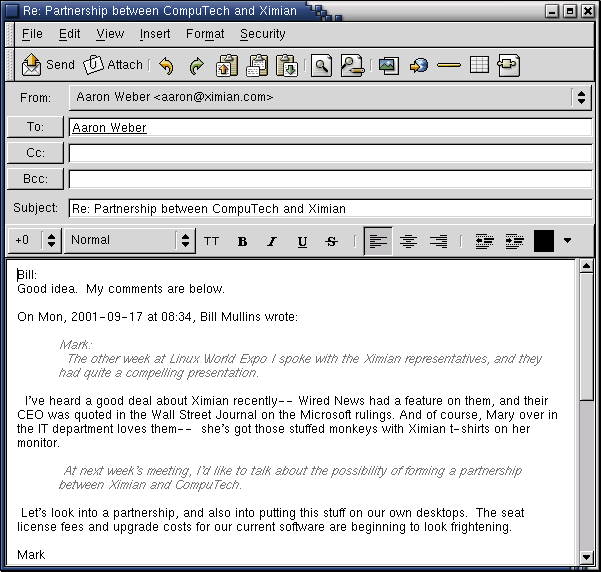
To reply to a message, press the Reply: button while it is selected, or choose Reply to Sender: from the message's right-click menu. That will open the message composer. The To: and Subject: fields will already be filled, although you can alter them if you wish. In addition, the full text of the old message is inserted into the new message, either grey (for HTML display) or with the > character before each line (in plain text mode), to indicate that it's part of the previous message. People often intersperse their message with the quoted material as shown in Figure 3-3.
If you're reading a message with several recipients, you may wish to use Reply to All instead of Reply. If there are large numbers of people in the Cc: or To: fields, this can save substantial amounts of time.
Example 3-1. Using the Reply to All feature
Susan sends an email to a client and sends copies to Tim and to an internal company mailing list of co-workers. If Tim wants to make a comment for all of them to read, he uses Reply to All, but if he just wants to tell Susan that he agrees with her, he uses Reply. Note that his reply will not reach anyone that Susan put on her Bcc list, since that list is not shared with anyone.
If you're subscribed to a mailing list, and want your reply to go just to the list, rather than to the sender, choose Reply to List instead of Reply or Reply to All.
What is a Mailing List?: Mailing Lists are one of the most popular tools for group collaboration on the Internet. Here's how they work:
The mail management program lets individuals subscribe to or unsubscribe from the list at will, without requiring the message writers to remember the addresses of every recipient.
Someone sends a message to a single address, like <evolution@ximian.com>. That address belongs to a program that distributes the message to a list of recipients. Mailing list servers can also let network administrators control mail flow, list membership, and even moderate the content of mailing lists.
Searching and Replacing with the Composer
You are probably familiar with search and replace features in any sort of text-editing software, and if you come from a Linux or Unix background, you may know what Find Regex does. If you aren't among the lucky who already know, here's a quick rundown of the automated text searching features that the message composer makes available to you.
- Find
Enter a word or phrase, and Evolution will find it in your message.
- Find Regex
Find a regex, also called a regular expression, in your composer window.
- Find Again
Select this item to repeat the last search you performed.
- Replace
Find a word or phrase, and replace it with something else.
For all of these menu items, you can choose whether or not to Search Backwards in the document from the point where your cursor is. For all but the regular expression search (which doesn't need it), you are offered a check box to determine whether the search is to be Case Sensitive when it determines a match.
Enhance your email with HTML
Normally, you can't set text styles or insert pictures in emails, which is why email is often regarded as uncommunicative and cold, and why people often resort to using far too many exclamation points to convey their feelings. However, most newer email programs can display images and text styles as well as basic alignment and paragraph formatting. They do this with HTML, just like web pages do.
HTML Mail is not a Default Setting: Some people do not have HTML-capable mail clients, or prefer not to receive HTML-enhanced mail because it is slower to download and display. Because some people may prefer not to get HTML mail, Evolution sends plain text unless you explicitly ask for HTML.
You can change the format of an email message between plain text and HTML by choosing Format-> HTML.
To send all your mail as HTML by default, set your mail format preferences in the mail configuration dialog. See the section called Other Mail Preferences in Chapter 9 for more information.
HTML formatting tools are located in the toolbar just above the space where you'll actually compose the message, and they also appear in the Insert and Format menus.
The icons in the toolbar are explained in tool-tips, which appear when you hold your mouse over the buttons. The buttons fall into four categories:
- Headers and lists
At the left edge of the toolbar, you can choose Normal for a default text style or Header 1 through Header 6 for varying sizes of header from large (1) to tiny (6). Other styles include preformat, to use the HTML tag for preformatted blocks of text, and three types of bullet points for the highly organized.
- Text style
Use these buttons to determine the way your letters look. If you have text selected, the style will apply to the selected text. If you do not have text selected, the style will apply to whatever you type next. The buttons are:
Push B for bold text
Push I for italics
Push U to underline
Push S for a strikethrough.
- Alignment
Located next to the text style buttons, these three paragraph icons should be familiar to users of most word processing software. The leftmost button will make your text aligned to the left, the center button, centered, and the right hand button, aligned on the right side.
- Indentation rules
The button with the arrow pointing left will reduce a paragraph's indentation, and the right arrow will increase its indentation.
- Color Selection
At the far right is the color section tool. The colored box displays the current text color; to choose a new one, click the arrow button just to the right. If you have text selected, the color will apply to the selected text. If you do not have text selected, the color will apply to whatever you type next. You can select a background color or image by right-clicking on the message background and selecting Page.
The Insert gives you opinions which let you spruce up your email to make it more interesting:
- Link
Lets you link some text to a website. Use this tool to put hyperlinks in your HTML messages. If you don't want special link text, you can just enter the address directly, and Evolution will recognize it as a link. To add a link:
Select the text you wish to link from.
Right click on the text and click on Link.
Put the URL you want to use in the URL field.
Click OK.
Note: If you're typing a webpage address to be automatically formatted, keep in mind that a space terminates the link.
- Image
Lets you put an image alongside text.
To insert an image into your email:
Open a new email by clicking New Message
Make sure that you have the Format->HTML selector checked.
Click the Insert Image button in the toolbar, or select Insert->Image.
Choose your image by clicking the Browse button.
Press Insert to insert the image.
- Rule
Inserts a horizontal line into the text to help divide two sections.
To insert a rule:
Open a new email by clicking New Message
Make sure that you have the Format->HTML selector checked.
Click the Rule button in the Toolbar.
Select the type of rule. You can use a plain line, a 3D line, or a yellow line with flowers.
Choose the size of the line, as a percentage of the width of the email window.
Choose the alignment and style. For the plain line, you can choose the thickness of the line, and whether it will be shaded, or solid. For the other types, you can only choose alignment.
Click Insert to insert the rule.
- Table
Inserts a table into the text to help divide two sections.
To insert a rule:
Open a new email by clicking New Message
Make sure that you have the Format->HTML selector checked.
Click the Table button in the Toolbar.
Select the Template you wish to use. Each template has a slightly different feel and layout.
If you so desire, you may change the other options such as: number of rows, columns, spacing of each cell, and more.
Click the Insert button.
Select the text you want to display as a link.
Right click on text and select Link
Enter the address you wish to link to in the URL field.
Press OK.
To add an image to your HTML message:
Select Insert->Image.
Click Browse to select the image you want to include in your email.
Along the right side of the window, choose the alignment, border, and other attributes of the image. If you change the size attributes, the image will be shrunk or stretched to fit the size you have chosen.
If you would like to make the image a clickable link, enter a URL in the Link tab of the window.
When you are finished, press Insert to include the image in your message.
You can insert an image into the background of your message by right-clicking on the message background and selecting Page. From that dialog, you may also select background color and set other general options about the html message you are composing.
HTML Templates
Evolution not only allows you to decorate your email with HTML text and graphics, but provides you with prebuilt templates for you to use when making these improvements. You can use these to emphasize a point or frame an image in an attractive manner.
To include a template into your HTML based email:
Create a new email by clicking New Message.
Make sure that the Format -> HTML selector is checked.
Click the HTML Template button in the Toolbar or select Insert -> HTML Template
Select the template type in the Template selection box. Your options are Note and Image Frame.
Set the size and alignment of the HTML template.
Click Insert to insert it where the cursor is.
Once you have inserted the template, click on the text in the template, and enter the text you want to use.
If you have selected an image frame template, right-click on the image and select Image to select the image you want to place in the frame.
Tables in Email
Evolution allows you to put tables in your HTML email to help organize your thoughts. These tables are a simplified version of what you might find in a spreadsheet program like Gnumeric.
To include a table in your email:
Create a new email by clicking New Message.
Make sure you have the Format -> HTML selector checked.
Select Insert -> Table or click the Table button in the toolbar.
Select the template, or style, you want to use for the table.
Set the number of rows and columns you want.
Click the Insert button.
Click in a cell and type to insert text into the table.
You can also edit a table after creation. Just right-click on it and select Table to open the table editing window again. Or, you can select items from the Table Delete and Table Insert menus.
Deleting an Entire Table: You can delete an entire table by right-clicking on a table or other HTML object in a message, and selecting Table Delete->Table. In an HMTL message, your signature, templates, and image inclusions all have tables around them, and you can remove them completely and quickly with this shortcut.
Forwarding Mail
The post office forwards your mail for you when you change addresses, and you can forward a letter if it comes to you by mistake. The email Forward button works in much the same way. It's particularly useful if you have received a message and you think someone else would like to see it. You can forward a message as an attachment to a new message (this is the default) or you can send it inline as a quoted portion of the message you are sending. Attachment forwarding is best if you want to send the full, unaltered message on to someone else. Inline forwarding is best if you want to send portions of a message, or if you have a large number of comments on different sections of the message you are forwarding. Remember to note from whom the message came, and where, if at all, you have removed or altered content.
To forward a message you are reading, press Forward on the toolbar, or select Message->Forward. If you prefer to forward the message inline instead of attached, select Message->Forward Inline from the menu. Choose an addressee as you would when sending a new message; the subject will already be entered, but you can alter it. Enter your comments on the message in the composition frame, and press Send.
Seven Tips for Email Courtesy
Don't send spam or forward chain mail. If you must, watch out for hoaxes and urban legends, and make sure the message doesn't have multiple layers of greater-than signs, (>) indicating multiple layers of careless in-line forwarding.
Always begin and close with a salutation. Say "please" and "thank you," just like you do in real life. You can keep your pleasantries short, but be pleasant!
WRITING IN CAPITAL LETTERS MEANS YOU'RE SHOUTING! Don't write a whole message in capital letters. It hurts people's ears.
Check your spelling and use complete sentences. By default, Evolution will put a red line beneath words it doesn't recognize, as you type them.
Don't send nasty emails (flames). If you get one, don't write back.
When you reply or forward, include just enough of the previous message to provide context: not too much, not too little.
Don't send spam.
Happy mailing!