2.00b Toy Product Design
Thermometer CAD
Adding Color!
We are incredibly fortunate to have a Polyjet 3D Printer that is capable of printing parts in any color (fundamentally it works just like a normal inkjet printer, but it keeps printing on the same paper over and over in layers to build up models). Because of this, we can add some colors to our models to really make them come alive!
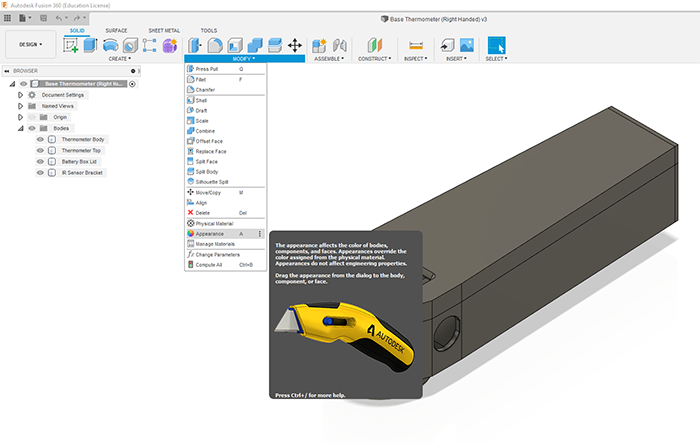
To add colors, navigate to and select the "Appearance" tool under the MODIFY drop-down menu:


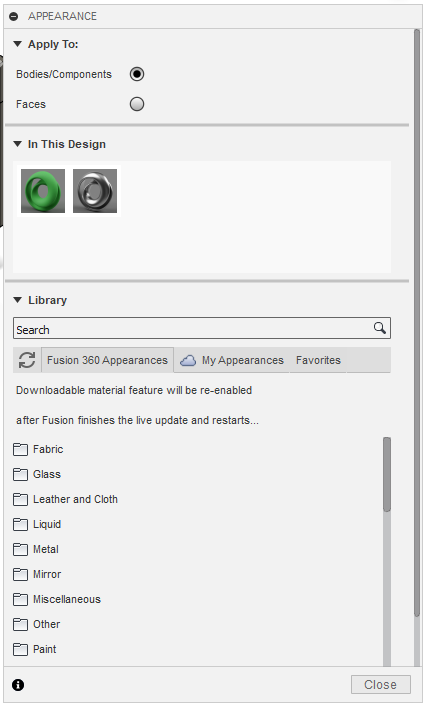
In the Appearance window there are three main sections of interest.
- At the top, you are able to select whether you would like to apply colors to entire bodies or to individual faces. Typically, you will want to apply your base or most prevalent color to the entire body (ie. with "Bodies/Components" checked) before switching to adding details on individual faces (ie. with "Faces" checked).
- In the middle of the Appearance menu is "In This Design," which shows you all the current materials you have used so far and allows you to use them in the same way a painter would use a palette. It also lets you edit materials and colors to your liking by right-clicking on them and selecting "edit."
- At the bottom is the Materials Library, which contains a plethora of textures and colors you can add to your model. Simply click on a material category to browse or search a keyword at the top of the section to find exactly what suits your needs!
Adding colors to our models from here is simple — just find the color you like, click on it in the appearance window, and drag it onto your model as shown below.

It is also possible to add small decals or images to surfaces in your models - while this is outside the normal scope of the class, we are able to print them! You can find a quick tutorial here.
Important notes: When you add color to your thermometer in Fusion, that color data is not automatically sent to the 3D printer. It must be manually added in by the TA team. While we are very happy to do that, please try to limit the details of the colors you add, and try to add at most two decals. Also remember that the colors the printer outputs will likely be slightly different than the colors shown in Fusion!


