State Machine and Control Structure
We designed a simple state machine to control the door system, with a focus on flexibility surrounding a core emphasis on safety. There are five states to the system (opened, closed, opening, closing, and emergency) which are shown in the diagram below.
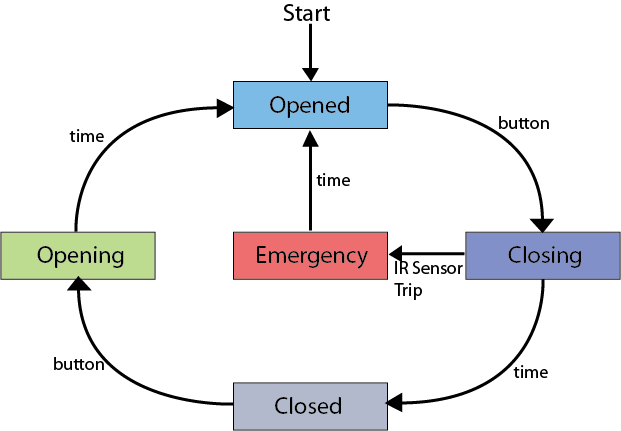
The State Machine:
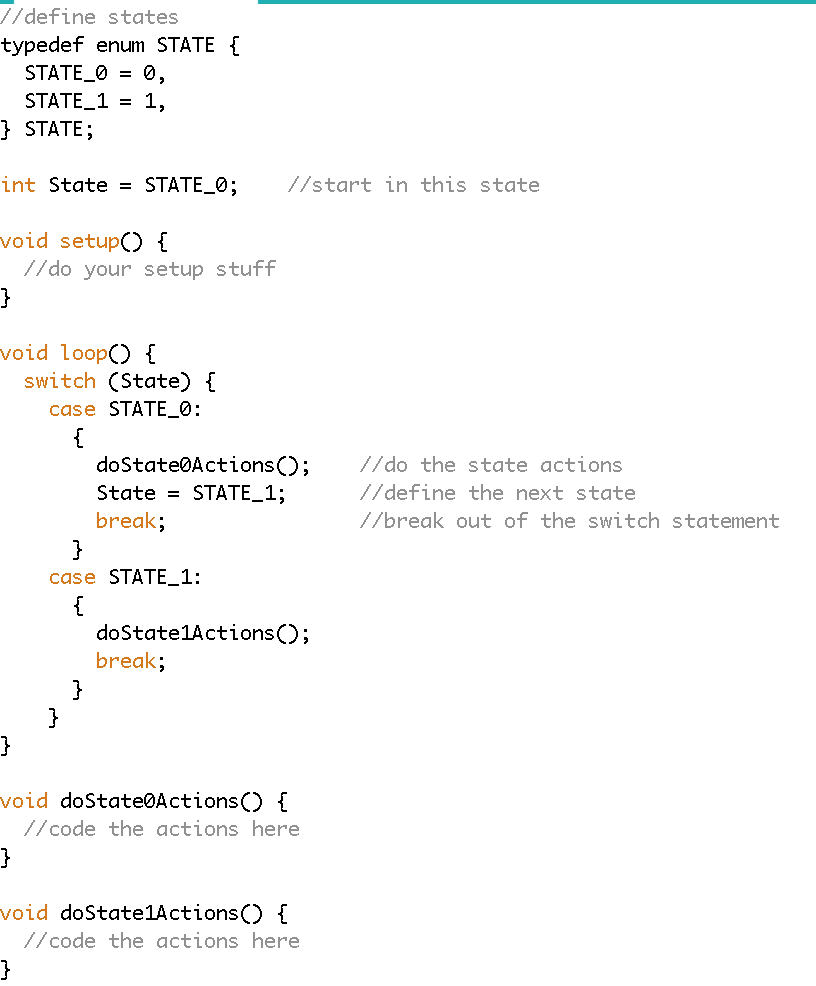
From a coding/control perspective, the advantage of a state machine design is that it decouples the system into independent, editable pieces. A state machine starts with a switch statement to determine the active state. Each state begins by executing the actions of that state, and ends by telling the system which state it should do next. To keep the code clean and clear (and thus easy to communicate amongst a team of designers), the state structure is defined in the main program loop and the state actions are defined outside of the loop in their own functions. The main program loop can be written entirely from the simple diagram shown above. Once completed it can be left alone, and all performance changes can be made in the state action functions.
In an awful analogy for non-coders: the main system structure is defined like the frame of a house, and the state action functions can be modified like the facade.
The Workflow:
What are the states of the system, and how does the system move from one state to the next? Answering this question results in the state machine diagram shown above. In our case, the system transfers between states using button presses, time delays, or the IR sensor trip switch. So after the state actions have completed, how does the system know to go to the next state? Well, it depends on the method.
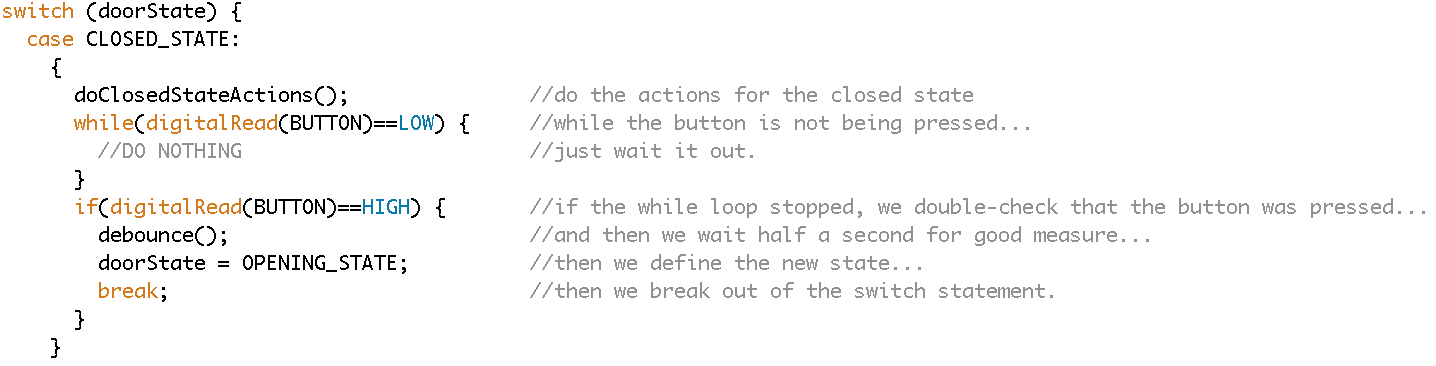
Buttons: In the case that the system should wait until a button press to enter a new state, a simple while loop is used to pause the system. After the while loop is broken by a button press, a debounce() function is often a nice trick to make sure the button doesn’t trigger multiple times and cause issues. (debounce() is really just a fancy way of saying “wait for half a second after the button is pressed”) The example below shows how the system goes from the closed state to the opening state on button press.
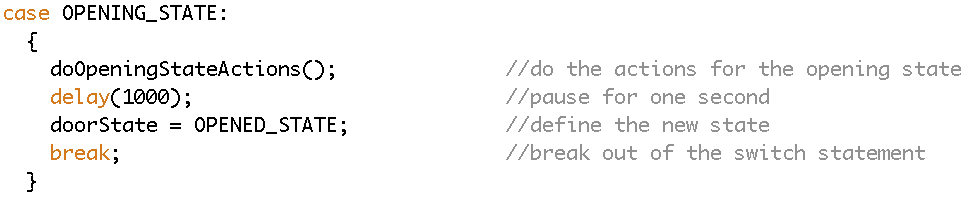
Time Delay: In the case that the system should wait a fixed amount of time to enter a new state, an even simpler delay() function is used to pause the system.
IR Sensor Trip Switch: This case is a bit more tricky. Here we want the state action functions (for the closing state, specifically) to execute, but we also want the IR Sensor Trip Switch to cancel those actions and force the system to the next (emergency) state. To do this, we incorporate an IR sensor check into the state action function, making sure that the state action function does is sliced up into a loop that constantly checks the IR sensor before each small step. The guideline here is that the loop time needs to be FASTER than the time it would take an obstruction/person to move past the trip switch (but then again, honestly if something moves by that fast it probably won’t get squished by the door!). If the trip switch is ever triggered, the new system state is defined and the function is exited immediately. If not triggered, the function will run its normal course.

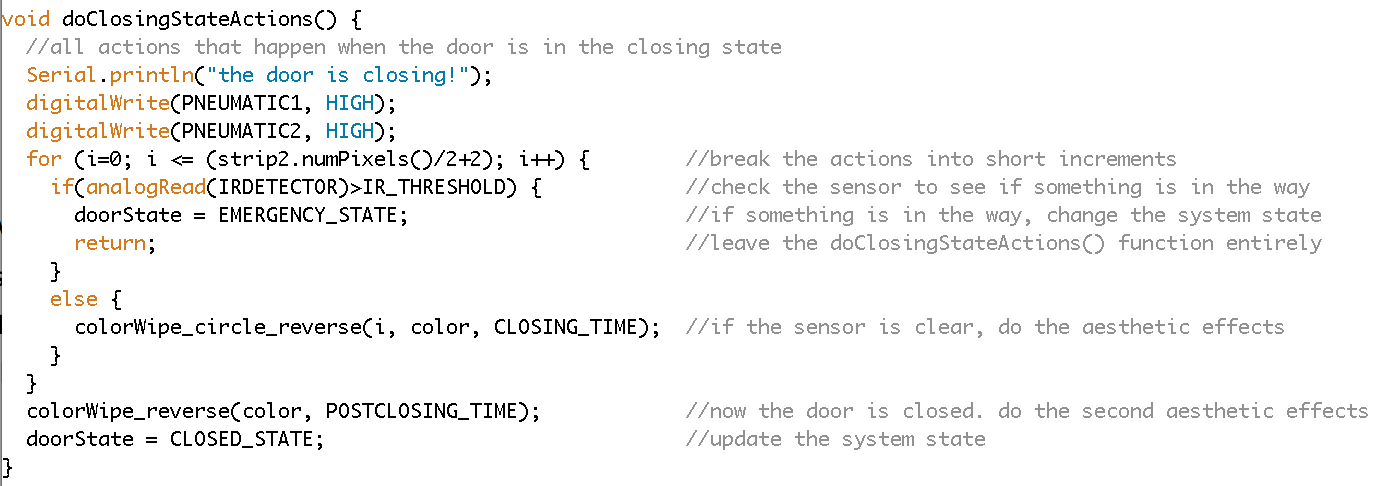
The Code:
Thats about all there is to say about the state machine to control the door system. You are welcome to download the code here if you want to look at it all in more detail, especially when it comes to setting up and defining the system states to begin with. You might also be interested in the code for the lights and the final wiring diagram that we designed.