This page covers how we built the tentacles, nests, and eggs in the well.
Tentacles
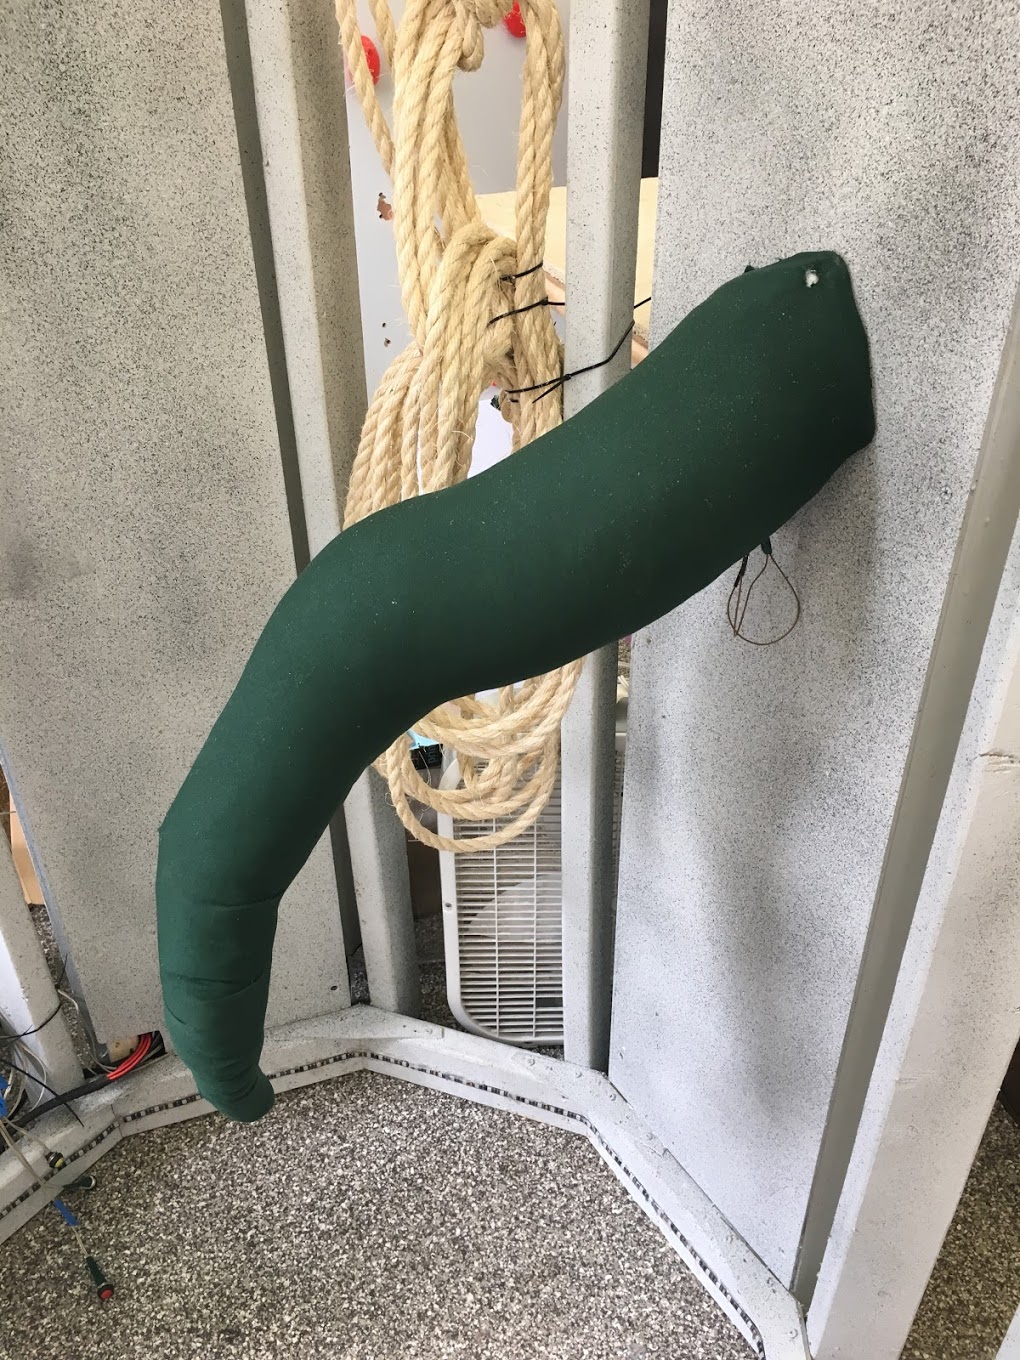
The tentacles were manufactured with a high degree of control and flexibility by making them out of a fabric shell stuffed with stuffing at a high density, to give the appendage the desired stiffness. The fabric shell could be virtually any shape, and only took about 30 minutes to fabricate. We also experimented with foam casting and carving, but both methods took substantially more time and effort, and the end product didn’t look as polished. The foam tentacles also had less ideal stiffness, for our purposes. The reason this stiffness was so important was the sensing aspect of the tentacles. A flex sensor was placed along the length of the tentacle, and if it was bumped by the explorers during play, it would trigger, very reliably for the fabric tentacle. This would then make the egg drop and the explorers would have to restart. As far as appearance, the tentacles were made out of a matte dark green fabric and looked pretty convincing, but details like suckers could easily be added to make it even more realistic.
Nests - Design and Look

For this model our nests started out as paper bowls, where we cut them in half ~1/2" from the bottom of the bowl and then pulled the rim of the bowl until it looked more uneven and less like a bowl. We then folded cardboard into a triangular support and hotglued it to the side of the bowl so that there was a flat surface for the bowl to connect to the well wall. We finally hot glued on nest material and spray painted the entire object brown. For this to be implemented in an Open World setting the bowls would have to be something more structural (probably plastic or wood).
Nests - Electrical and Moving Components
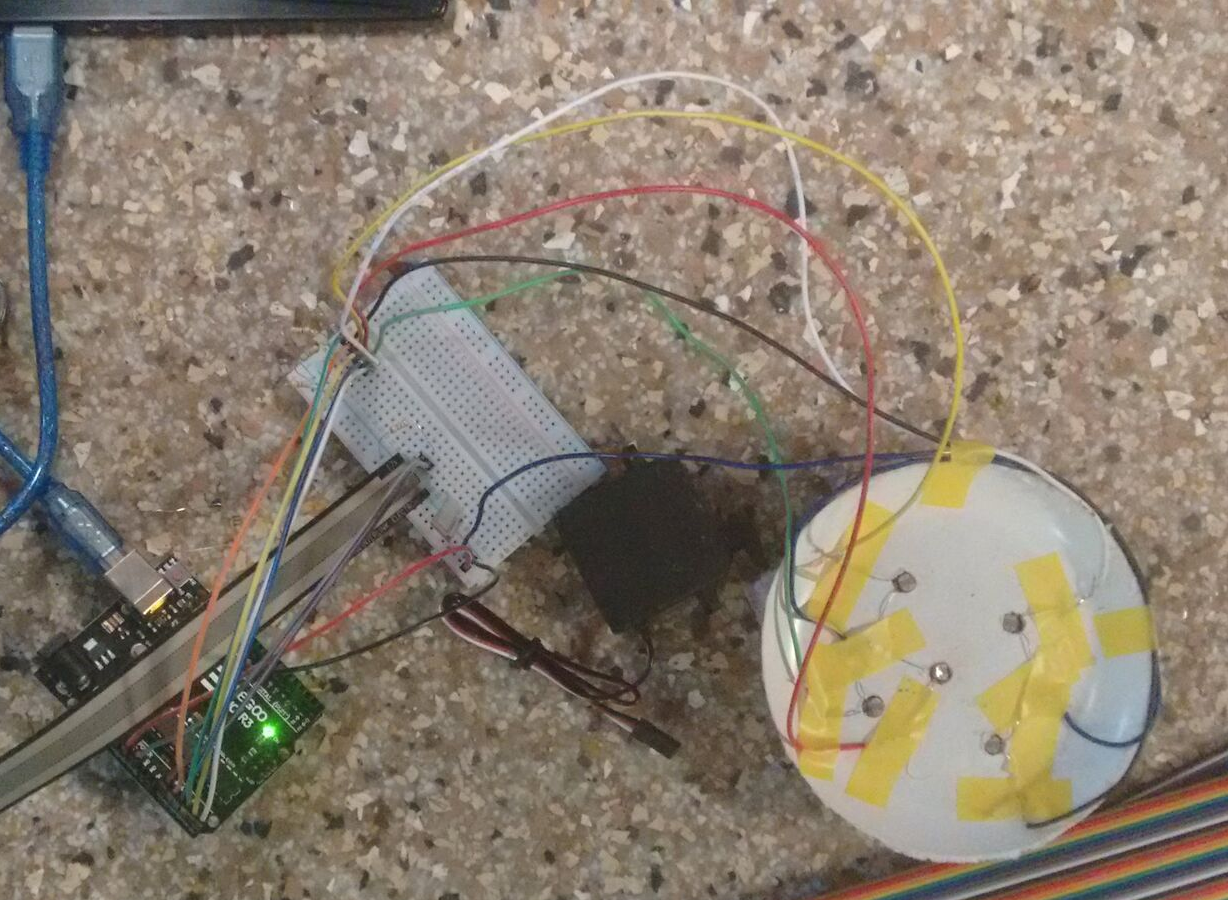
The base of the bowl was attached to a piece of foam, which has a cutout for the servo horn. In our model these pieces were all glued together. The servo horn is attached to a small continuous rotation servo. The basket has 5 small indents for 5 photoresistors, as shown in the picture. If any of the 5 photoresistors detected a significant change, the system has detected an egg, and the servo rotates down 90 degrees and then back up. The video of this working can be seen on the Electronics page.
Eggs
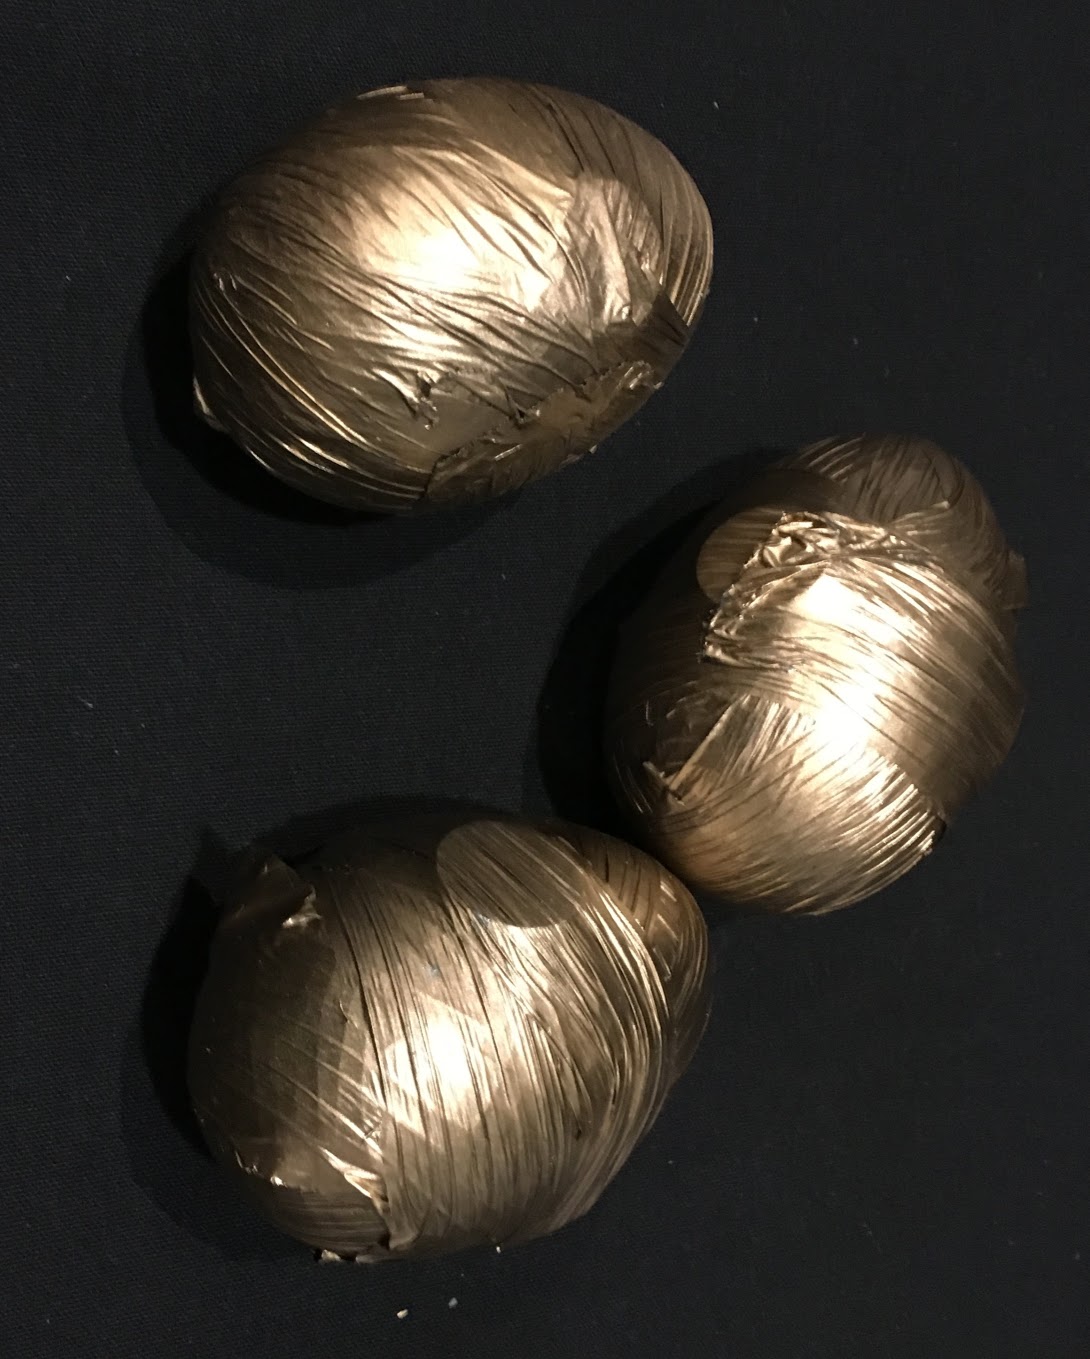
The basic requirements for the eggs were that they would stick to the electromagnet, so that it could pick them up, and that they would appear to be gold. We stuck with the idea of a plastic egg form, that we would fill or cover with metal, because an entirely metal egg would have been much more expensive and heavy. Our initial design, a plastic egg with washers stuck to the inside, proved to not have enough magnetic attraction, because the washers were too far from the electromagnet. To address this, we instead glued washers to the outside of the eggs, but ran into the issue of the washers falling off during a drop test. Finally we settled on wrapping these eggs in plastic wrap, making use of its compressive strength to hold the egg together. This also gave the eggs a pretty nice surface finish, when spray painted gold. In future iterations of these eggs, probably a hollow metal egg would be more ideal.