Tea Leaf Jars
Final Design and Prototype
Concept Refinement and Feedback
During concept refinement, the team came up with a tea leaf jar silhouette with four curved surfaces, as shown in the image below. While such a design is elegant and fits well with the theme of a ancient Chinese tea room, there were concerns about how 80 of such jars could be easily made, and how the designs could be applied to the curved surfaces.

Final Design
When determining the final design of the tea leaf jars silhouette, the team first explored different options that could be possible in making the jars of the above initial design, such as 3D printing and CNC routing. However, none of options seem feasible in the given time frame, nor practical in mass production. Thus, the team ultimately decided to adopt a simplier inverted truncated-square-pyramid design. By doing so, the jars could be produced much more easily. Such a silhouette would also make it easier to apply designs onto them, due to the lack of curved surfaces.
Prototyping
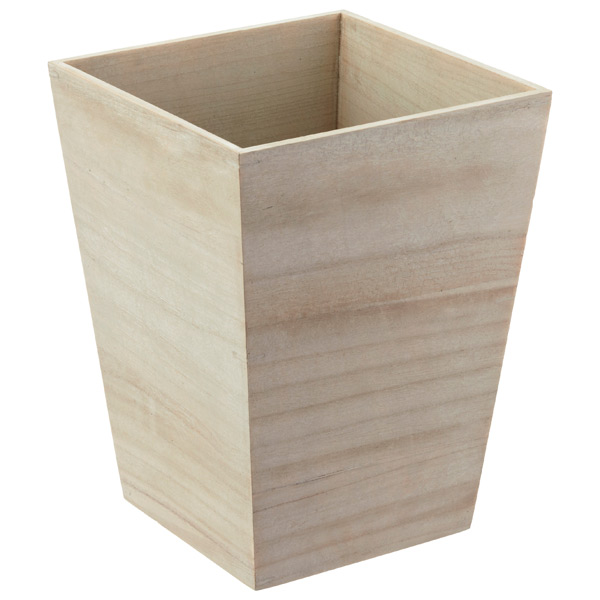
To simplify the prototyping process, the team decided to purchase wooden bins and use them as the main body of the jars. This allows the team to spend less time on trying to make the jars symmetrical and uniform, and instead put more emphasis on the decoration of the jar exteriors. Shown in the picture below is the bin used by the team, courtesy of The Container Store.
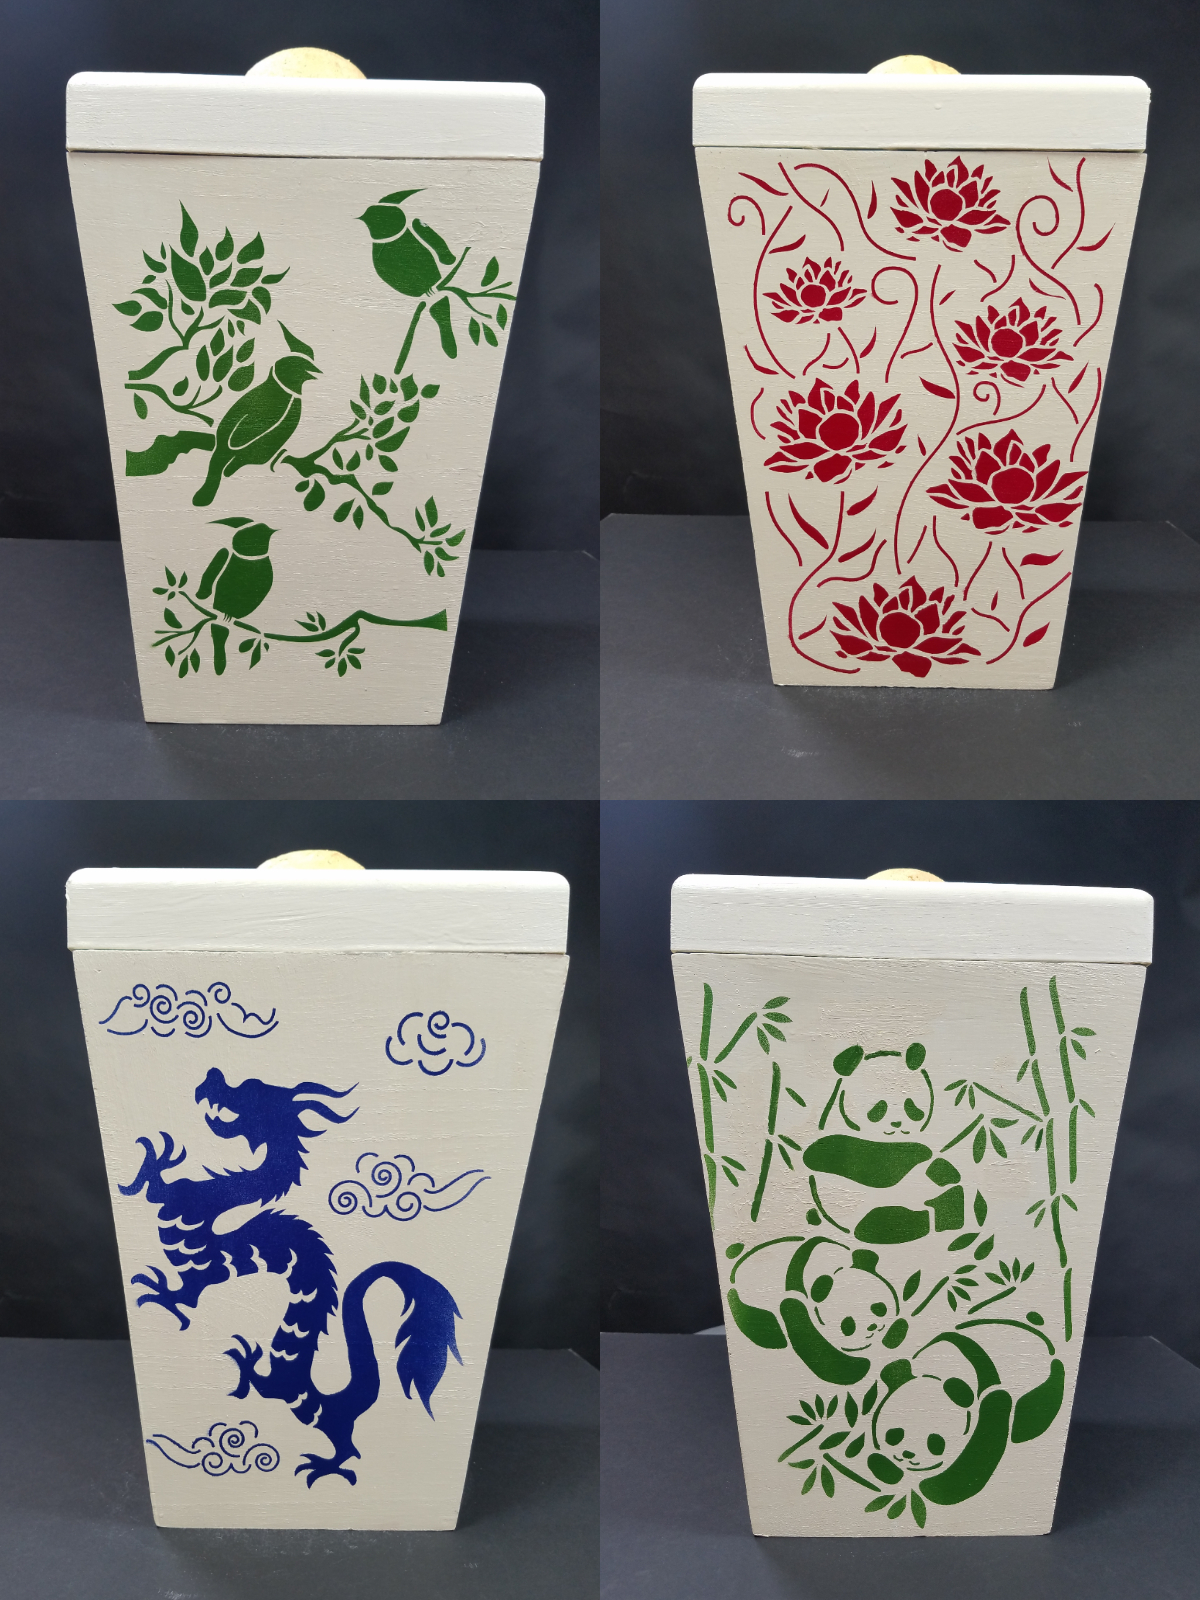
Prior to applying any designs onto the wooded bin surfaces, the bins were first primed with Gesso. Then, ivory-colored acrylic was used to give the bins the base color wanted. After the acrylic paint has been dried, a layer of gloss was applied to it to protect the paint, as well as to give a first layer of smooth finish. After all these base coats were dried, the designs were then applied onto the bins, the once-simple dust bins were transformed into exquisite jars! More details on how the designs were applied could be found in the Designs page.
On the other hand, foam core and styrofoam were used to make the lids. For the base of the lid, foam core was first cut to the required dimensions on a bandsaw and then sanded to perfection. This was followed by forming the edges of the primary surfaces using a handheld router to give them desired shape. To give the foam the desired color, fine dust from sanding of the surfaces was first removed. Then, primer spray was used to prime the surface for the spray paint. After spray painting all the lids ivory, a clear gloss spray was used to give the desired glossy finish. The picture below shows the foam lids before being primed and colored.
.jpg)
Finally, for the top parts of the lids (the dome on the top), they were made by cutting styrofoam spheres into halves, applying white putty over them and sanding the putty to acheive a smoother surface, then painting them gold using acrylic. Below are some pictures of the final jars: