Touch Sensor Handle
by Carolyn Sheline
Overview
I decided to develop the handles for the stabilizer. A game concept that the team decided on was to have the laser not light up until all of the users were holding the handles with both hands. This addition was made for safety and to ensure that all the users were playing the game properly. This page details the design concepts and engineering analysis that went into the CAD and electronic prototyping for the touch sensor handle.

Components
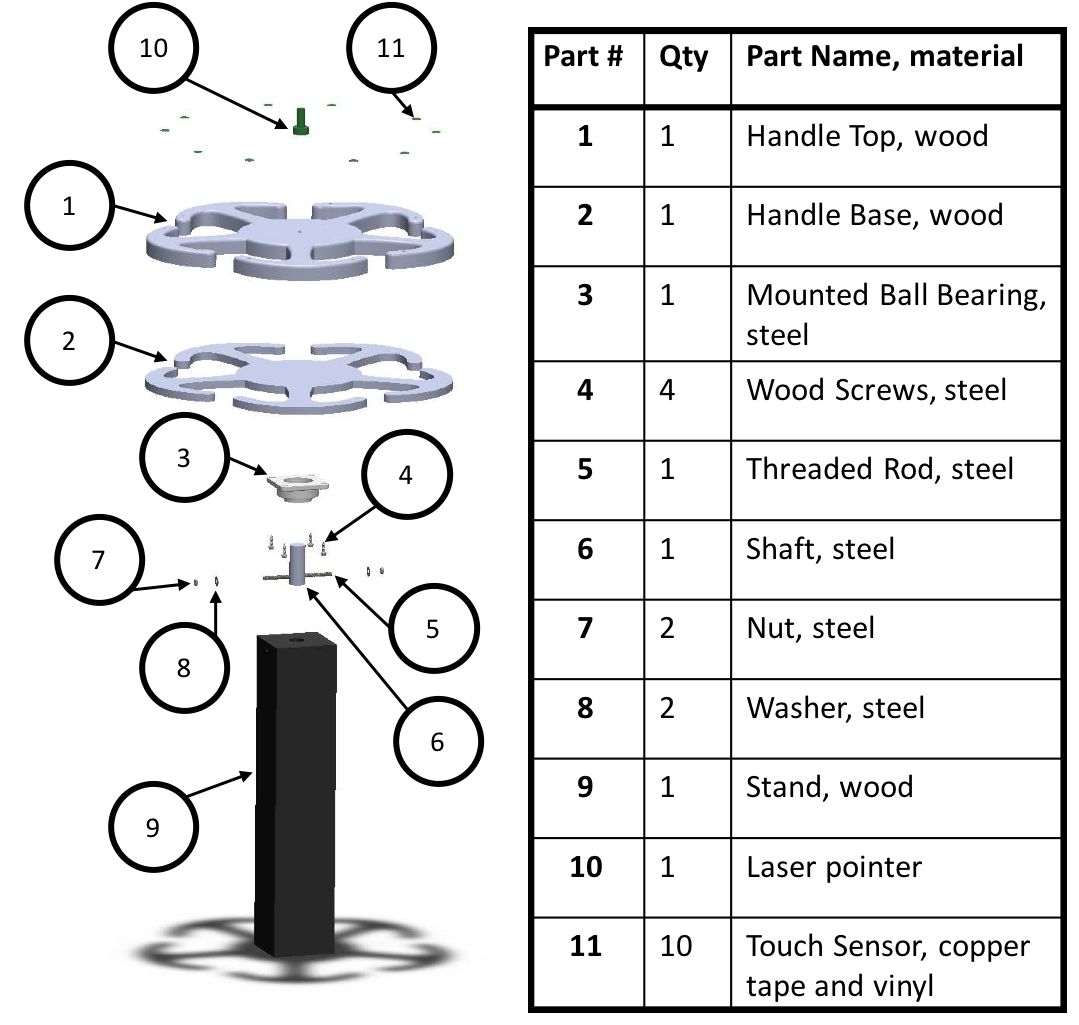
The exploded view and parts list for the CAD of the touch sensor handle is shown. The parts list can be broken into groups, namely the stand, the handle, the laser, and the touch sensor.

Stand
The stand assembly is comprised of a wooden beam with a mounted ball bearing (parts 3-9). Because the users must keep their hands on the touch sensors of the handles while also being free to move about the platform to distribute their weight, the bearing is necessary so that the handles can spin. Other engineering decisions had to be made on the stand including how tall and thick to make it. The decision for how tall to make the stand came from analyzing the average chest height for men and women (here), which was found to be about 1 meter. The decision for how thick for making different components (mostly the stand, shaft, and handle arm) came from analyzing the maximum bending stress that would be induced from a 100kg person hanging on one of the handles. This was then compared to the maximum allowable stress of the material and safety factors were included to ensure that the maximum stress wouldn’t be close to the yield stress. The handle arm was a weak point, and in a final product could be made out of a stronger material such as steel, but for cost reasons will be made out of wood for this project. Also, this analysis found that the shaft of the ball bearing should be at least 30mm (we used 50mm), and the stand should have a diameter of at least 100mm (we used 200mm). The stand itself will be made out of wood and covered in foam for safety. A hole will be drilled in the top to mount the shaft for the bearing. Then a hole will be drilled in the side of the stand and the shaft and a threaded rod will be fitted through and clamed in place, with nuts and washers, in order to fix the shaft to the stand. Then the bearing is fixed to the shaft with set screws, and wood screws are used to mount the flat side of the bearing to the handle base.
Handle
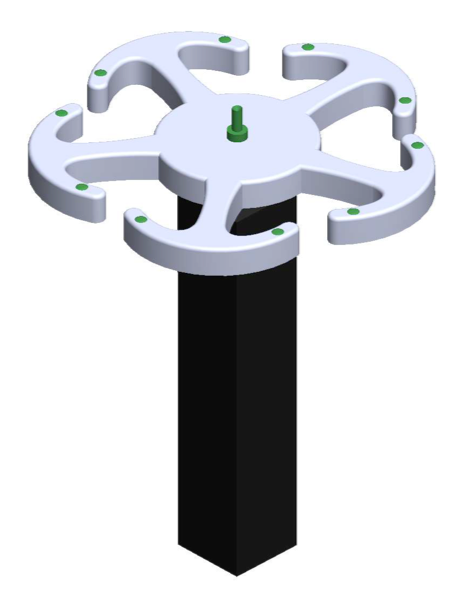
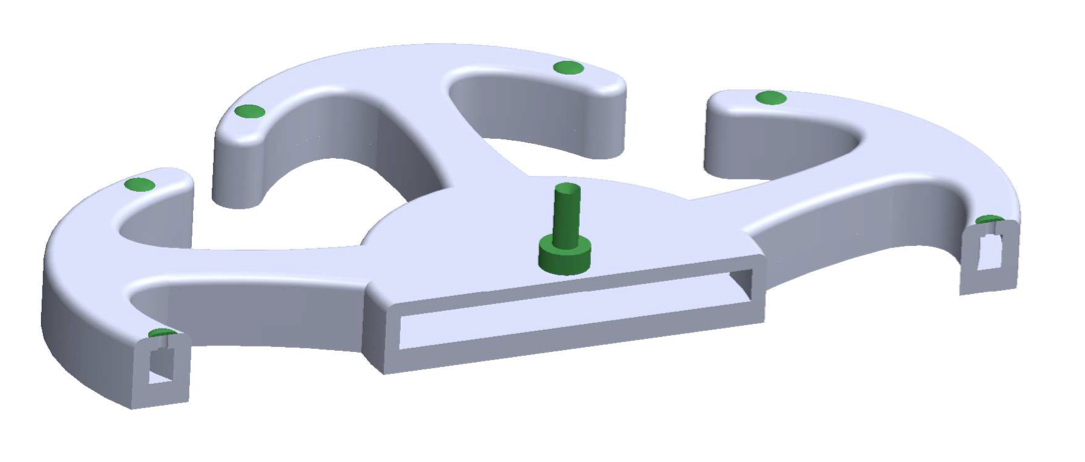
The handle assembly is comprised of a top and bottom which will be CNC routed from wood and then screwed together. The top piece is hollow to allow for the electronic components to fit inside. As can be seen in the image, there is a cutout for wires to go from the touch sensors to where the electronics and laser will be in the center. The shape and colors (green and silver) that were used were chosen to give it a futuristic/ spaceship feel while still being fluid and appealing to hold onto. Also, 5 handles were chosen as that will be the maximum people allowed in a team.

Laser
The laser was chosen to be mounted to the top of the handles in the center. The laser chosen is a class 3A laser for safety reasons and FDA regulations. A green laser was also chosen as they are more visible than a red laser. As previously discussed, the laser will not turn on unless the correct number of sensors are touched.
Touch Sensor
To electrically prototype the touch sensors Arduino Uno and Adafruit MPR121 Capacitive touch sensors were used. Ten of the touch sensors were connected to wires and capacitive tape and then hooked up to the Arduino board and a green LED. Code was written in which the number of people entering the room was input, then this number was multiplied by two to define the number of sensors that needed to be touched for the LED to light up. An example of the code and sensors working is shown. In the video an input of 2 people was given and the LED will only light up when 4 sensors are touched. If too many or too few sensors are touched the LED turns off.