Introduction
These tutorials have received minor cosmetic changes to make them appropriate to Beta 1. More updated materials will be coming soon. The new TNG Game Creation Curriculum may also be of help. There are more tutorials available in the TNG Google Group too.
Video Tutorials Now Available (using Preview 4.2) also for the adventurous there is a shape importer tutorial to import your own 3D shapes. And new to Preview 3, check out Searching and Typeblocking features. Also there is a navigation tutorial for the SpaceLand Navigation in Preview 4.
This tutorial is an overview of StarLogo TNG. If you have never used StarLogo TNG (even if you have used StarLogo) then you should probably read this tutorial. If you have already read this one and want to jump to another tutorial. Try these:
Also check out the new TNG tutorial on Concepts of Complexity.
When you launch StarLogo wait a few seconds (the time will vary based on your computer). You should see a splash screen and then soon see the SpaceLand (3D) and Canvas (programming) windows. Let's explore what these windows are for.
SpaceLand
In StarLogo, you have agents that run the programs you write. When you first start StarLogo, there are two “Turtle” agents standing a couple of spaces apart in the middle of SpaceLand. Using your mouse, you can drag the green terrain around to move the camera looking onto SpaceLand. You can also rotate the view by right-clicking and dragging. The easiest way for beginners is to use the camera controls in the lower right.
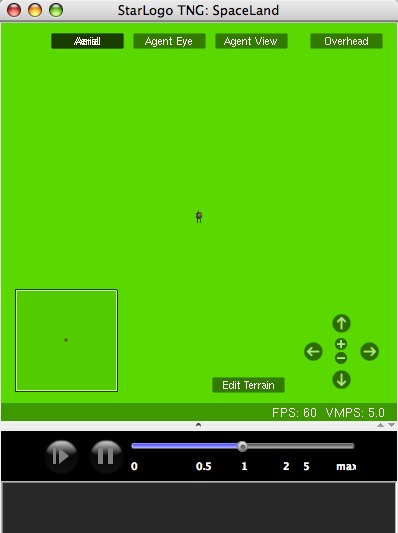
There are four textual buttons at the top of SpaceLand. The aerial viewis the default perspective, where you can fly the camera around wherever you choose. When in aerial mode you can move the camera either with the mouse (click and drag to move left and right, use the scroll-wheel to zoom, and right click and drag to change the angle) or with the keyboard (if the keyboard controls camera option is set in the options menu). If you forget the keys, you can press the H key for help. Again, the controls in the lower right may be the easiest. To see what they do, you can mouse over them and look at the status bar on the bottom.
The Agent Eye is for first person view.
- Press the Agent Eye button to have the camera jump inside a turtle’s head so you can see what the turtle sees.
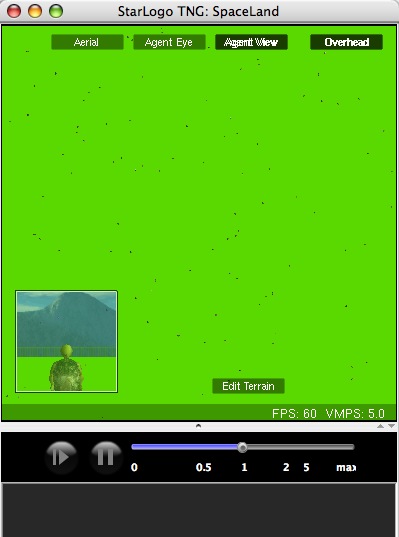
The Agent View button is for third-person (over the shoulder) perspective.
- Press the Agent View button to have the camera jump over the turtle’s shoulder.
The overhead view is a top-down "orthogonal" view that looks 2-dimensional
- Press the Overhead button to have the camera jump to the 2-D view. Note there is still an inset that is 3-D. The contents of this inner-window can be controlled with the agent-eye and over-shoulder blocks.
All of the views can either be controlled by the buttons or the blocks in the Control palette.
In the overhead "Aerial" view, you can also inspect individual agents by calling up Agent Monitors. To get an Agent Monitor for an agent, go into the Airplane view and move the mouse around over the screen. When the mouse is aligned with an agent the cursor will change to a hand. Click on the agent and its monitor will pop up.
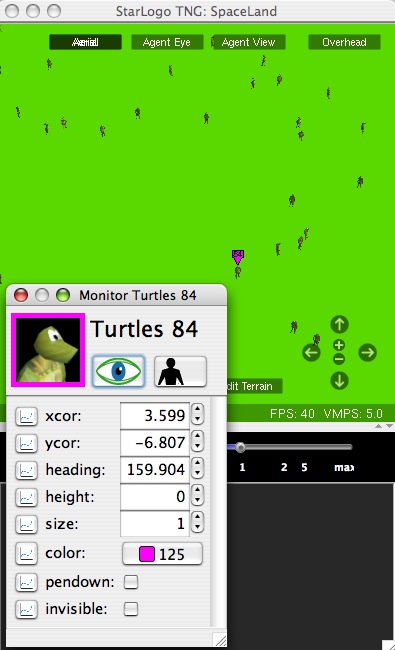
Agent monitors reveal all of the variables for the associate agent. You can view those values, change those values (either directly or by using the arrows), and even graph those values (using the graph icon). The location of the agent being monitored is indicated with a bubble indicating its color and number. Note you may also view that agent's current view by clicking on the associated eye or over-the-shoulder view.
Block Factory
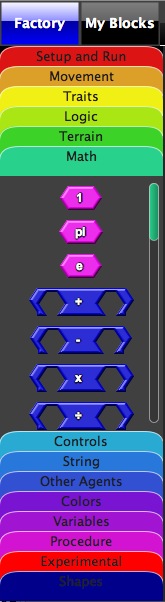 |
In StarLogo TNG, you write your programs using blocks that fit together like a jigsaw puzzle. Each block has a different command and has different shapes to help your figure out what they can connect to. The blocks are "created" in the Block Factory. You can use blocks created in the Block Factory to create your program.
The Block Factory is on the left side of the screen. There are 14 category tabs that you can press to see the blocks inside each category. Some blocks appear in multiple categories. Look at some of the blocks and try to figure out what they do.
- Click on the Math category and look at the block for a number. Notice that numbers have angular connectors on both sides. But also notice that true and false (known as booleans) have rounded connectors.
- Click on the Movement category. Look for a block with a port on the right that a number block can fit into. For example, look at the forward block right at the top. The angular empty space (known as a port) shows you that the block takes a number as its argument.
|
Block Canvas
The Block Canvas is the empty black space to the right of the block factory, which has a label called “Turtles.” This area is where you place the blocks that make up the program for the turtle to run. Try the following to make a simple program:
 |
- Click on the Movement category (if it is not already selected).
- Drag a “forward” block from the factory onto the canvas. You will see that a number block “1” appears automatically! That is called the default argument for the forward block. You can click on the number 1 and type the number 5.
- Double-click on the forward block. You should see the two turtles in SpaceLand move away from each other. Every turtle agent ran the program “forward 5.”
- Now grab out a "left" block from the Factory. Attach the left block directly beneath the forward block. Now try double-clicking on the forward block. Notice how it moves foward and turns left each time you double-click on it.
- Scroll down and find the pen down block. All agents hold pens, so they can draw where they've been. Bring the pen down block out of the library and then double-click on the pen down block. Now try double-clicking on the forward block. Notice how the agents leave a trail.
- Finally, it is a little cumbersome to keep double-clicking to make the blocks run. Instead, go to the Setup and Run section of the Factory and drag out a Forever block. Attach the top of the forward block to the notch on the Forever block. Now flip the switch on the Forever block and watch the agents run.
|
If you make a mistake and want to get rid of some blocks, you can drag them to the Trash Can in the lower right, select them and press delete, or drag them back to the Factory. You can navigate across sections of the Canvas by clicking and dragging on the scrol bars on the bottom and right of the canvas or by using the mini-map in the upper right.
My Blocks
The blocks in the Block Factory are blocks that any agent can run. Some blocks are specific to certain breeds (types of agents that you define - e.g. cats and dogs might be two breeds in one model because they have different behaviors, and people and cars might be breeds in another model). By default, you have one breed of agent called Turtles. On the top right of the screen you'll see a button that says My Blocks. Click on that button to toggle to the My Blocks section instead of the Factory section.
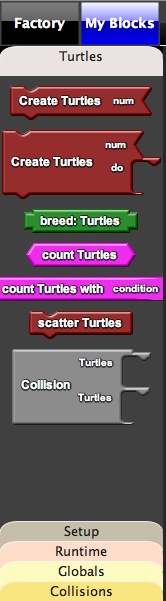 |
- Click the Tab that says Turtles to open the Turtle Blocks. Notice how there are several blocks in here that are specific to Turtles, including create blocks, collision blocks, and count blocks. Drag a “create turtles” block onto the canvas.
- Change the number to “20”.
- Double click on the create turtles block. 20 turtles should appear all on top of each other in the center of the screen.
- Run your forever block and watch all of the agents tha tyou have created run your code.
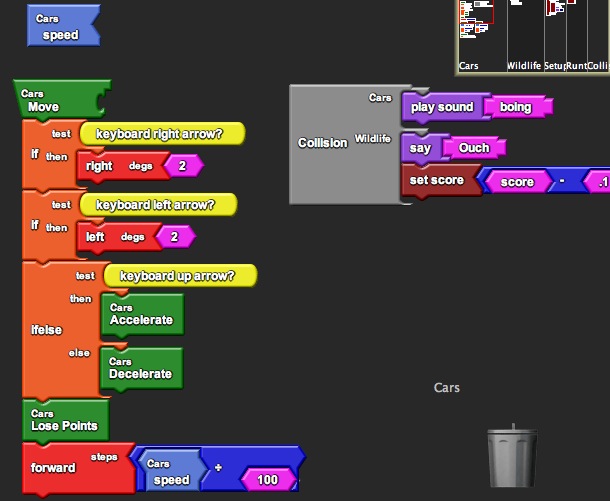
There are many important blocks contained in the My Blocks sections. You can think of these blocks as belonging to the associated breed (though in some cases other breeds can "borrow" these blocks). One of the most important is the Collision block that runs whenever two agents run into each other. See the other tutorials for more on the Collision block.
The other tabs in the My Blocks section are for Setup (for when you create new things at the beginning of a model), Globals (for some characteristics that are shared across your breeds) and Runtime (where you would normally put your Interface buttons). Each of these areas are "suggestions" for where you might put your blocks. They don't necessitate placement. In a later tutorial we'll use the Edit Breeds to make new breeds. |
Runtime Space
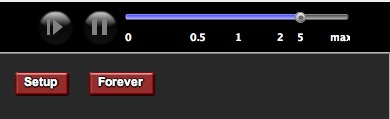
The runtime space in TNG Beta 1 has been moved directly below Spaceland. When ou create forever or setup blocks you should see buttons appear in this space automatically (though you may need to move them around). Check out this space and you should see a button that says "forever". Try pressing that button. Your agents should do the same thing they did when you clicked on the switch of your forever button before. That is because this button was created automatically for you when you created your forever block. Whenever you create a forever block a corresponding block is placed here on the runtime space. The same also goes for sliders, monitors, and graphs that we'll discuss later. Note the speed controller at the top of the runtime space. From here you can slow down (or speed up) your simulation, and even pause it or step through it one step at a time. Note that the position of the runtime space changes automatically from the bottom to the side depending on the aspect ratio. It can also be resized manually using border between the runtime space and Spaceland. |
 |
|
Graphs
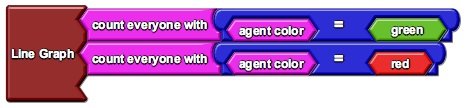
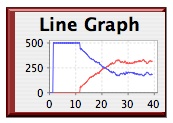
Graphs can be integrated into your projects and viewed in the runtime workspace. Locate graph blocks in the Interface category in the block factory. You can create line and bar graphs by dragging their blocks onto the canvas. Connect other blocks that have a number plug to the graph sockets to create data series for your graph.
You can then view your graph by clicking on the runtime workspace. Double click on the graph block you see for an enlarged view. |
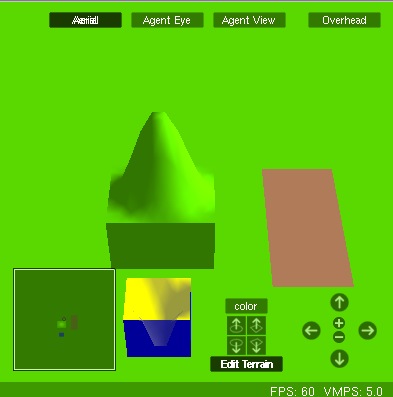 |
Terrain Editor
Finally, you can explore the Terrain editor. That requires a tutorial by itself. But this can be used to created new landscapes in StarLogo TNG. You can get to the terrain editor by clicking Edit Terrain button in Spaceland and using the controls that pop up. Be sure to click Edit Terrain again to deslect the terrain. |
Next Steps
You're now ready to try some more advanced tutorials. Try these: