Glazing
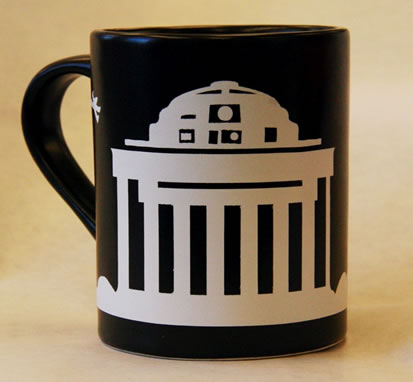
To accomplish the manufacturing of this prototype we began with unglazed (bisque) mugs. This allowed us to get a basic mug design that we really liked, rather than a less-designed, more standard mug. We glazed the mugs with a brush-on satin black glaze and had them fired.  |
 |
| Bisque Mug | Glazed Mug |
White Layer
We then began testing a variety of inks and application methods. After the Concept Refinement review we had decided on an epoxy based color changing ink for the color changing portion of the product. The epoxy ink changes from colored (in our case black) to translucent. Since we wanted the image on the mug to be white, we then had to find a suitable white ink for the base image.For the white base image, we initially chose a non toxic enamel paint for both it's non-toxicity and it's durability. We also tried a an epoxy screen printing ink similar to the heat-sensitive ink. Despite trying a number of methods to apply the white layer, including airbrushing, pad printing, rolling, traditional screen printing and a mask/screen application method, we were unable to achieve a satisfactory surface finish. Therefore, we decided to use a white acrylic spray paint for the prototype, despite its being ultimately unsuitable because of durability concerns.
White Spray Painted Layer
Black Layer
For the black epoxy ink top layer, we found the best method to be a mask layer of Frisket, a low tack masking film, underneath a tightly clamped screen printing screen. The Frisket serves as the stencil while the screen meters the ink. Applying the black epoxy ink by rolling, using a Frisket mask, worked as well. 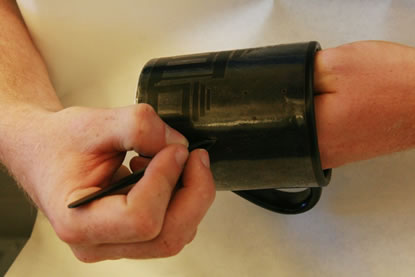 |
 |
| Weeding the Frisket | Clamping on the screen |
 |
 |
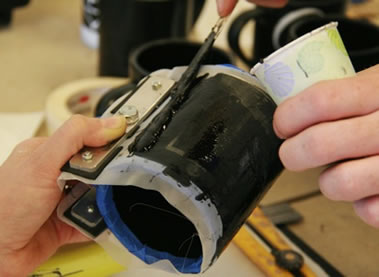
| Applying the Ink | Wiping the Ink |
The epoxy ink we used is designed is designed to either air cure for 5-7 days or for 10 minutes at high temperature. We did find the curing process to require high precision (over-curing resulted in a slight yellowing in the translucent (hot) state.